— July 17, 2017
Modern consumers rarely make purchases without doing some level of online research first. And why not? The internet has made it incredibly easy to find the best deal for pretty much anything you want. As an ecommerce store owner, the trick is figuring out how to make consumers pick you.
With Google Shopping ads, you can stick your products right under the noses of hungry consumers who are looking for exactly what you offer. By displaying all the need-to-know details upfront (like price and customer ratings), the Google Shopping format eliminates the need for much of the research that consumers do on their own. If you know what you’re doing, it’s pretty much the easiest and most effective way to sell products online.
In this guide, we’ll go over everything you need to know to get your products set up in the Google Merchant Center and flying off the shelves.
1. Getting Set Up

Before you can start selling on Google Shopping, the first thing you need to do is add all your products to the Merchant Center. This is essentially a live catalogue of all your active inventory that allows searchers to find your products when they need them. Google will pull the information you add (including product descriptions, titles, color, etc.) and use it to display your products in Shopping results.
To create a Merchant Center account, you’ll need to use the same credentials you use for AdWords and Google Analytics. Once you’ve created an account, add your ecommerce store information and contact details and accept the terms and conditions. Once you’ve verified your website address, you’ll be able to access your Merchant Center Dashboard.
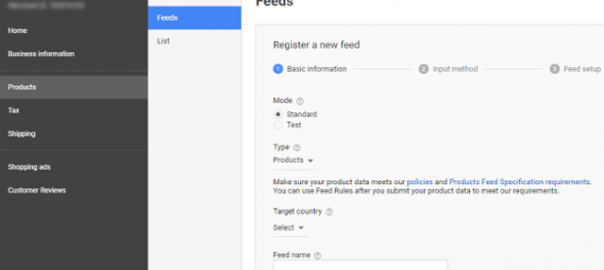
2. Filling Out Your Data Feed

To run the best Google Shopping campaigns, you’ll need to fill out the following items in your product data feed:
- id – Sort of like a SKU, the id is what helps Google identify the item.
- Title – The name of your product. It’s best to use descriptive terms and keywords in your title. For example, “Men’s Brown Leather Jacket.”
- Product description – This is the brief product copy that tells consumers about your product.
- Link – The link to the product page for the item you’re selling.
- Condition – Is the product new, refurbished, or used?
- Availability – Is the product in stock, out of stock, or available for preorder?
- Price – This one’s pretty self-explanatory. You’ll need to provide the price of the item, which should also be displayed on the product page.
- Brand – Who makes the product? If you manufacture the product, add your brand name. If you’re reselling it from another brand, like Nike, put their brand name.
- GTIN – A Global Trade Item Number is an 8 to 14 digit number used in barcodes. There are five different ones, including UPC, EAN, JAN, ISBN (exclusively for books), and ITF-14. If your product does not have a GTIN, you will mark “identifier exists” as “false.”
- These will get you started. For a full list of product data attributes, click here.
3. Uploading Your Data Feed to the Merchant Center

Once you’ve identified all the information you need to fill out your data feed attributes, there are a few different ways you can add it to the Merchant Center:
- Direct Upload – If your data feed file is under 200MB, then you’re in luck—this the simplest method for uploading your feed to the Merchant Center. Note that this process can take up to a full day.
- FTP (File Transfer Protocol) – This method can be used for files under 4GB.
- SFTP (SSH File Transfer Protocol) – This method can be used for files under 4GB.
- Scheduled Fetches – This method can be used for files under 4GB.
You can find detailed instructions for each of these methods by visiting this link.
4. Finally! It’s Time to Set Up Your Google Shopping Campaign

Now that you’ve done all the hard work, we can move on to the fun part—selling. Here’s what you need to do to get things rolling:
- Go to the Campaigns section and create a new campaign by clicking on the red button that reads, “+CAMPAIGN.” Choose “Shopping” and give your campaign a relevant name.
- Add your Merchant ID under “Merchant Identifier.”
- For “country of sale,” you’ll need to list every country that you’ll be selling your product to. “Locations” is where you want your Shopping ads to be displayed. You can also add location exclusions.
- After entering your default bid and budget, click “Save and Continue.”
Even though you’ve set a default bid and budget, you’ll get better results if you create product groups and set bids there. Product groups are subcategories, like brand names or product type, that help you arrange and classify your inventory. By creating product groups, you’ll have more control over how much you want to bid for different types of items. For example, you wouldn’t want to include a refurbished PS2 and a brand new XBOX One in the same group since the latter is significantly more valuable.
There are eight categories you can use for creating product groups: item ID, brand, category, product type, custom labels, condition, channel, or channel exclusivity. With the exception of item ID, all of these categories can be combined to make more organized and accurate product groups.
Be aware that the bid you set at the most defined product group level is the bid that will be used. For example, the bid you enter for the “item ID” would overrule the bid you entered at the “brand” level.

In order to use the categories we discussed to break products into organized groups, do the following steps:
- Select an ad group from your Google Shopping campaign and go to the Product Groups tab.
- Click on the plus sign (+) beside “All Products.” In the window that pops up, select the first attribute you want to use to break down your group. From there, you can select several subcategories. After selecting a subcategory, click “save” to add it on.
- After you’ve finished, you’ll be able to set new bids for each group.
Digital & Social Articles on Business 2 Community
(91)