About two years ago, I wrote an article on using Google Tag Manager (GTM) to personalize your website. Even then, people asked why I wouldn’t just use Google Optimize. At the time, the answer was simple: Personalization was part of Google’s six-figure paid solution.
However, in November 2018, Google released the functionality to all users. Since then, Google Optimize has become a primary platform to initiate personalized experiences. But GTM is still critical to overcome its enduring limitations.
When combined, the two tools are a powerful—and free—personalization engine. They also overcome several challenges that, Gartner predicts, could cause 80% of marketers to abandon personalization efforts by 2025.
In short, this is your chance to roll out a pilot program in personalization—a recommendation from that same article—and figure out whether it merits further investment or if, for now, it’s best to preempt the exodus.
Setting up Google Optimize and Google Tag Manager
Thanks to Shanelle Mullin’s great introduction to Google Optimize, including a detailed guide on how to set it up, I’ll keep this section brief.
To make sure that everything’s working smoothly:
- Deploy your Google Optimize snippet via Google Tag Manager.
- Install the anti-flicker snippet as detailed here to avoid showing visitors your “non-personalized” content first.
- Make sure Optimize is connected with Google Analytics so that you can track results.
For WordPress sites, I also recommend this free Google Tag Manager plug-in to deploy Tag Manager. (In this post, I focus on implementation examples in WordPress, but you can easily adapt these for other platforms. )
The main benefit versus manual deployment is that it initiates a dataLayer with useful data about the page, user, and events—information you can use for personalization.
How to identify personalization opportunities
Personalization can’t be customized only for users or customers. It also needs to be specific to your business.
This means you can’t just copy and paste other solutions—what might have worked for others could be completely pointless for your business. (Rhett Norton highlights other potential pitfalls.)
The best starting point to create great personalization is reminding yourself, “What am I actually trying to achieve?” Personalization, after all, aims to make your content (copy, images, videos—anything) more relevant to your web visitors.
How can you create this relevance? First, apply some common sense. What really makes a difference for people interested in your product or service?
- Are you a local business serving different areas? Consider localizing the experience based on the visitor’s location. The same applies if you’re serving different international markets; show visitors content based on their location and language.
- Are you a marketplace with demand- and supply-side offerings? Try to segment your visitors to increase relevance.
- Are you running myriad paid acquisition campaigns with different benefits or advertising different products? With personalization, you can align messaging on all relevant pages (not just the landing page).
- Are you running an ecommerce site with discounts for specific campaigns? Try to apply these discounts directly on the site so visitors know the final price.
- Getting a lot of traffic via email newsletters? Stop pestering these visitors with “subscribe” banners—they already are! Instead, maybe shift messaging to get them to refer friends.
- Have an app or software for different platforms? Show download buttons only for the relevant platform, like App Store for iPhone users or a Windows download for PCs.
After thinking through these questions, don’t forget to check your data in Google Analytics.
Are the segments you’ve identified big enough to justify the effort needed? As Norton cautions, “All optimization efforts come with opportunity costs. If we choose to personalize to an audience, we’re forgoing other optimization opportunities.”
Start where the opportunity is most obvious and personalization is relatively easy to do.
If it works, you can always continue with more sophisticated experiences. Start simple, test the impact, and iterate. Don’t aim for perfection.
The limitations of Google Optimize for personalization
Even though Google released its personalization module for all users over a year ago, it’s still fairly limited. Google prioritizes ease of use over sophistication, which makes it a great tool for those getting started with this type of optimization.
Understanding the limitations will help you decide if it makes sense to invest in a different tool from the start. From my perspective, these are the biggest ones:
- Personalization rules are very basic. You must set up each personalization experience separately. If you want to greet visitors with “Good morning,” “Good afternoon,” or “Good evening” depending on their local time, you need to set up a separate personalization experience with separate rules for each. This is a nightmare to manage and measure. (Spoiler alert: It’s also something you can solve with GTM.)
- You’re limited to 10 personalization experiences at a time. Given the first limitation, you’ll likely hit that limit quickly. However, using GTM, you can group different experiences together, making the limitation much less of a problem.
- If you’re not on Google Analytics 360, you can’t target Google Analytics audiences. This is a shame—it’s a powerful feature. There are a few things you can do with Google Tag Manager to can create similar results, but it’s definitely not the same.
Since you can address the biggest limitations of Google Optimize with GTM, I recommend giving this solution a try if you’re just starting with website personalization.
3 proven personalization examples
1. Personalize based on your visitor’s geographic location
As outlined in our previous section, segmenting your traffic based on their location is a good start to personalization.
There are limitations to identifying a visitor’s location based on their IP address. Some visitors may be using a VPN, which means their location could be anywhere in the world, independent of their physical location.
For others, the location-based IP is simply inaccurate, especially if you’re going as granular as a visitor’s city. Make sure that localization isn’t done forcefully and that visitors can change it manually, if needed (e.g. for country, language, and currency).
With that caveat in mind, let’s get started.
Getting the data
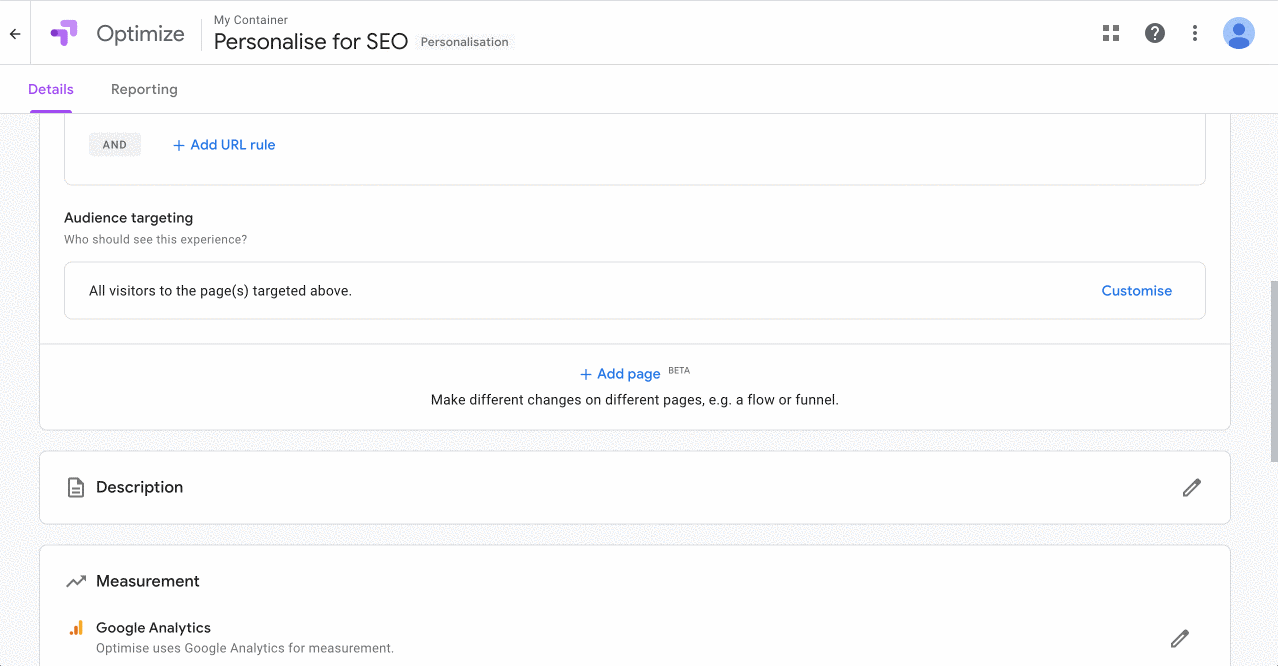
First, you may wonder, “Why do I need Google Tag Manager here? Isn’t this built into Google Optimize?” Geography-based targeting is a built-in feature in Google Optimize:

But this is a great example of personalization that bumps up against the limits of Google Optimize. To make it work, you have to set up a separate experience for each country or region you want to target.
For example, if you had an ecommerce shop and wanted to display your prices in three currencies (e.g., EUR, USD, and GBP), you could create groups of countries with that currency (and another as the fallback), then change the currency accordingly.
But this requires building at least three personalization experiences. Wouldn’t it be better to have it in one? This is where GTM comes in.
We first need to a way to identify a user’s location based on their IP address. Google Optimize’s geolocation is based on Google Analytics data; however, we can’t access that directly.
We can get this data by using a third-party service; several APIs are available. Simo Ahava’s recommendation is IP Geolocation. It’s free for up to 1,000 requests per day and inexpensive if you need more; it also has built-in HTTPs. On top of that, Ahava created a template for it.
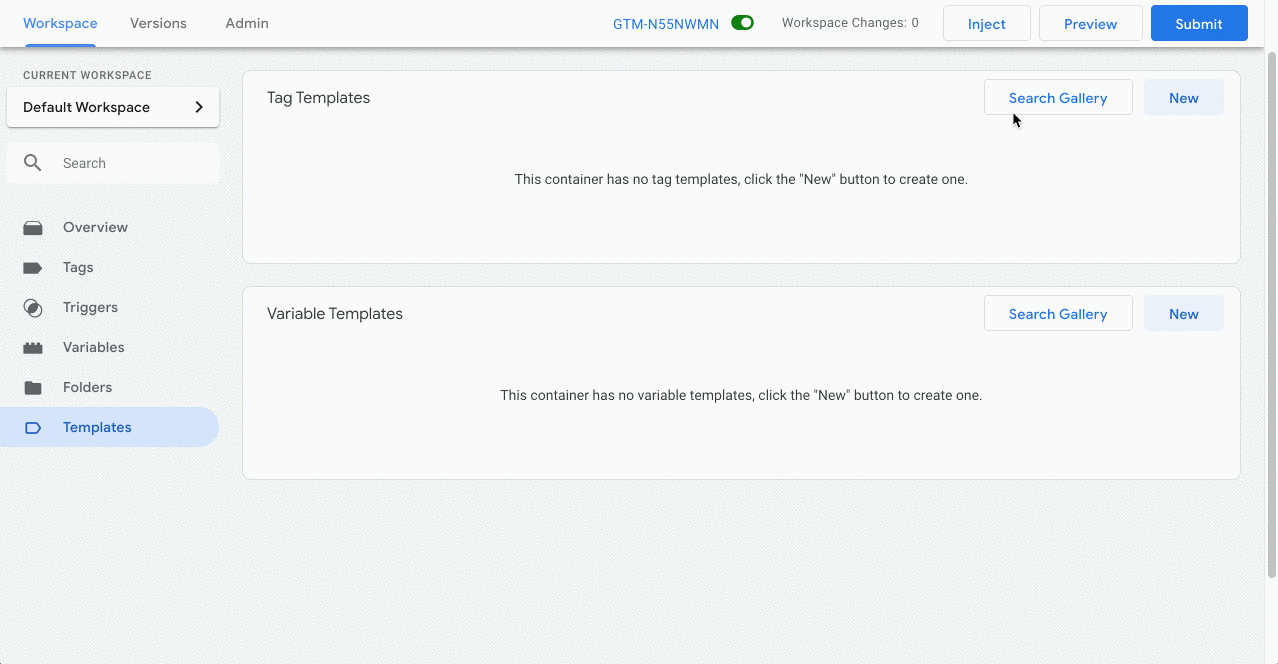
Register for a free account here, then copy the API Key from your dashboard. Next, add Simo’s Geo Location script to your workspace.
Head to Tags, create a new one, and select the IP Geolocation Template under “Custom.”

Next, enter the API Key you obtained from your dashboard.
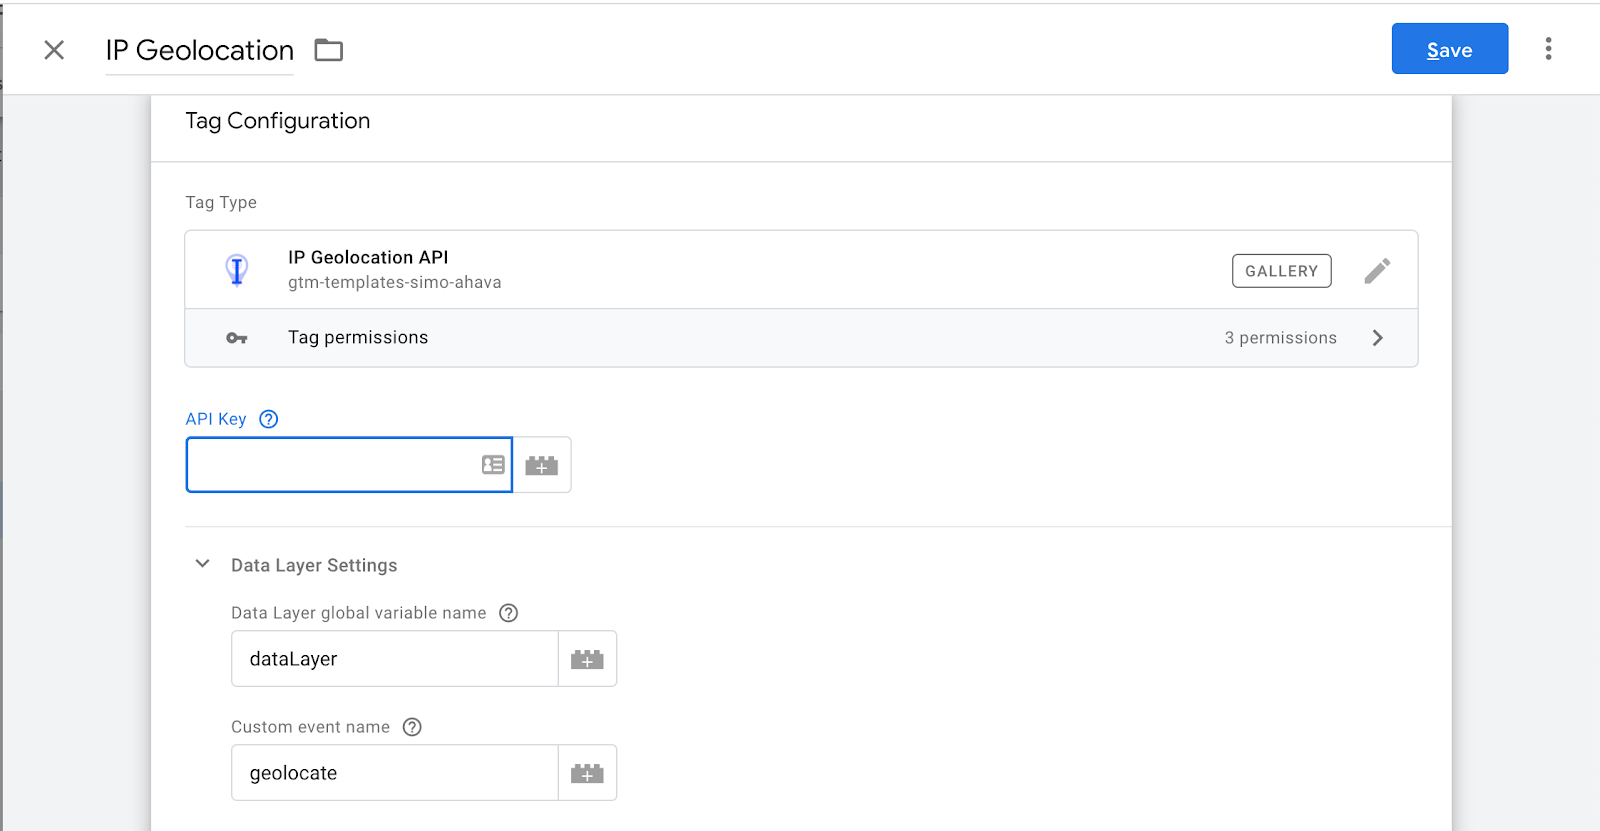
Keep the other settings for the Data Layer as they are—unless you know exactly what you are doing.
Lastly, add the Page View trigger. We can limit this later if you want to send a request to the API only for specific pages. Save the tag and preview your changes.
When you hit your site in preview mode, open the console (right click > inspect) and type in “dataLayer.” If all went correctly, you should see some information about your IP address in one of the objects.
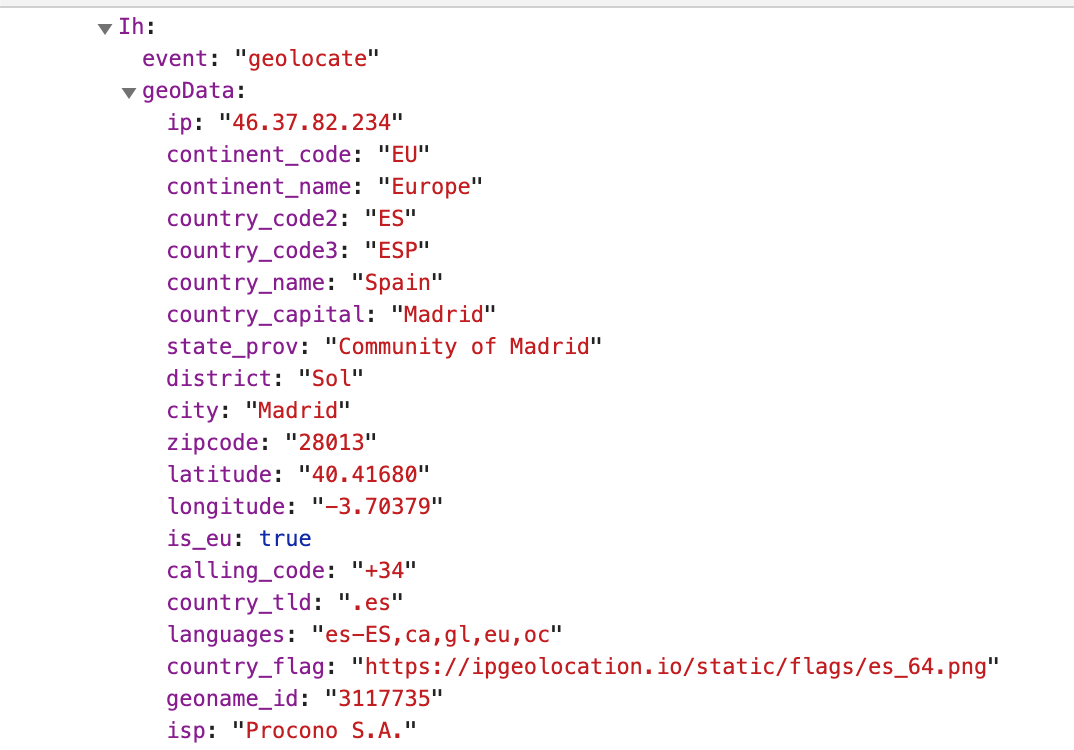
As pointed out before, this data might not be 100% accurate. If you’re not using a VPN, at least the country should be correct. However, in my specific case, I’m about 250 miles away from Madrid, in Malaga.
So please use the feature with caution! If your targeting isn’t too granular, you’ll find a lot of useful data here, like currency and languages.
Using the data for personalization
First, we need to decide how we want to personalize. There are millions of things we could do, and you need to choose what makes sense for your business.
I’m going to use a deliberately simple example to show the logic for a use case. (I’d love to hear what you came up with—just leave a comment!) This example assumes you have a product or service and are using a similar module, showcasing your past clients as a form of social proof.
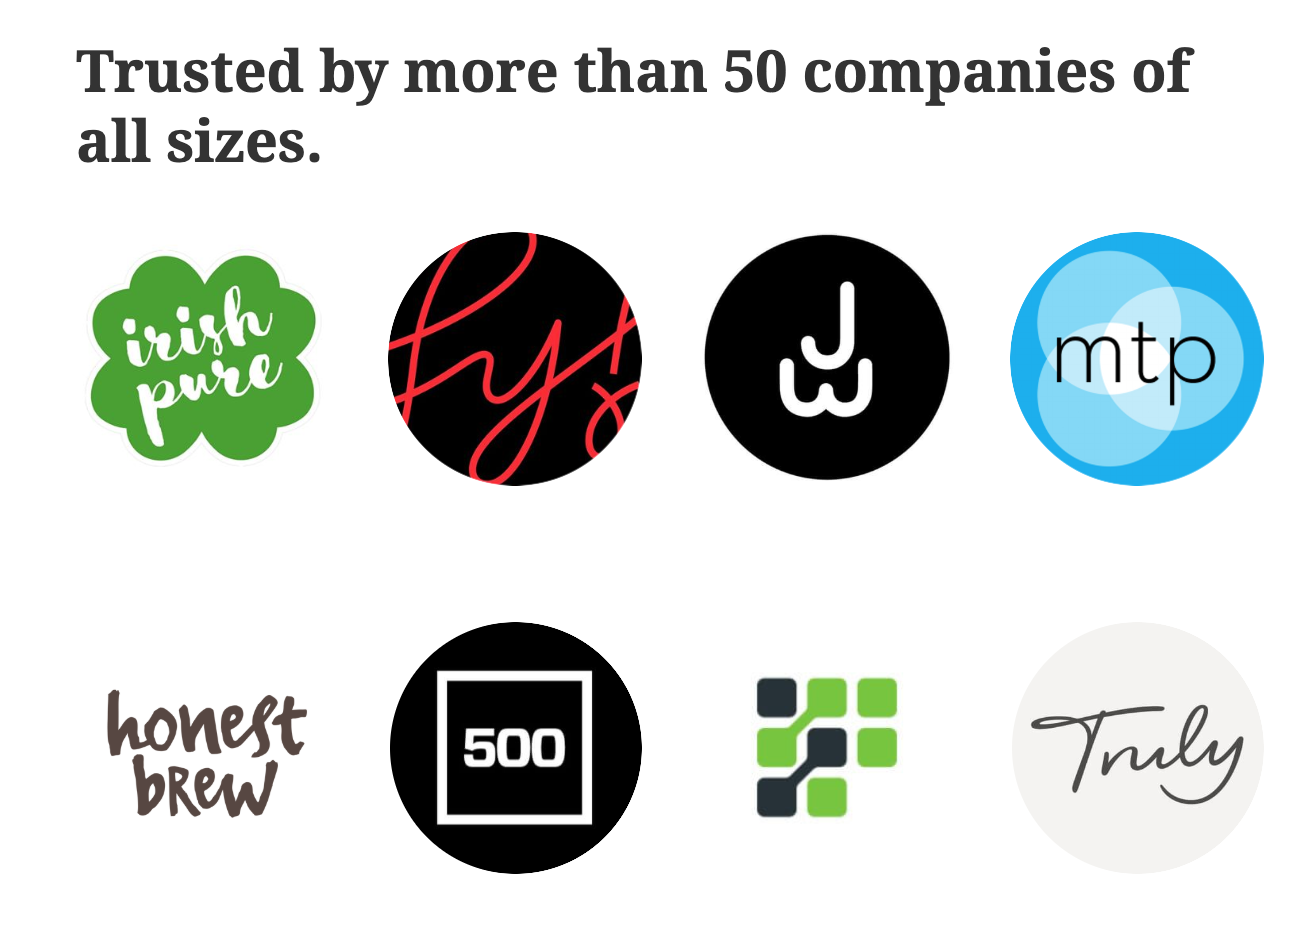
To make this more relevant and showcase local expertise, why not mention the country of the visitor in the headline? So, instead of “Trusted by more than 50 companies of all sizes,” I could test the headline, “Trusted by more than 50 companies in {Visitor’s Country} and the rest of the world.”
Before going to Google Optimize, you need to make a small change to your WordPress page (or post). This is done by wrapping a <span> tag around the text that should change. The span groups these elements together.
Also, make sure you assign a unique ID to this span. In my case, I’m using “vistorsCountry,” but you can make it as long and descriptive as you like. This ID is critical: It will identify the span element you want to personalize.

Preview your change and inspect the element to see if the span has been added:

Next, head to your Google Optimize account, click on “Create Experience,” define a name, and choose a page that contains the content you’d like to change. As the type, select “Personalization.”
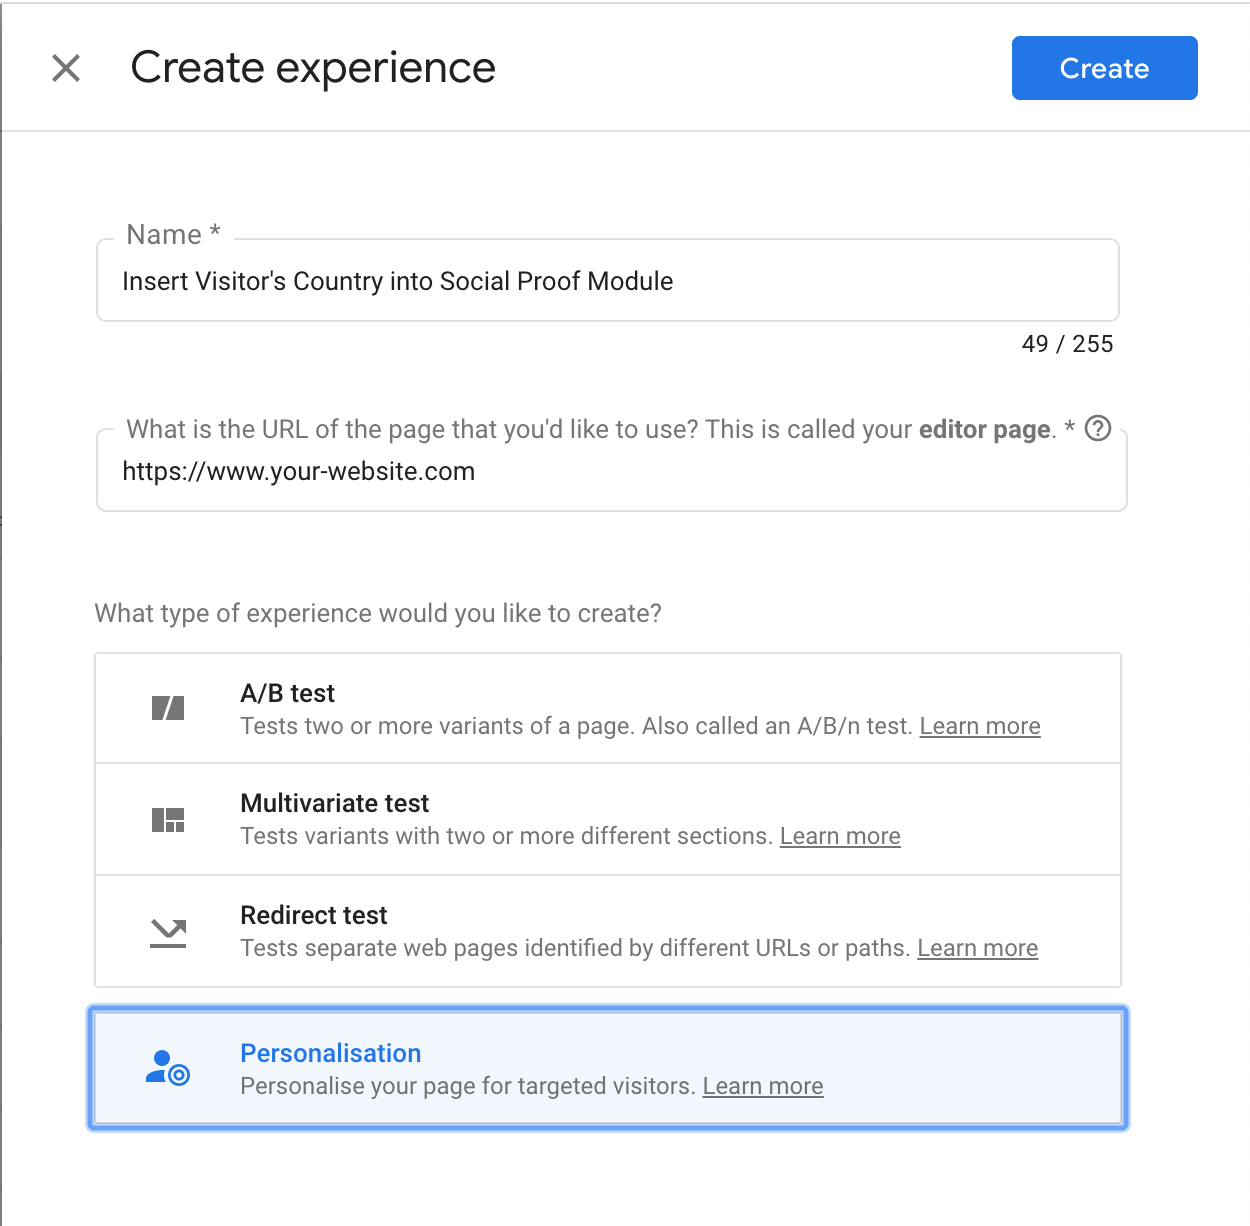
Then, click on “Create Site Changes.” This will load the page and content that you want to personalize. Normally, you’d then select the element you want to change and apply the changes. However, in this case, we need to use JavaScript.
Click anywhere and select “Run JavaScript.”

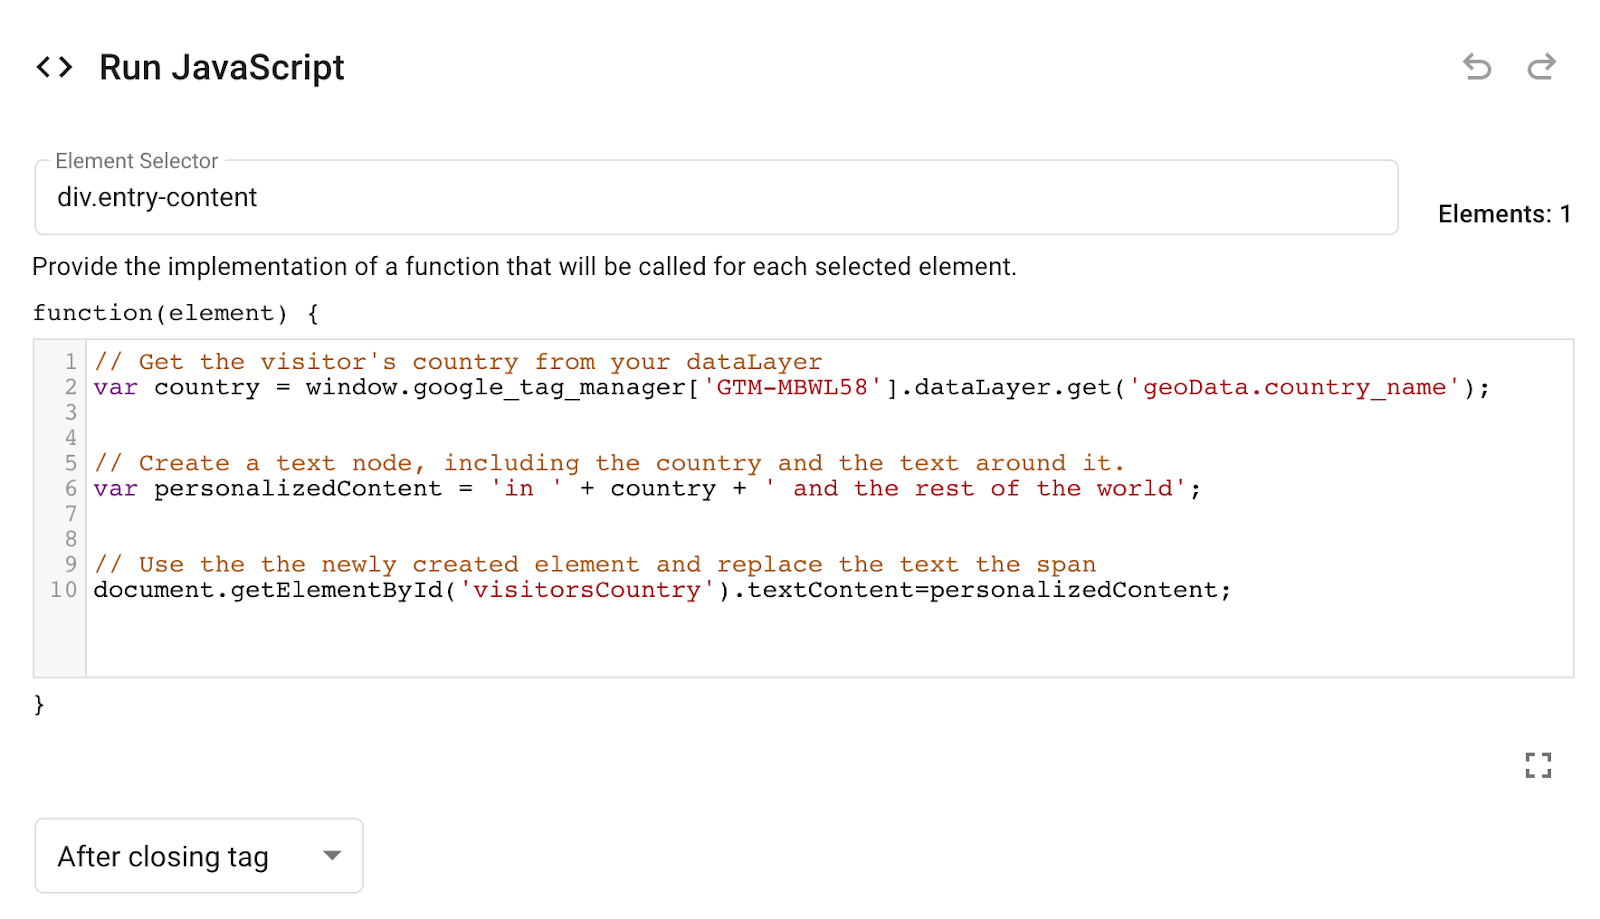
First, get the visitor’s country from the dataLayer. There’s a standard code for this, so save it for future reference:
window.google_tag_manager['GTM-XXXXXX'].dataLayer.get('variable_name')
The variable name, in this case, is “geoData.country_name”; replace “GTM-XXXXXX” with your Google Tag Manager Container ID.
Then, create the personalized text, including the visitor’s country, and replace the content in the span with the id “visitorsCountry.”
Here’s the final code:
// Get the visitor's country from your dataLayer< var country = window.google_tag_manager['GTM-MBWL58'].dataLayer.get('geoData.country_name');// Create a text node, including the country and the text around it.var personalizedContent = 'in ' + country + ' and the rest of the world';// Use the newly created element and replace the text the spandocument.getElementById('visitorsCountry').textContent=personalizedContent;
Paste this into the JavaScript field and save:
If you’ve followed the steps correctly, you should see the following (depending on your current location) in the preview screen:
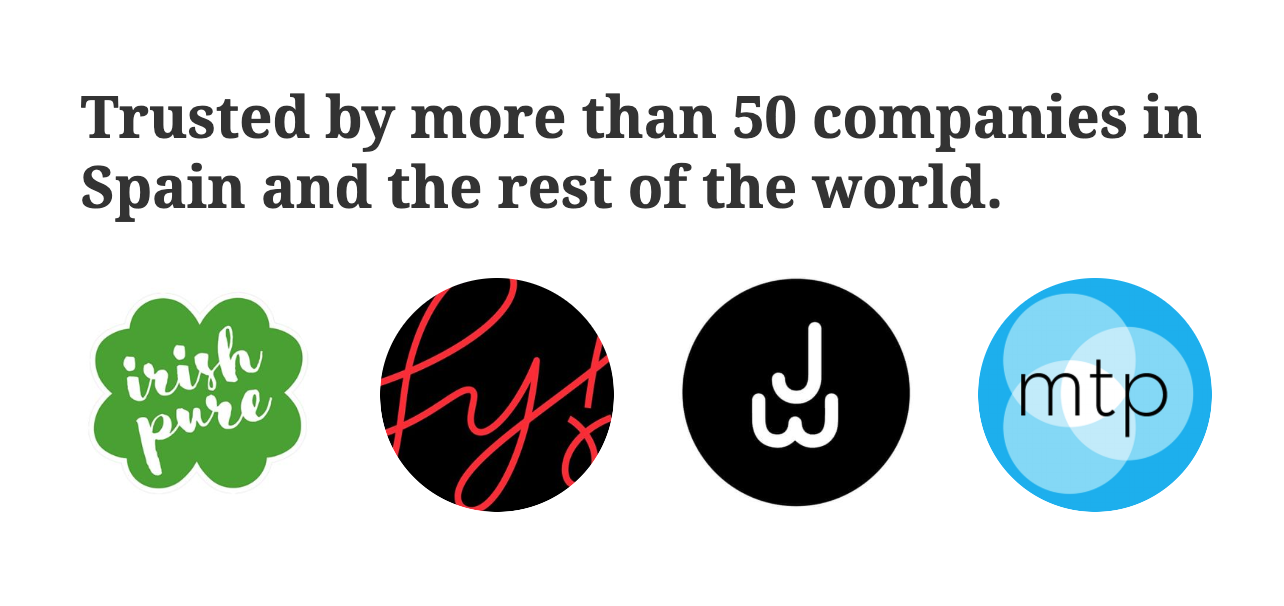
You’re almost done; however, if you were to push this live, your visitors would see the following:
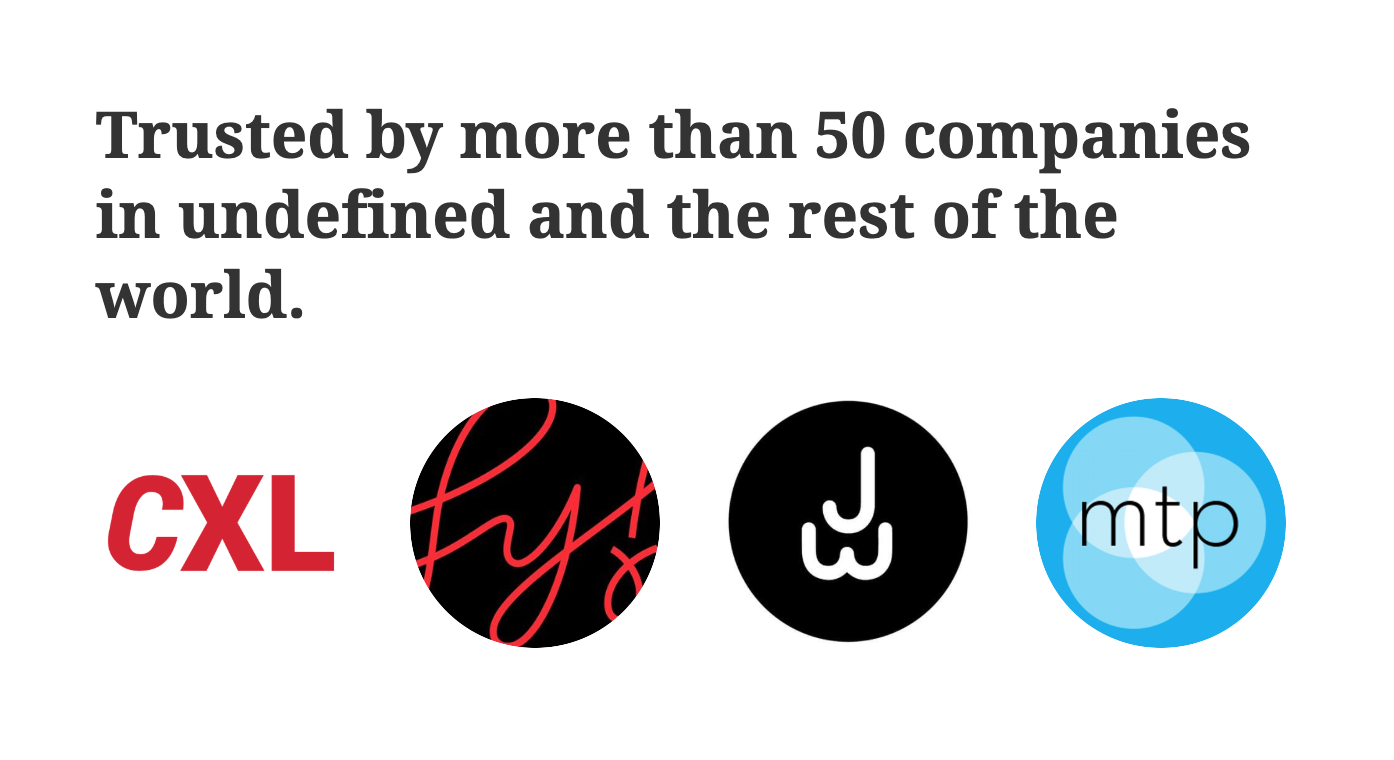
Yikes. The problem is that the API doesn’t respond as fast as the page loads. To make this work properly, change the activation event so that the change gets activated only when the data is ready.
Luckily, this is super easy to do with Google Tag Manager. First, head to Google Optimize and change the experiment’s activation event. You can use the pre-defined event called “optimize.activate.”
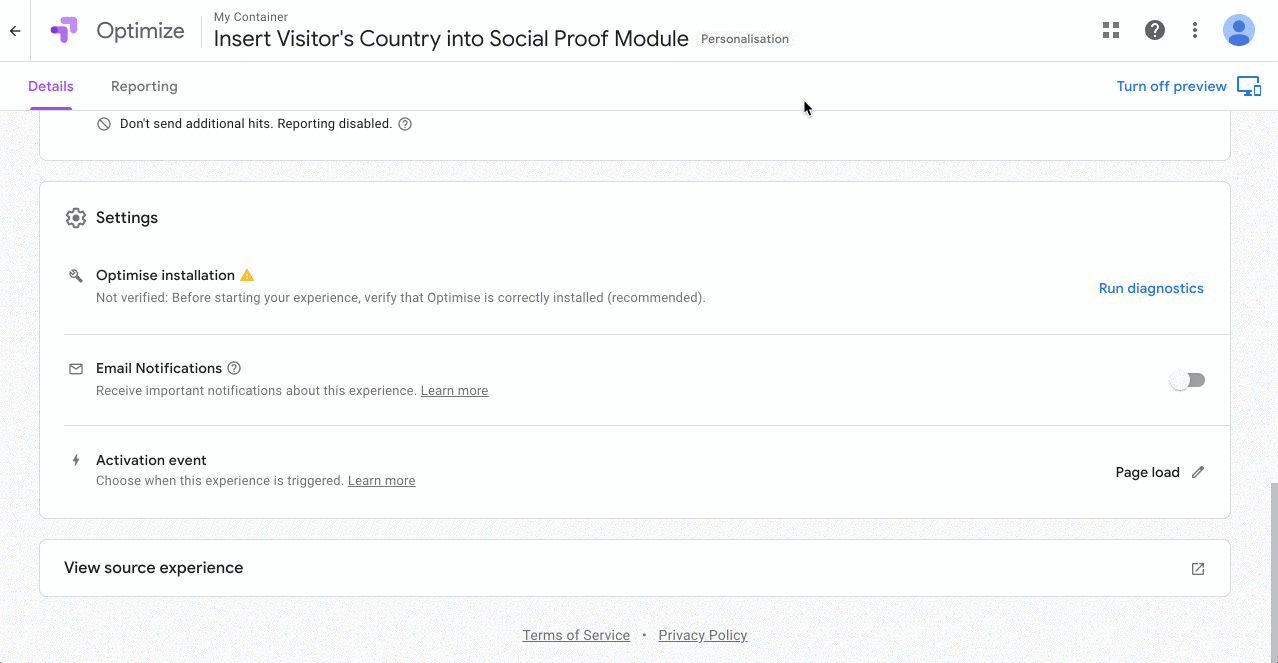
Next, go to Tag Manager to activate the event when the data is available. Head to Triggers and create a new one. Call it something like “Geolocate Done,” and, as the Trigger type, select “Custom Event.”

The name of the Custom Event is “geolocate” and gets created automatically by Ahava’s template.
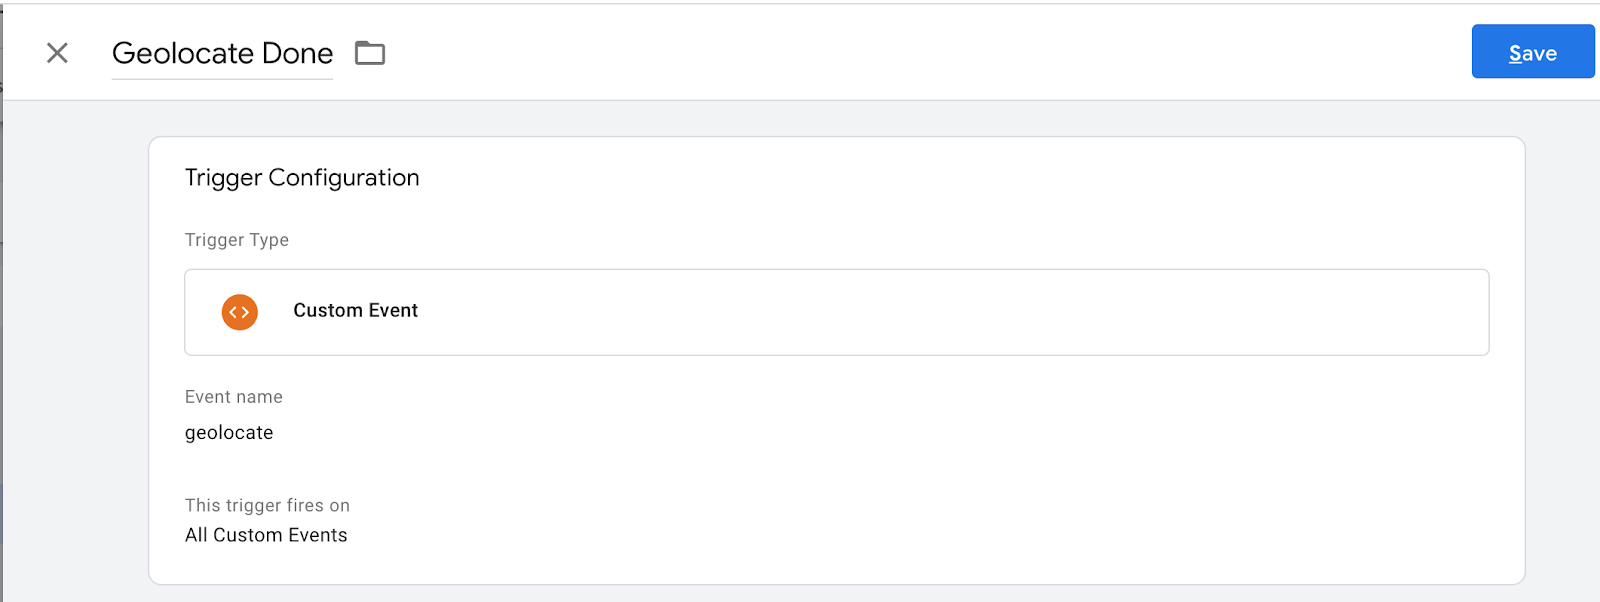
Set it to trigger for “All Custom Events” and save.
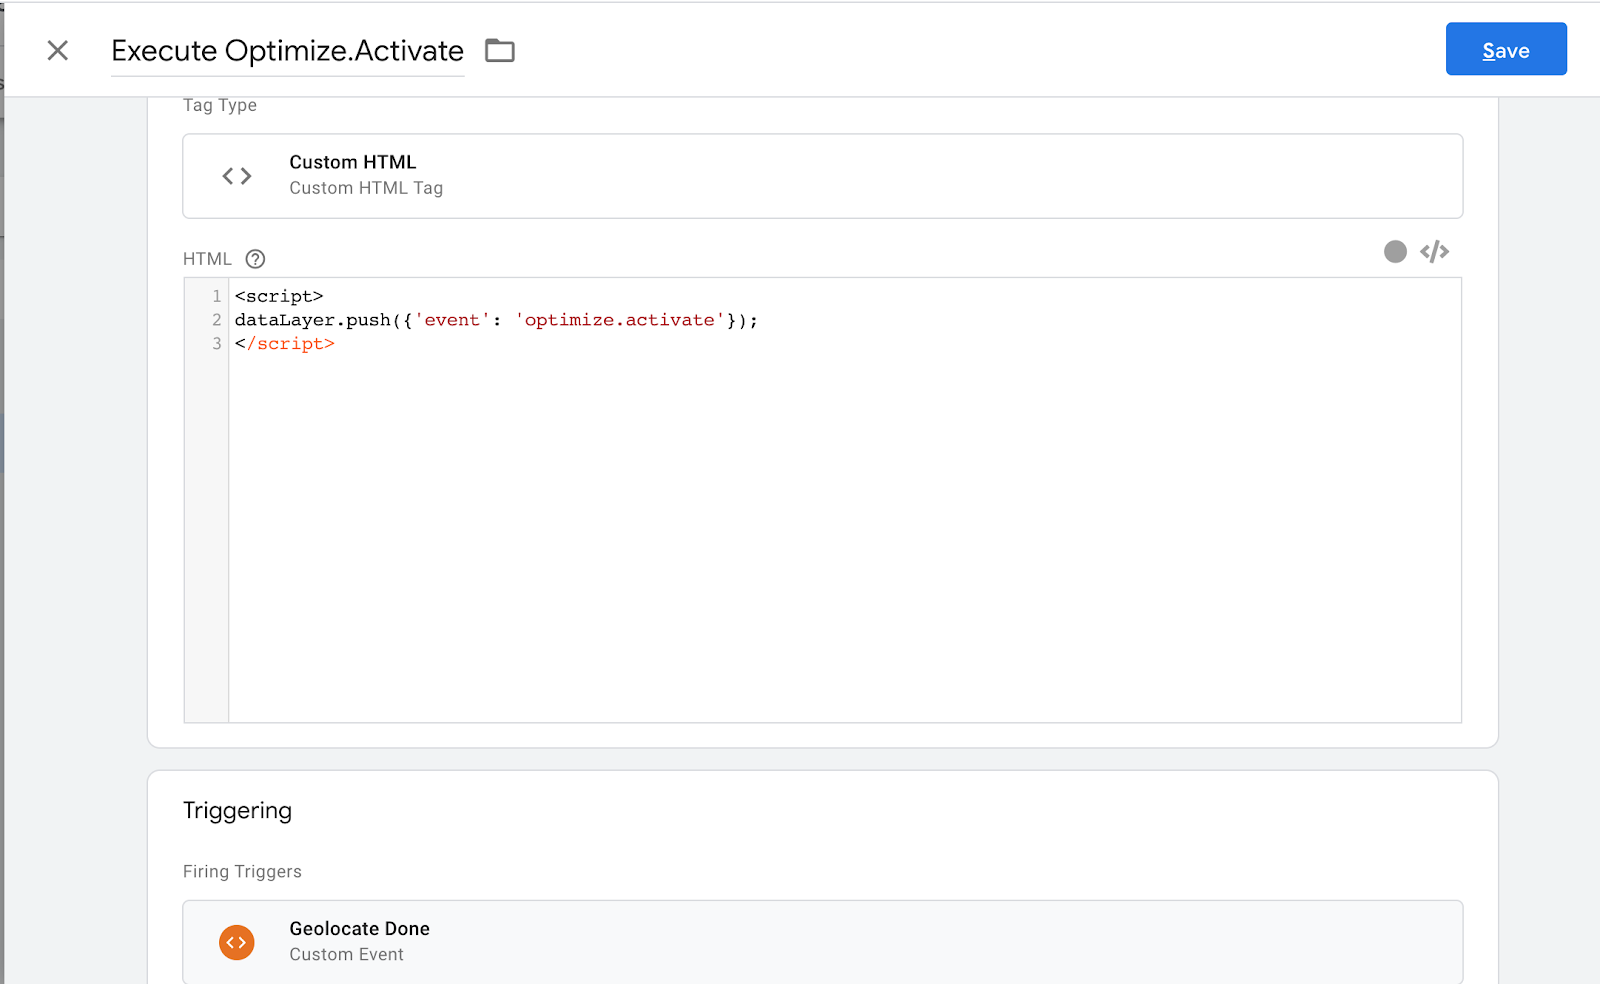
Next, head to Tags and create a new Tag called “Execute optimize.activate” (or something similar). This tag will fire the optimize.activate event defined in Google Optimize.
Choose “Custom HTML” as the type and use the following code:
<script> dataLayer.push({'event': 'optimize.activate'}); </script>
As the trigger, choose the trigger you just created (e.g., “Geolocate Done”).
Now you’re done. Go back to the preview and voila—it works!
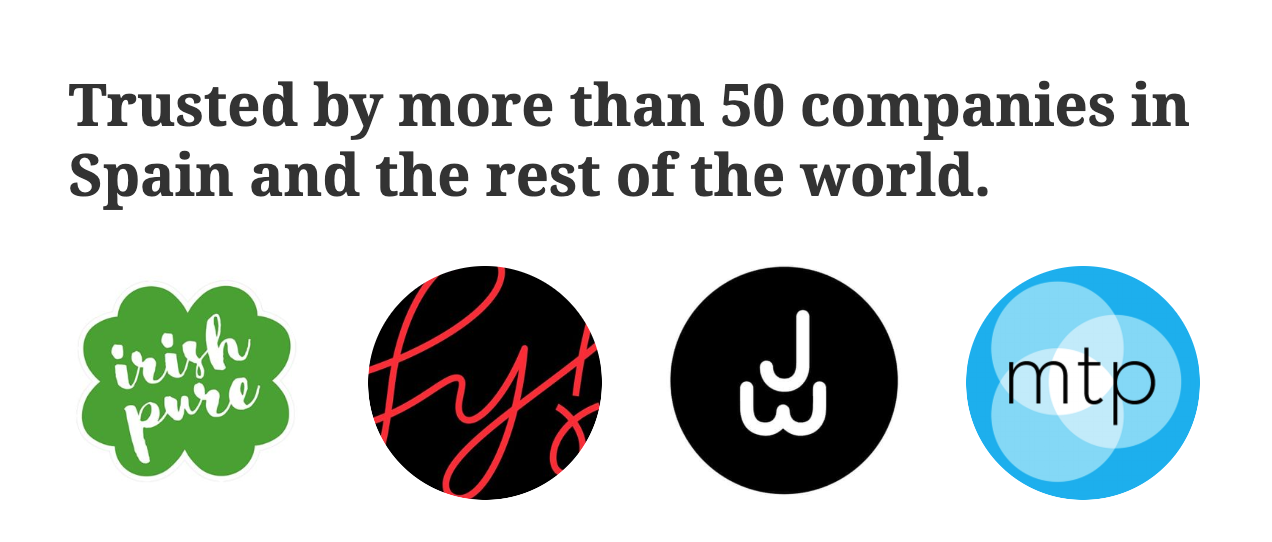
Click “Start,” and your personalization is running.
2. Personalize based on channel, campaign, or referral
You can also personalize the experience based on the campaign your visitor came from. For this, you’ll target users based on UTM parameters. These can be used across all channels—as long as you can control the link.
Getting the data
Imagine you sell marketing services, and three channels are the main drivers of traffic to your site:
- You’re active on Quora, helping people with marketing issues related to growth. At the end of your posts, you include a link to your website. Apart from using “utm_source=quora,” you use the “utm_campaign” parameter based on the topic of the post, so if it’s SEO related you set “utm_campaign=seo,” “utm_campaign=personalization” for personalization, etc.
- You’re also running Google Ads for keywords related to SEO. You’re using “utm_campaign=seo” here.
- And you’re running another Google Ad campaign for keywords related to website personalization. Here, you’re using “utm_campaign=personalization.”
This is a simple setup, but you get the point. This can be expanded as much as you like, but know that setting up each variation may be far quicker than creating the content to support it.
In this case, we have two intent groups—one looking for SEO services, one for personalization. You can do this in Google Optimize without the help of Tag Manager, but Tag Manager can enable more elaborate experiences.
Using the data for personalization
As we’re using Google Optimize, we’ll need a separate experience for each campaign. Let’s start with the one we want to create for “SEO” intent. Start by going into WordPress and creating the content visitors should see:

After creating this in WordPress, we need to add some code to:
- Identify it later;
- Hide it for those without SEO intent.
For each WordPress block, assign a unique ID and add the style “display:none,” which will hide the block for people not looking for SEO services:
id="h_seo" style="display:none"
Go to the Code Editor and add these two attributes to the blocks you’ve created. Here’s the entire code for my headline:
<!-- wp:heading {"align":"center","level":4} --> <h4 id="h_seo" style="display:none" class="has-text-align-center">Learn how I helped growing Truly's Organic Traffic 15X in 18 months with Content & Technical SEO.</h4> <!-- /wp:heading -->
For the button, assign the id “button_seo”:
<!-- wp:button {"textColor":"white","customBackgroundColor":"#2408b3","borderRadius":29,"align":"center","className":"is-style-fill"} --> <div id="button_seo" style="display:none" class="wp-block-button aligncenter is-style-fill"><a class="wp-block-button__link has-text-color has-white-color has-background" style="background-border-radius:29px">15X? I want to read more!</a></div> <!-- /wp:button -->
That’s it. Save the page and preview it. The content will be hidden. (You may see a warning on WordPress that it contains “unexpected or invalid content.” Ignore it.)
Next, head to Google Optimize and create a new experience with a descriptive name; choose “personalization” as the type. Define the page you want this to run on (you can add others later), which you’ll also use to preview the changes.
Click on “Make Site Changes” and wait until the site has loaded. Then, as before, click anywhere on the page and select “Edit Element” and “Run JavaScript.”
Paste this code, which unhides the specified elements:
$ ("#h_seo").toggle(); $ ("#button_seo").toggle();
Note: This code uses jQuery, which allows you to use a lot less code. However, it requires that you have the jQuery library installed on your site.
Save it. You should already see the SEO-specific text re-appear.
Next, define the targeting for this intent group. Google Optimize makes this simple. Go back to your personalization settings, and scroll down to Audience Targeting. Select “UTM parameter” targeting. For the utm_campaign, simply set it to match “seo”:
This time, you can use “page load” as the activation event. That’s it. Save the experience and push it live.
(Google Optimize automatically stores the UTM_campaign parameter for the user’s session, so the visitor will see the same content if navigating between pages. More info about this here.)
Now, let’s set up the “personalization” intent group. Simply create a copy of the above, but this time replace “seo” with “personalization.” In WordPress, make sure you have the page elements defined as above, then create a separate experience in Google Optimize for this second intent, using the UTM parameter “personalization.”
Here’s where Google Tag Manager comes in. If you’re creating several intent groups, you can use GTM to combine all personalizations into a single experience in Google Optimize:
- Save the utm_campaign (or utm_source, utm_content, etc.) to the user’s session.storage with a custom script in Google Tag Manager. (This section of one of my articles explains how to do it; I recommend using “sessionStorage” instead of “localStorage” to make it session-based only.)
- Use JavaScript to pull the utm_campaign from sessionStorage.
- Create a simple “if this, then that” condition to unhide the relevant content.
The code combining steps two and three looks like this:
<script type="text/javascript"> // Define the variable utm_campaign var utm_campaign; // Get the utm_campaign from your sessionStorage. utm_campaign = sessionStorage.getItem(“utm_campaign"); // Depending on the variable, unhide the relevant content if (utm_campaign == "personalization") { $ ("#content_personalization").toggle(); } else if (utm_campaign == "seo") { $ ("#content_seo").toggle(); } else if (utm_campaign == "strategy") { $ ("#content_strategy").toggle(); } </script>
3. Personalize based on past behavior (e.g., existing users, previous purchases, consumed content)
In this last example, we want to personalize something on our site based on previous visitor behavior. This can be tricky for two reasons:
- Google Tag Manager is a “stateless” environment, which means it doesn’t save any data itself.
- The free version of Google Optimize does not allow us to access Google Analytics Audiences, which would make this easy.
You can get around these limitations (for free) by using cookies or localStorage. The only thing you need to ensure is that visitors accept these cookies—ask nicely.
Here’s an overview of what this looks like:
- A visitor shows some intent based on coming from a certain campaign, visiting a specific page, or completing an action.
- You store this behavior in the visitor’s localStorage.
- When the visitor returns, you retrieve this information using JavaScript and push it into the dataLayer.
- That information triggers changes to the site.
There are plenty of use cases:
- If you have a conversion funnel, nudge visitors to the next stage after they complete a first action, like downloading a white paper.
- Show different content on your homepage for visitors who have been to a pricing page.
- Hide your email capture fields for people who have already given you their contact information.
- For ecommerce, show past purchasers a different homepage message.
- For users who added to cart but don’t complete their order, trigger a chat pop-up asking if they need help.
Another example is common to WordPress sites. A visitor reads a few blog posts. Then, days later, they return to consume new content.
You want to show content that’s relevant to the visitor’s interest. You could ask them what they’d like to see more of, but you can also infer their interest based on past behavior.
Getting the data
You can set it up in four steps:
- Capture the visitor’s interest based on article tags.
- Save these tags into the visitor’s localStorage.
- Upon the visitor’s return, retrieve the most popular tag from localStorage.
- Personalize homepage (or other) content based on that tag.
My friend Ben Jackson helped code the scripts for this functionality. First, capture the visitor’s interest by saving the tags of the articles they’ve read, along with their frequency.
So, for example, assume you have the following two articles:
- Article 1 tagged with “personalization,” “CRO,” and “google-optimize.”
- Article 2 tagged with “CRO” and “google-analytics.”
Your visitor visits both articles. As a result, we save in their localStorage: “personalization”: 1; “CRO”: 2; “google-optimize”: 1; “google-analytics”: 1.
To do this, we need tags (pageAttributes) available in the dataLayer. If you don’t have that yet, use the GTM plugin referenced in the first part of this article or create it manually.
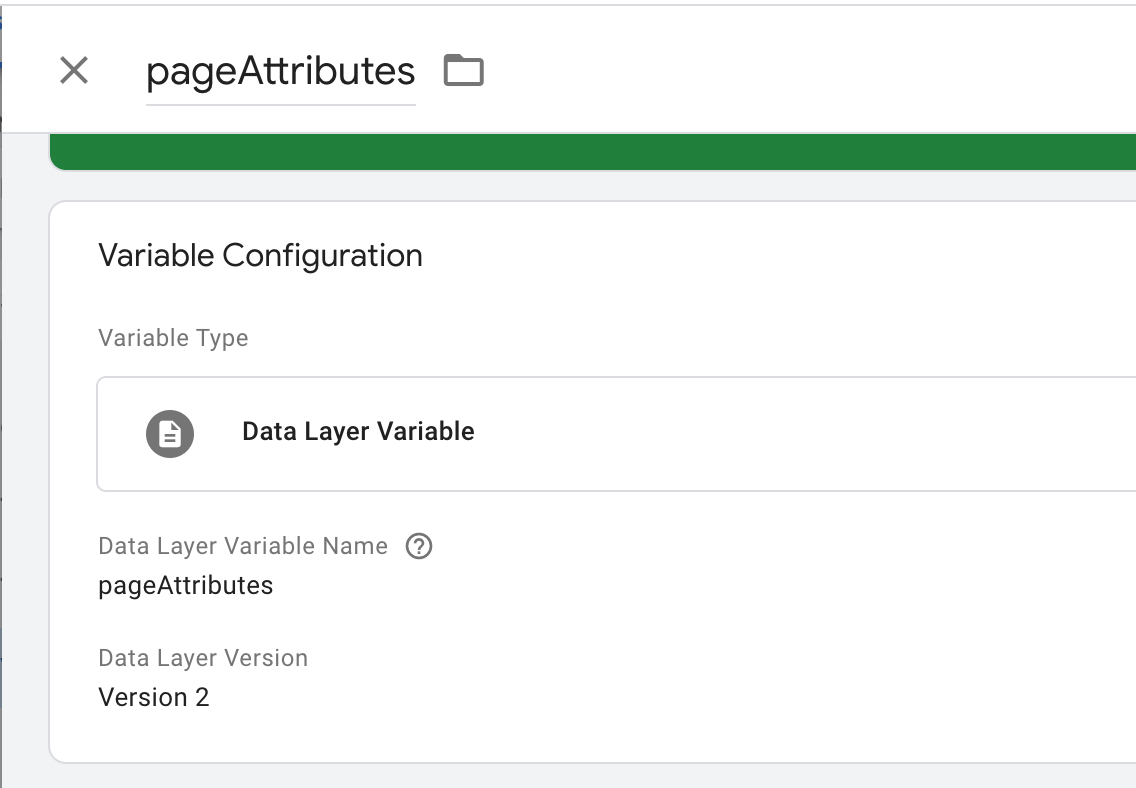
Create a GTM variable for your pageAttributes (tags) to make accessing them even easier. Go to Variables and create a new Variable called “pageAttributes.” As the Variable type, select “Data Layer Variable,” name it “pageAttributes,” and save.
Next, create a new tag with Custom HTML. Call it, for example, “Save WP Tags to LocalStorage + DataLayer.”
Paste this code in the Tag you just created:
<script> function updateTags(dataLayer) { // Retrieve my list of preferences from local storage. It's JSON but has to be stored as a string. // The parsed JSON looks like: // { // "tag-name-1": 3, // 3 is the number of times viewed. // "tag-name-2": 1, // } myPrefs = JSON.parse(window.localStorage.getItem('myPrefs')) || {}; if ((dataLayer.pageAttributes && dataLayer.pageAttributes.length > 0)) { // Loop through each of the pageAttributes from the dataLayer... for (var i = 0; i < dataLayer.pageAttributes.length; i++) { // ...and add 1 to the number of times this user has seen that attribute. myPrefs[dataLayer.pageAttributes[i]] = myPrefs[dataLayer.pageAttributes[i]] || 0) + 1; } // Save the updated list of preferences back in local storage, turning it from a JS object into a string. window.localStorage.setItem('myPrefs', JSON.stringify(myPrefs)); } // Pushing the top pageAttribute into the DataLayer var topTag = Object.keys(myPrefs).reduce(function(a, b){ return myPrefs[a] > myPrefs[b] ? a : b }); window.dataLayer = window.dataLayer || []; window.dataLayer.push({'topTag': topTag}); return myPrefs; } var myPrefs = updateTags({ pageAttributes: {{pageAttributes}} }); </script>
The script will push the “top tag” (most frequently seen tag) into the dataLayer. You’ll also see the {{pageAttributes}} variable in there, which references the variable in GTM that we just created. (If you’re using a different name, change it accordingly.)
As a trigger for the Tag, choose “Page View” on all pages. Save it.
As you preview the functionality, browse articles on your WordPress site, then go into your console and type in “localStorage.myPrefs.” You should see a list of the article tags you viewed.

Next, create a variable in GTM for the newly created dataLayer variable “topTag.” Add a new variable (e.g., “dlv – topTag”) and use the Data Layer Variable name “topTag.”
You also want to convert “null,” “undefined,” and “false” to “none,” which will be helpful later. Here’s how it should look:
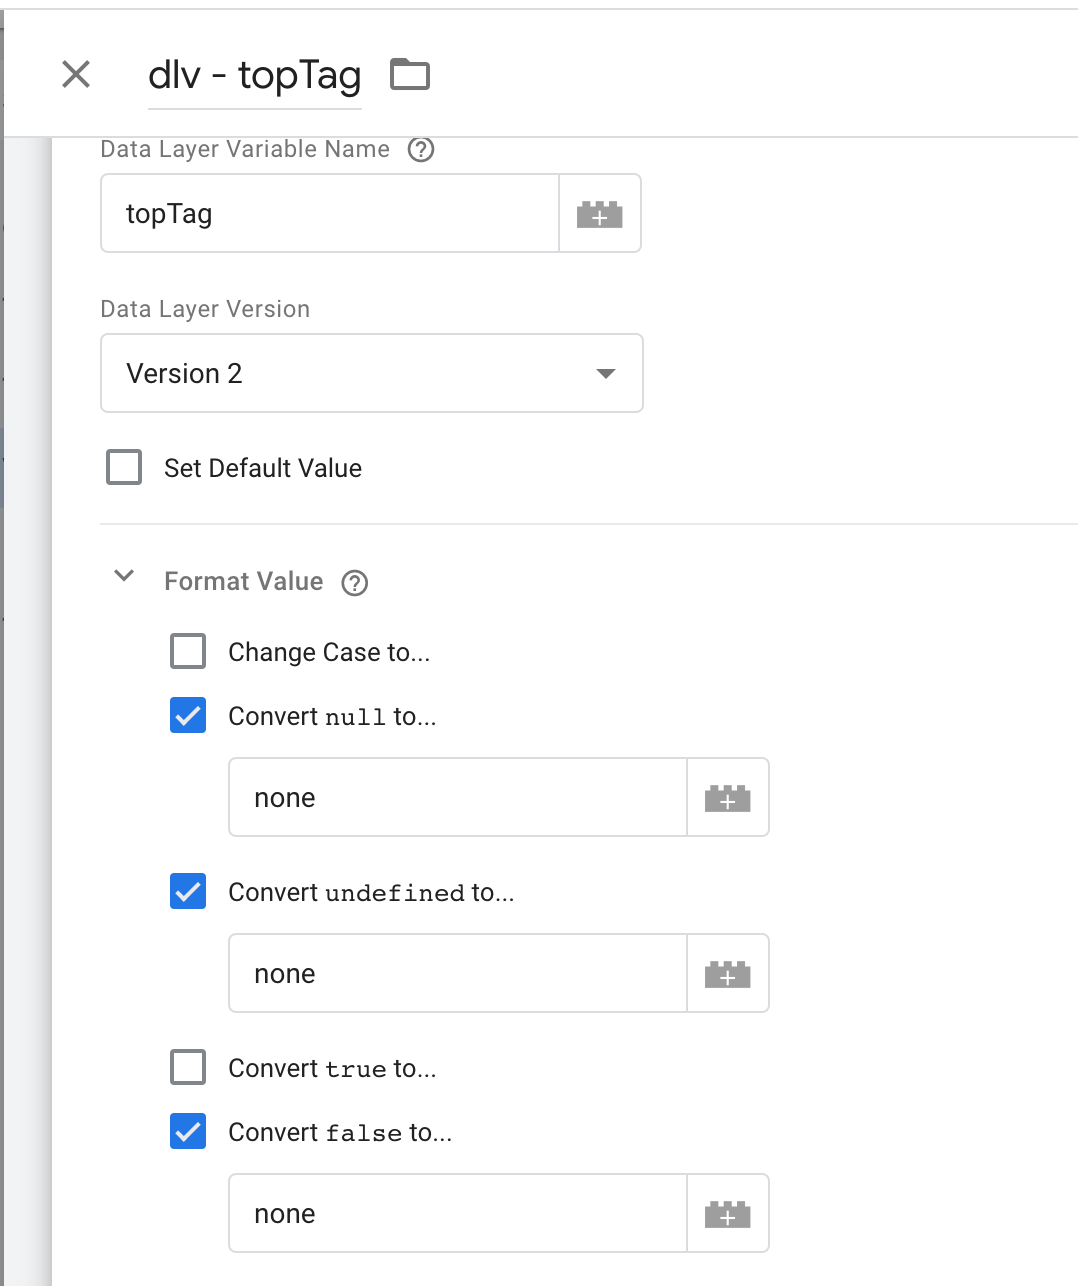
Save it, preview, and check if it’s included in your dataLayer:

Using the data for personalization
Now you need to set up your personalization experience. I’ll use my blog as a (rudimentary) example, adding a little text module with a link to relevant articles for the returning visitor.
Here’s what the visitor sees:
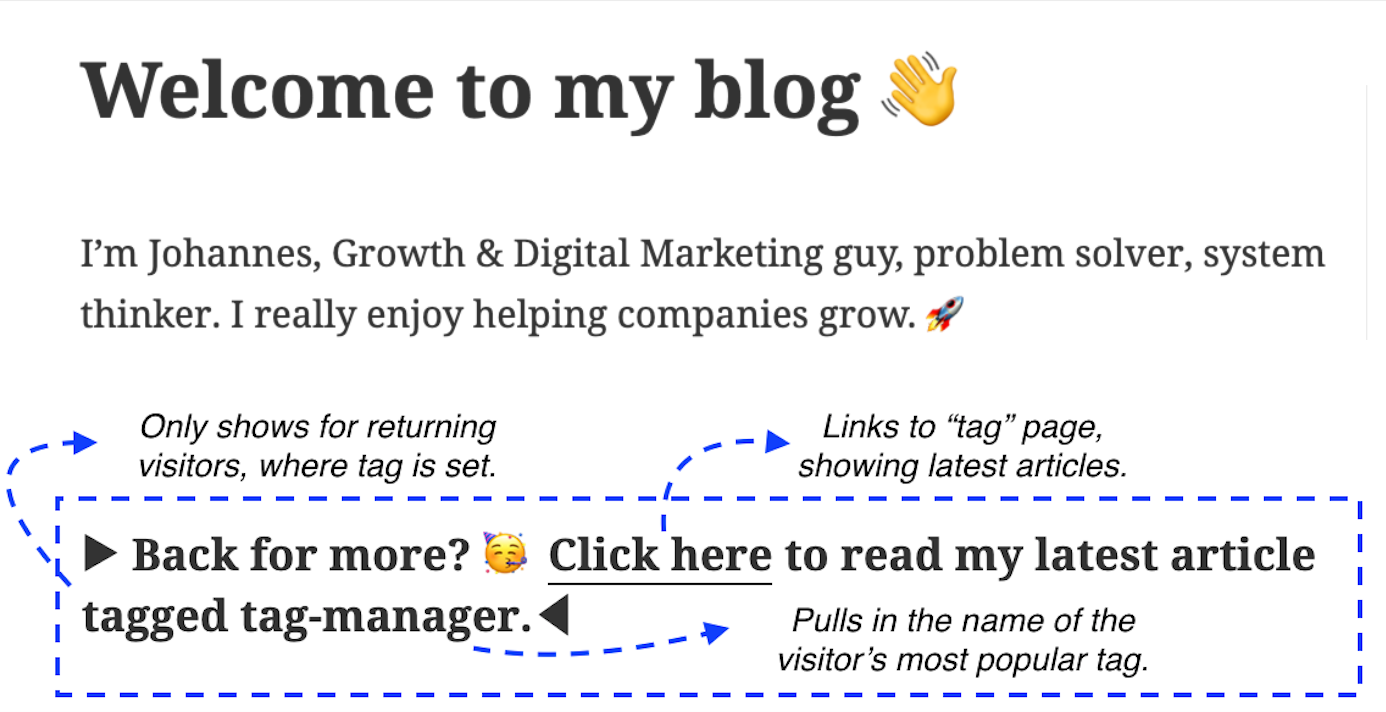
In WordPress, I created a new headline and added ids to the different elements, which are altered based on the visitor. I’m also hiding the H4 using the style “display:none” (same as the first example). It will be unhidden only for returning visitors.
Here’s the code for this little module:
<h4 id="returning" style="display:none">? Back for more?<a id="tag-link" href="">Click here</a> to read my latest article tagged <span id="topic"/span>.
?</h4>
Next, go to Google Optimize and create a new personalization experience and define the page on which you’re going to make changes. Simply select any part of your page and click “Run JavaScript,” then paste the following code:
var topTag = window.google_tag_manager['GTM-XXXXXX'].dataLayer.get('topTag'); $ ("#returning").toggle(); $ ("#tag-link").attr("href", "https://www.your-website.com/tag/" + topTag + "/"); $ ("#tag").text(topTag);
Adjust the code:
- Replace “GTM-XXXXXX” with your Container ID.
- Use the IDs you’ve assigned to the elements you’d like to change.
- Use your website to append the “/tag/XXX/” to. (This is standard WordPress format and should work, but you need to use your own domain.)
Save it, click Finish, and preview the change. You should see the personalized module.
Lastly, define the audience targeting conditions for this tag. You want to show this module only to returning visitors.
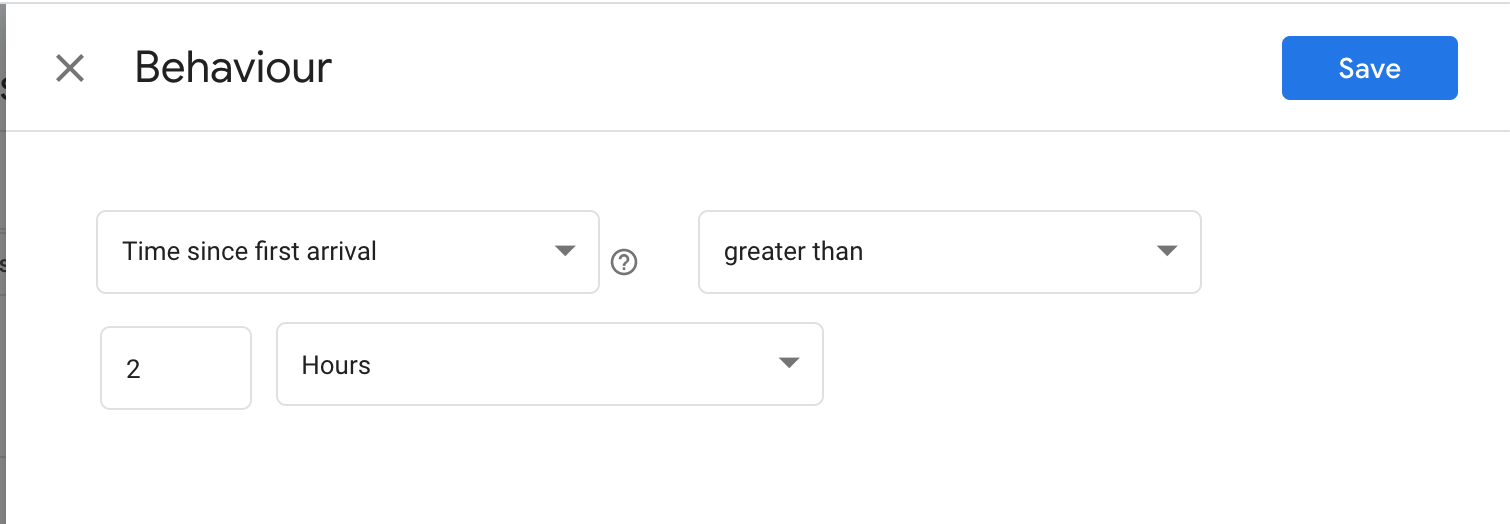
To define that, select “Behavior” in the targeting criteria and set it, for example, to a minimum of two hours. This could be set to more, depending on your liking.
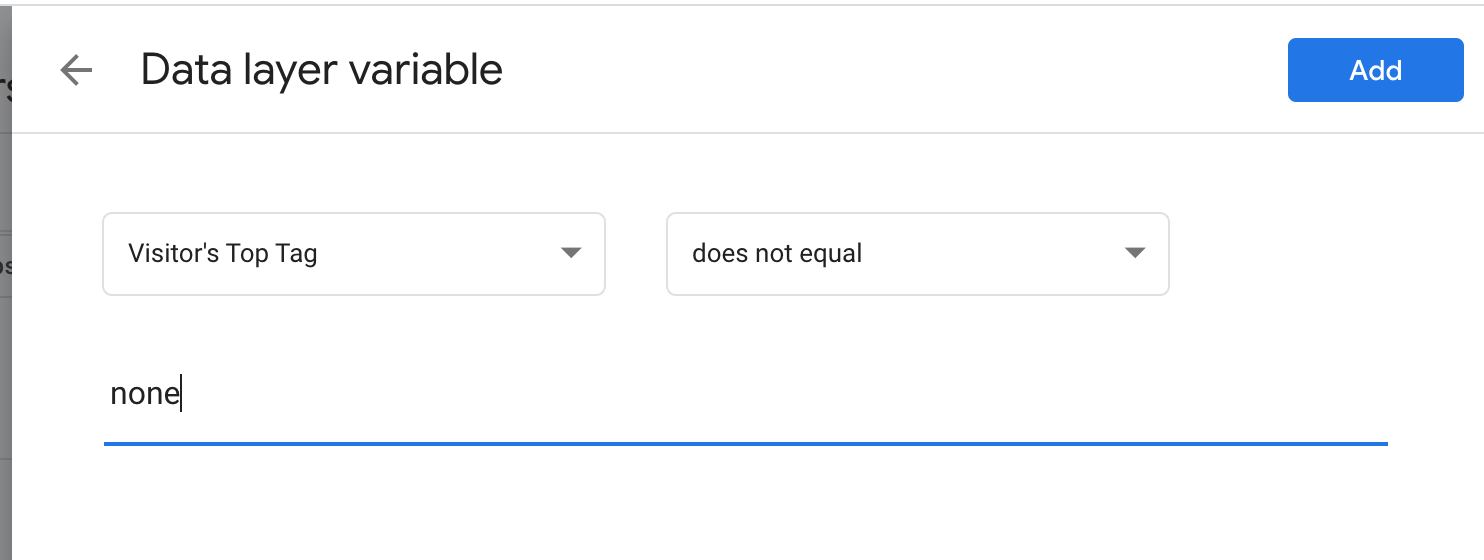
Second, make sure that you show this module only to people with a valid dataLayer variable for their “topTag.” Thanks to the dataLayer integration in Google Optimize, simply click on “Create new variable,” set the value “topTag,” and give it a name.

As the condition, define it as “does not equal” and “none” (as per the variable rules defined earlier in GTM).
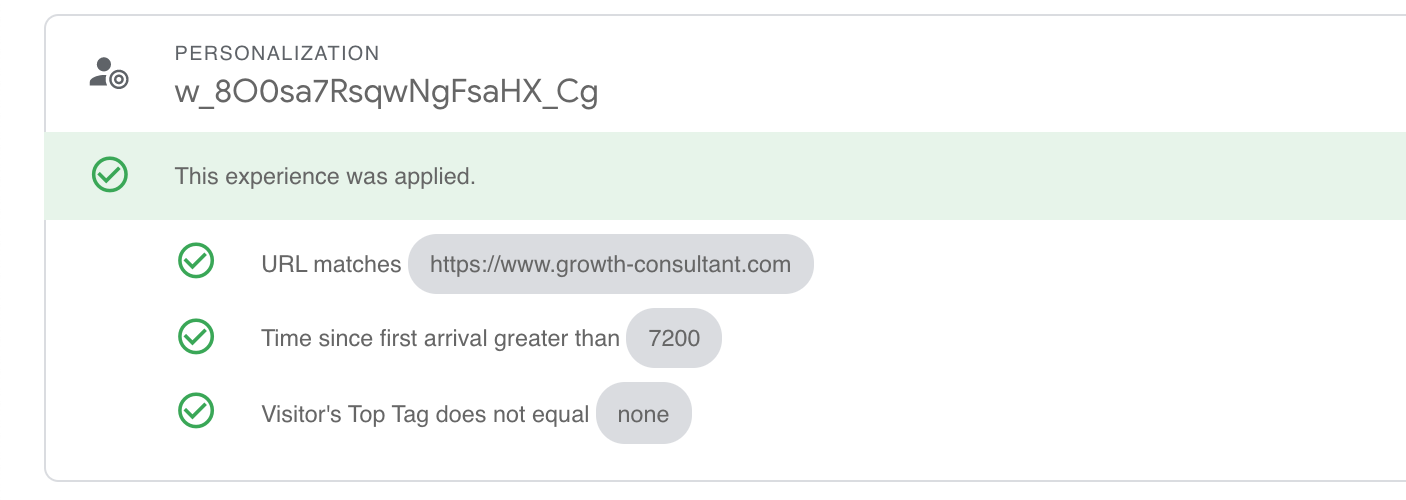
Your audience definition should look like this:

Now, you’re ready to start the experience. If you have problems, use the “Debug Live” mode to see what’s going on. In my case, the experience shows as expected:
Conclusion
This step-by-step guide has walked you through how to use Google Optimize in combination with Google Tag Manager to make changes to your website based on:
- User location;
- Acquisition channel;
- Past behavior.
With a little bit of JavaScript, any marketer can create sophisticated personalization experiences, which—deployed intelligently—allow you to test more targeted, intent-based messages and site elements.
These tools and examples are free to use, and they use data that is non-identifiable (i.e. legal). This type of personalization also avoids the “creepy” personalization that no one wants, no matter how well executed.
If you’ve wanted to test personalization as a way to improve your website, here’s your chance.
Digital & Social Articles on Business 2 Community
(63)

 (
( (
(