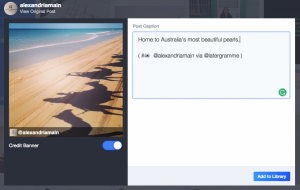
Want to add every post on your blog to your Buffer queue, complete with images and automatically generated hashtags?
Recently I realized I hadn’t added my old blog posts to Buffer, and needed to go back and queue them all up. While I was doing it, I decided I could grab the images and use a free API to generate the hashtags for me!
So, I thought I’d record how I did it so I can tell you, too.
In this post, you’ll learn to:
- Export a CSV of your posts from WordPress
- Tidy up the CSV to include only URLs and titles of your posts
- Automatically include hashtags in the tweet text using Aylien
- Use import.io to scrape images for your tweets
- Push the tweets and images to your Buffer queue using Zapier
Oh, and by the way: all the tools used here are used in their free versions. 
I’m not going to lie and say it’s the simplest process ever, but if you have hundreds of posts on your blog, you’ve basically just taken care of your entire social feed for months.
It’s one-off — a set-it-and-forget it.
Plus, you can even add those same tweets to the queue over and over. This tutorial will help you set your Buffer up for life.
From this:

To this:

Here we go!
Download and install WP CSV

The first step is to export all of your posts to a CSV file. The only information we really need from the export is the every post’s title and URL.
Download WP CSV here.

Open the CSV file in Google Sheets
Go to Google Sheets and open your CSV file.
As you might imagine, a CSV file containing all of your WordPress data will have a lot of useless data. By deleting the column that contains the bulk of the data, you can slim it down.
- Open the CSV you just downloaded and delete column F, wp_post_content.
- Now, move wp_post_name all the way left so it becomes column A.
Here’s a gif to demonstrate:

Column A now consists of every slug (the part of the URL to come after the domain) on your site. Now you need to create URLs out of them.
Turn slugs into full URLs
Right click column A and click ‘Insert left’.
Call the new column ‘domain’ and populate every cell in column A with your domain, like this:

Next, insert a new column to the right of column B and call it ‘full URL’.
Use the following formula in cell C2, and drag it all the way down the to bottom of the sheet in column C:
=CONCAT(A2,B2)
Now you’ve got a list of every URL on your site.

Copy the whole of column C. Right click and choose Paste special > Values only. Then, delete columns A and B.
Here’s a gif to demonstrate:

Finally! All full URLs in column A, and mapped to the post title.
Now to import the CSV to Airtable to take advantage of its excellent filtering features.
Import the CSV to Airtable and filter out the junk
Download your CSV from Google Sheets, and head over to Airtable. Create an account if you don’t have one already, and then create a new base from your CSV file.

You’ll see your spreadsheet loaded into Airtable, which allows you to easily filter out junk data.
Tidy the sheet up by deleting or hiding every column apart from ‘full URL’, ‘wp_post_date’, ‘wp_post_status’, ‘wp_post_title’, ‘wp_post_type’.
It’ll look like this:

Now’s the time where it’ll all start to make sense.
At the moment, your data is full of all kinds of irrelevant rows including every revision and attachment you’ve ever saved.
To filter down the data to just the relevant rows (e.g. only published posts), hit ‘Filter’ and set it like this:

Time to generate hashtags!
Generate hashtags in Google Sheets using Aylien
Create a new Google sheet, and install the Aylien Text Analysis add-on.
You get 1,000 API calls for free, so unless you have over 1,000 posts on your blog, you’ll be able to generate a full list of hashtags.
Paste back the full list of URLs from Airtable into your new Google sheet, and fire up Text Analysis from the Add-ons menu. Select your column of URLs, and choose ‘Hashtag suggestion’ from the dropdown, like this:

Aylien will start spitting out hashtag suggestions for every URL.
Now comes the manual part. You have to check each row and delete the irrelevant ones. To be sure you’re not going to overrun 140 characters, keep it down to 2-3.
Also make sure to use find and replace to remove all commas.
Paste in the titles from Airtable and generate the full tweet text
Now you have 2 out of the 3 three ingredients for your tweets, all that’s left is to make a new column A and paste your titles in from Airtable and concatenate the rows together into full tweets.
Use the formula below in a spare column:
=CONCATENATE(A2,” “,B2, ” “, C2)

Now copy the formula into every row to generate a tweet plus hashtags for every post on your blog.
That’s part one done.
Next up: scrape blog post images and push the tweets and images to your Buffer account!
Scrape your blog for images for the tweets
It’s important that tweets have images, but don’t worry — you don’t have to add them manually.
Let’s set up a quick Import.io Extractor and query it to grab a list of image URLs you can add to the final sheet of tweets and images.
First, get a free import.io account and download the app.
Once inside, create a new Extractor:

Follow the instructions it gives you. Put your blog’s URL in, make sure you navigate to a blog post page, and switch extraction on.

Now extraction is active, click the post’s header image and choose ‘Just one row’ from the pop-up box.

Hit ‘Done’.
On the next screen, you can use the tool you just made to extract the first image from every URL in your spreadsheet list. Hit ‘Run queries’ and import.io will scrape every image for export.
Export the list from import.io, and you’ll get every image URL, organized in the same order as the list of tweets.
Paste those URLs right next to the tweets in your original spreadsheet:

HOORAY.
Now you’ve got every URL, every title, and every hashtag combined as a tweet, mapped to every image.
Now it’s time to get that data into Buffer.
Send the tweets and images to Buffer
Since everything is already in spreadsheet form, the best way to send it to Buffer is using Zapier. Go sign up to Zapier if you haven’t already.
With Zapier, you can connect Google Sheets to Buffer and automatically add all of your tweets and images as items to your Buffer queue. Connecting two apps together happens inside a configuration called a ‘zap’.
First, you need to make a new Google sheet with two columns: one for the tweet text, and one for the image URL.
Add one tweet and one image URL to the sheet so the zap has some sample data to pick up:

Once you’ve set up the Google sheet template with sample data, time to set up the zap.
Here’s the configuration:

Once your zap’s up and running, you can paste your URLs into the connected spreadsheet. This will finally add the tweets and images and hashtags to Buffer!

(I only have 10 items at a time because I’m on the free plan)
Bonus tip: Automatically add new content to Buffer as it’s posted
So, in this tutorial I’ve shown you how to schedule your entire archive of posts in Buffer. However, you don’t want to keep doing it every time you post new content. You want it to be fed directly to your Buffer queue from now on
For that, you can try any of these options:
- Use Buffer’s Content Inbox (premium feature) to add new RSS feed items into your queue.
- Use the WordPress to Buffer plugin
- Use an RSS-to-Buffer zap
- Use an RSS-to-Buffer IFTTT applet
I hope this tutorial helped! Let me know in the comments if you have any suggestions, or if you’d like to share how you keep your social feeds updated.
Digital & Social Articles on Business 2 Community(112)


