— July 12, 2019

You know that little checkmark you see on some Facebook Business Pages that indicates it’s a verified business? You can get one, too. But before I explain how to verify your Facebook Page, here are 4 reasons why you should verify your Facebook page.
4 Reasons To Verify Your Facebook Page Now
1. AUTHENTICITY: The verified checkmark acts as Facebook’s stamp of approval. It tells people that you are who you say you are. And it means that Facebook has confirmed your Page as authentic and official.
2. ELIMINATES CONFUSION: Maybe your business had more than one page at one time. This can cause confusion when people look for you, or your fans want to see your Page. The verification of your Page tells Facebook and your potential customers that it is, in fact, the official Page of your company.
3. BUILDS CREDIBILITY: We all can agree that first impressions are essential, especially on the internet where our attention spans are so short. ideal customer first comes across your business Page, you have a few seconds to make a good impression. The verification checkmark makes your Page look professional and your business credible. (If you want to know more about how to make your website and marketing move your ideal customers to buy – check out my free offer below).
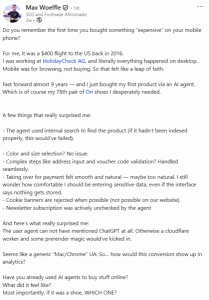
4. VISIBILITY: Once you’ve completed the verification process you will receive a pop-up with the following message: “Your Page will have a verified badge and show up higher in search results to help attract more visitors.” It looks like this:

Facebook’s algorithm is consistently changing, so I recommend that you give your Page every advantage to be successful.
So, are you ready to verify your Facebook Page? Here’s how:
How To Verify Your Facebook Business Page
One thing to note before you verify your Page: You must have a physical address associated with your business. This may seem counterintuitive, especially if your business is virtual and your customers are from all over the world. But, the reality is that a physical address, even to virtual customers, shows that you have a real company and are legit.
I have a home office, and for privacy reasons, I don’t want my street address displayed on my Page. So I experimented and entered only my city and state, and I was successful in verifying my Page.

So, are you ready to verify your Page? Here’s how:
How To Verify Your Facebook Business Page
One thing to note before you verify your Page: You must have a physical address associated with your business in order for Facebook to certify your Page. This may seem counterintuitive, especially if your business is virtual and your customers are from all over the world. But, the reality is that a physical address, even to virtual customers, shows that you have a real company and are legit. I have a home office and for privacy reasons, I don’t want my street address displayed on my Page. So I experimented and entered only my city and state and I was successful in verifying my Page.
1. Click “Settings” at the top of your Page.
2. From “General”, click “Page Verification”.
3. Click “Verify this Page”, then click “Get Started”.
4. Enter a publicly listed phone number for your business, your country and language.
5. Click “Call Me Now” to allow Facebook to call you with a verification code.
6. Enter the 4-digit verification code and click “Continue”.
There you have it – now you’re verified!
Did it work for you? Let me know!
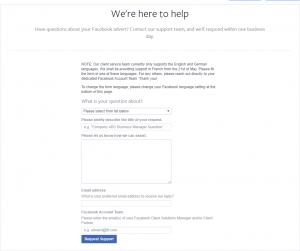
NOTE: I received lots of emails and comments in reference to this blog post. Many of you followed the directions but were unable to verify your Page. If you still can’t get verified after following the instructions above, link here for a list of troubleshooting tips.
Do you have Facebook Business Page tips to share with my community? Feel free to add them to the comments below.
Digital & Social Articles on Business 2 Community
(96)