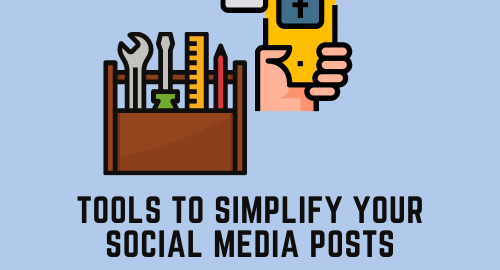

In the last few posts, we’ve looked at how to plan and execute the social media presence of your business. From knowing your social media objective to using different features of each platform, we have identified the key points for the strategy. Now we have to get down to creating the posts and posting them. In this blog, I am going to provide detailed information on the tools that make this task much easier.
Sourcing free images and videos
The first thing that people will see on your social media feed is the image of the post. Whether that is a static image or your video cover, it should be impressive and relevant to you. A good place to find these images and videos is ,Pixabay. Pixabay has tonnes of copyright-free images and videos for you to use.
Another option is to use the Creative Commons search engine. This is an aggregator, which allows you to search on multiple platforms at once. You can also look through illustrations and digital art on this search engine.
Creating image posts
The best tool to create image posts is Canva. This tool wins hands-down over anything else!
Canva has a simple interface and comes with many templates that you can customize. No more hunting for the size of the image, you can simply pick the page size that Canva provides. Working with an existing template makes it easier to create the post. You can customise everything in a template to align with your brand. Or you could start with a blank sheet.
The free version of Canva is sufficient for most people. You can select from a variety of backgrounds, elements, pictures and fonts in the free version. But some of these elements are only available to pro users. In that case, you will have to hunt from the collection to find the free elements. Frankly, this is not a deal-breaker and most people can manage with it. But if you want to scale up and save time, I highly recommend paying for the pro version.
Creating video posts
The tool you use for creating video posts depends on what type of videos you make. Let me break down the tools based on what they do.
- Slide show: If you want to create a simple video of multiple images, then Canva is the best option. Even in the free version, you can add animations to the elements of each image, with timing for that slide. You can also pick from copyright-free music that Canva provides. Finally, you can export it as a mpeg or gif file. Here’s an example.
- Animated video: There are many tools for animated videos, but I have found Animoto and Kapwing to be the best options. Both have a limited free version that you can try before you buy. Animoto has standard templates that you can customise. You can add your own images, videos and overlay text on them through the software. This tool is great for creating simple animated text videos but can get restrictive in the features that it offers. The free version adds a watermark to the video. Here’s an example of an animated video from Animoto.
- Kapwing has more flexibility in terms of features. This also makes the interface a bit more complicated. You will need to play around with it for a while to understand how layers work. You can add to your video from a vast library of images, along with your own video and images. The free version does not add a watermark, but you can access your project only for 7 days. Here’s a video made in Kapwing.
- Audiogram: Audiograms are used to convert podcasts into videos. Audiogram tools pick up the content from your podcast or audio file into a standard template. You can customise the template to your requirements to some extent, but mostly you are restricted to minor colour and font changes only. Nevertheless, these tools are useful for posting your podcast on social media. Headliner is a great tool to achieve this. The free version allows 5 videos per month without watermark. It also has 10 mins of subtitles built into the free plan. Here’s a video made in Headliner.
- Full-feature video: A full-feature video can contain multiple videos, images, text, transitions, music and additional elements on the screen. When it comes to free tools, the best option is the InShot app. But if you want more control, then it is worth investing in an Adobe Premiere Rush subscription.
InShot app works on a phone or tablet. Starting out with a video or image, you can add multiple layers to it. You can also trim and split your existing video. It is best to use this app for videos that are shot on the phone. The free version offers a limited version of all the features. The app is easy to use and a great option to use for social media videos. Here’s a video made using InShot.
Adobe Premiere Rush is best for professional videos. Whether it is for YouTube or for social media, this tool gives you full flexibility to create a suitable video. You can edit your existing video for length, colour, sound, etc. You can place multiple videos on the screen to run in parallel or overlay an image over a video so that the voiceover continues on the image. It provides transitions and text options to add to the video. All this is shown in a visual layer format, which is easy to navigate. Here’s a video I created for YouTube and then shortened for social media.
With this information, you can easily decide which tools work best for you. You can save your projects in most of the free versions of the tools. This will save time when you have to create posts that are repeated. Using these tools will simplify your process to create social media posts.
Digital & Social Articles on Business 2 Community
(48)