
Are you looking to drive more sales to your e-commerce store this year? If you are, have you ever considered using social media channels to do it?
Yes, I know, social media can be a bit overhyped with all the “gurus” and “experts” promising amazing results by “engaging” with your followers.
But let’s be honest, no one will buy anything from you if you only engage with them. You need to do more.
In this article, I will show you how you can use the power of three social media channels to bring more traffic to your store, and drive more sales in the process.
How Social Media Fits your E-commerce Sales Funnel
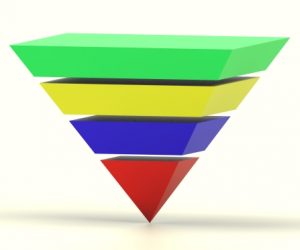
Let’s be honest: you can’t throw traffic to your store, whether it’s social or not, and expect your visitors to buy from you. There’s a whole process people go through when they buy anything (including you). This process is usually best structured using a marketing model called “sales funnel”.
This funnel-like model segments buyers into three main steps, which go from the lowest purchase intent to highest:
- Awareness
- Interest
- Purchase
Let’s quickly go over each one of them.
Awareness
In the first step, Awareness, you try to engage with your audience and bring them to your site. You do that by creating content that’s related to their interests and problems. For example, Nike publishes nothing but inspiring content on their Instagram page with the intention of creating a relationship with their audience.
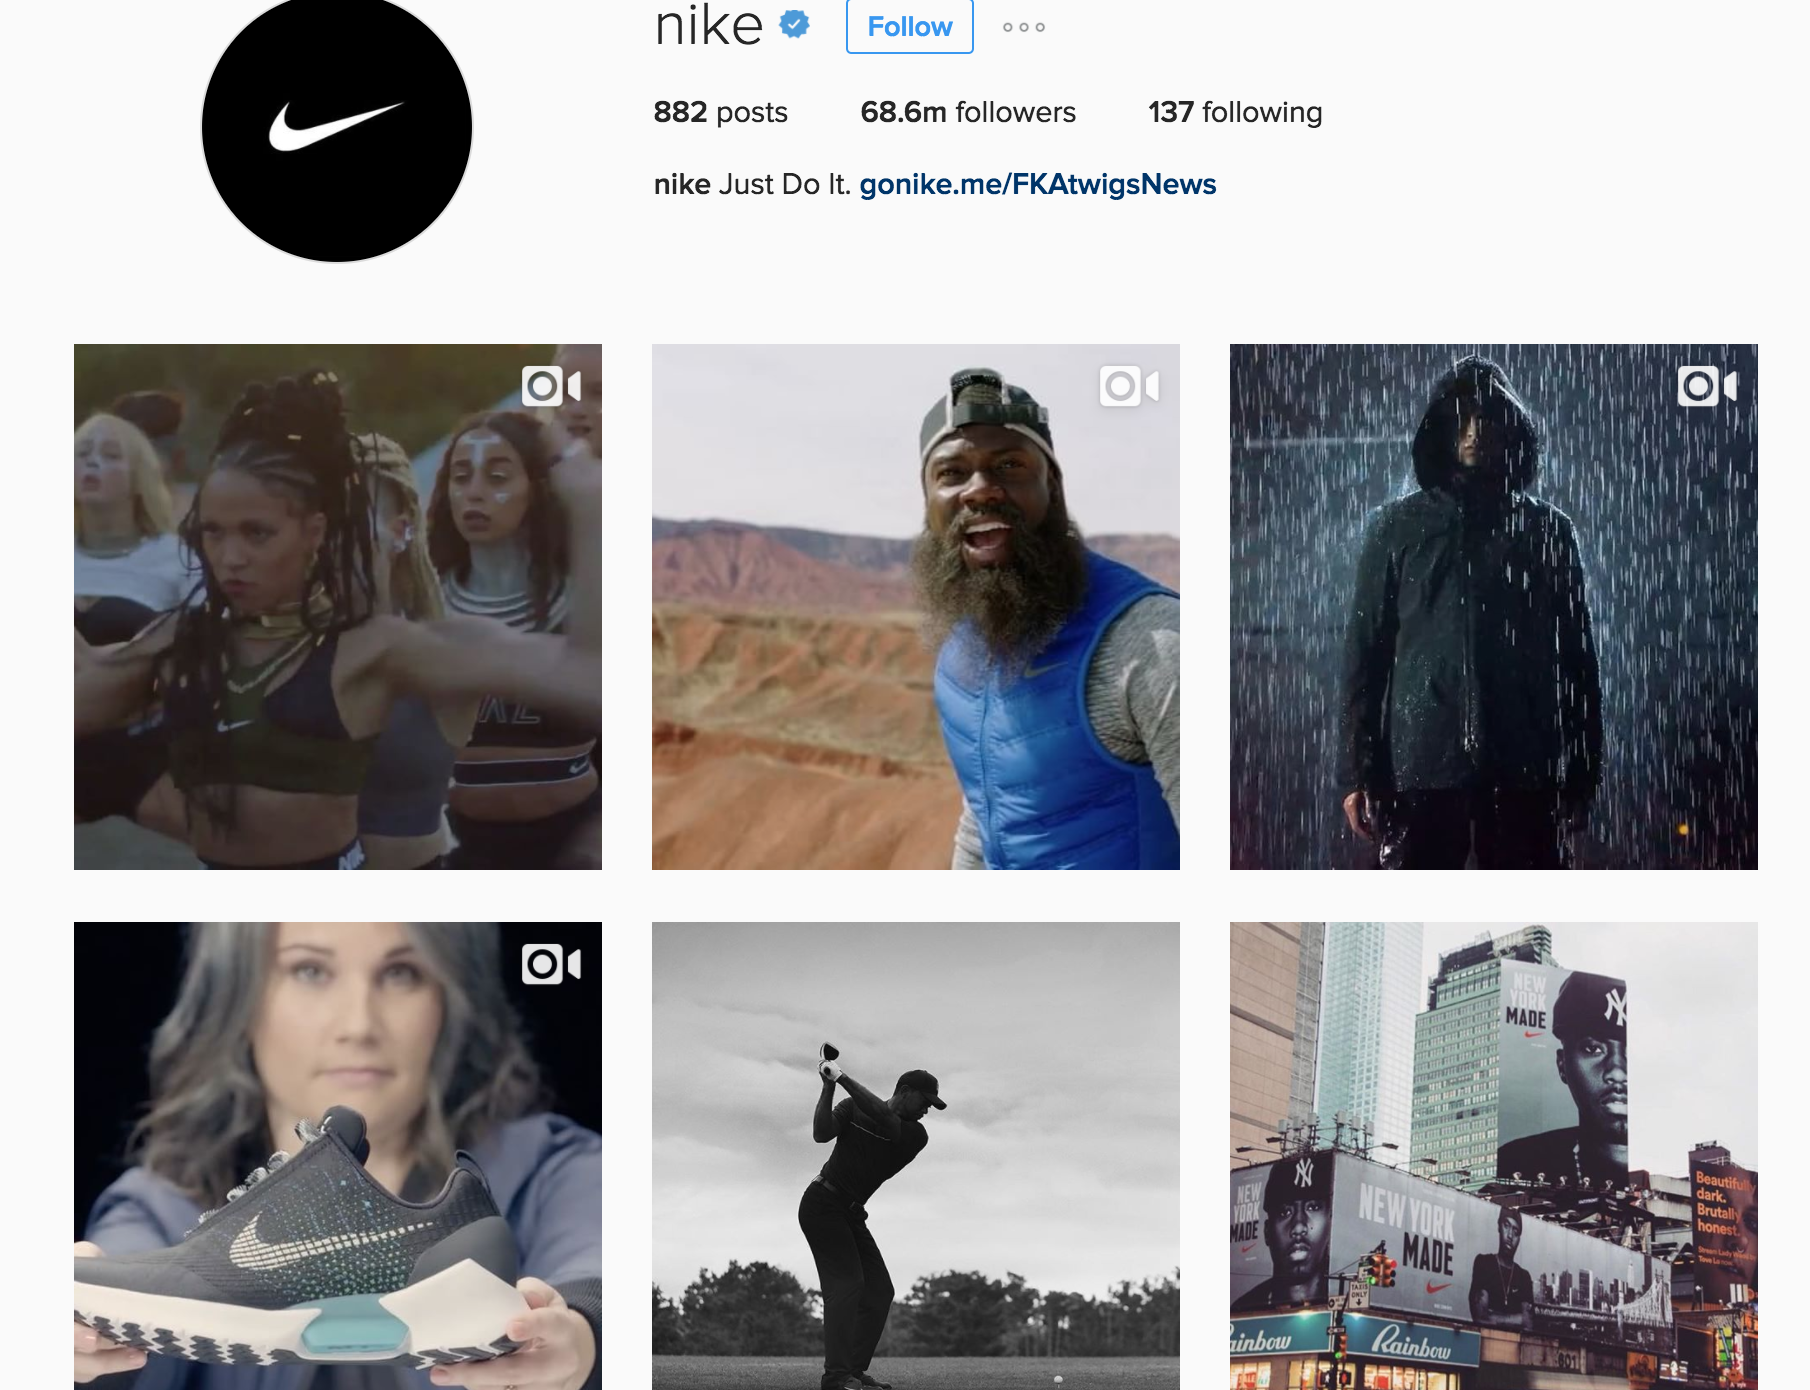
Of course, Nike is one of the world’s largest companies, so they don’t have to make much of an effort when trying to bring people to their site. Also, their brand is so strong they don’t have too much convincing either. Let’s see another more realistic example.
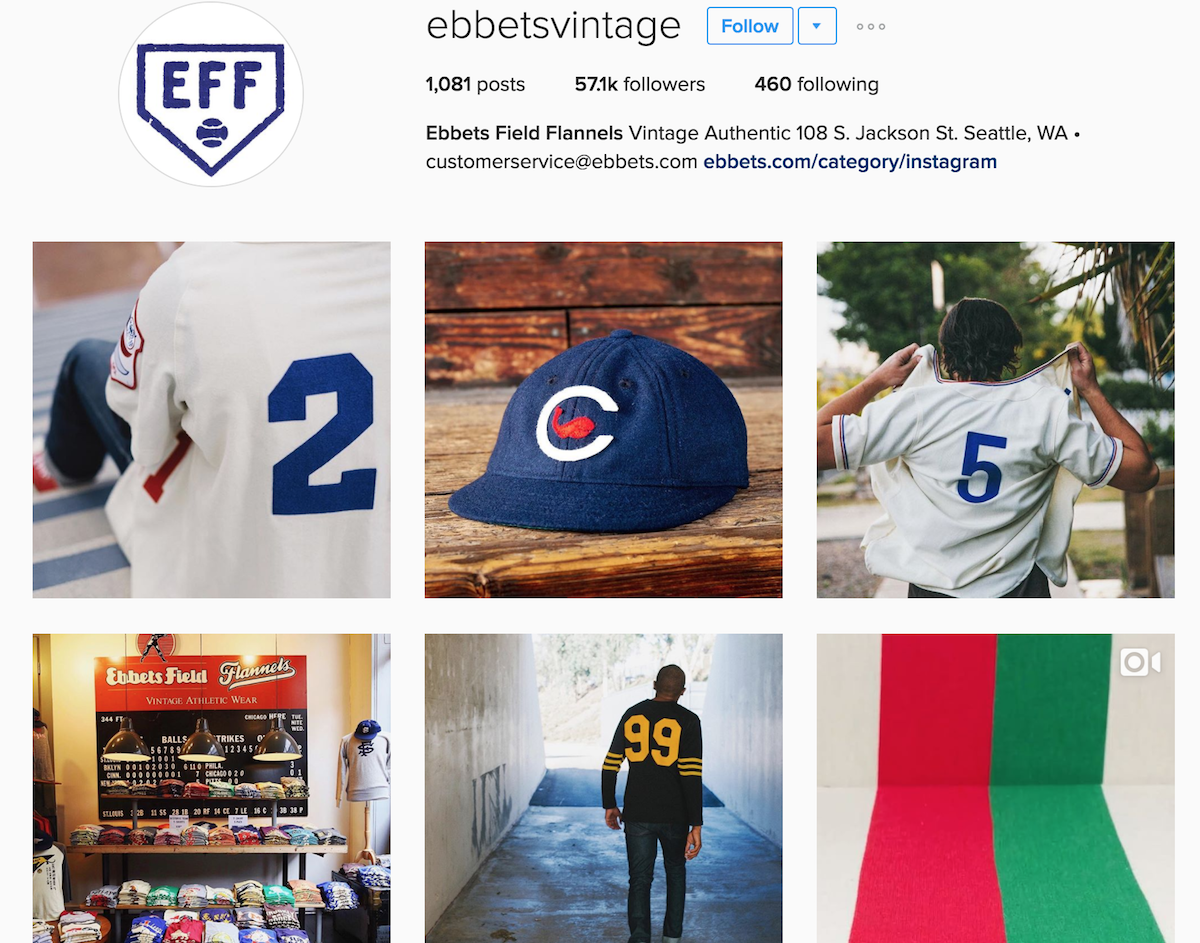
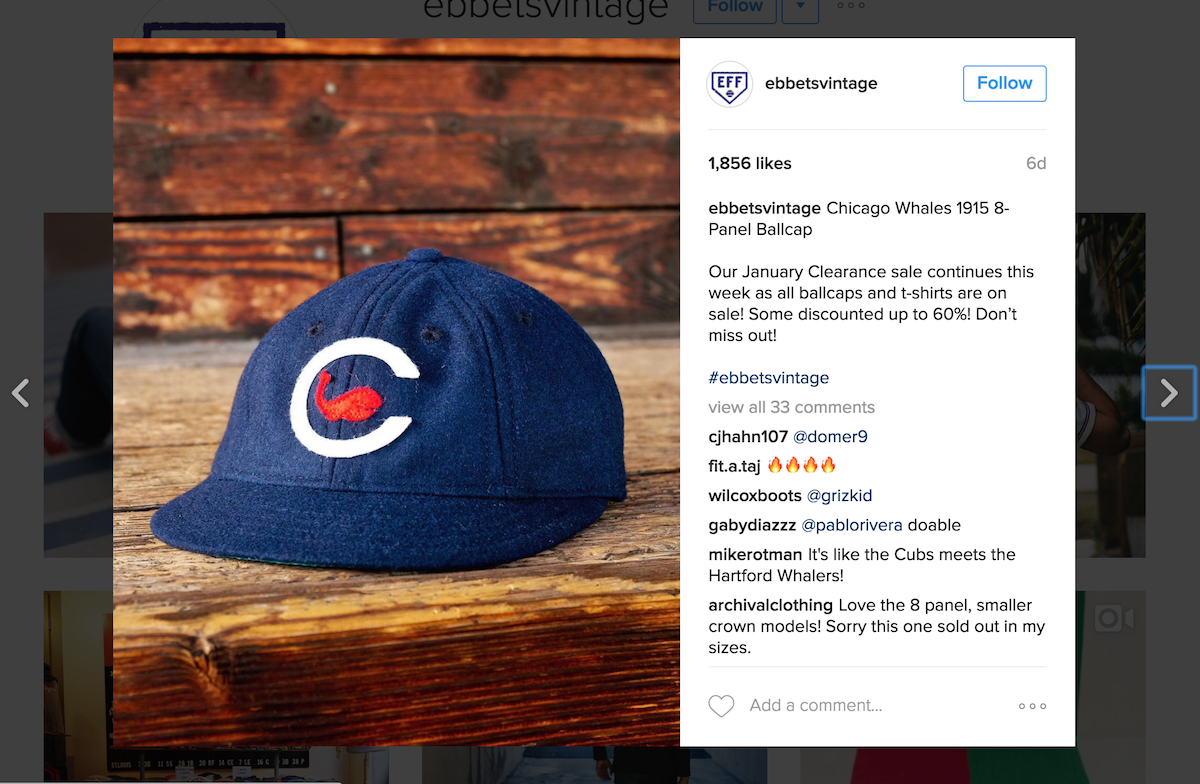
In this case, Ebbets Fields Flannels, a company that manufacturers old-school baseball clothing, features a mix of engaging and interest-focused content. As you can see on the image below, they even create content that’s more sales focused (the following Instagram post would fit into the Purchase step):
Before we move on, I’m aware (no pun intended) I previously said you build awareness by engaging with your audience when at the beginning of the article I said engagement doesn’t bring sales. In this step, engaging without looking to make a sale is fine. Not only that, but it’s the only way to make a sale later. Remember, everyone goes through this purchase funnel, so you can’t skip this step.
Interest
Then, we have the Interest step. In here, you look to bring people to your site to make them interested in what you have to say. You shouldn’t focus on making a sale right away, because people may not be interested in buying from your company yet. Instead, you show them what your company and the products you sell do, but with a focus on solving a problem or tapping on a passion.
For example, the company that sells the Five Minute Journal does a good job of creating a short and attractive copy in their message without pushing you to a sale. Rather they focus on briefly mentioning the benefits of their product and then tell you to go to their website to know more.
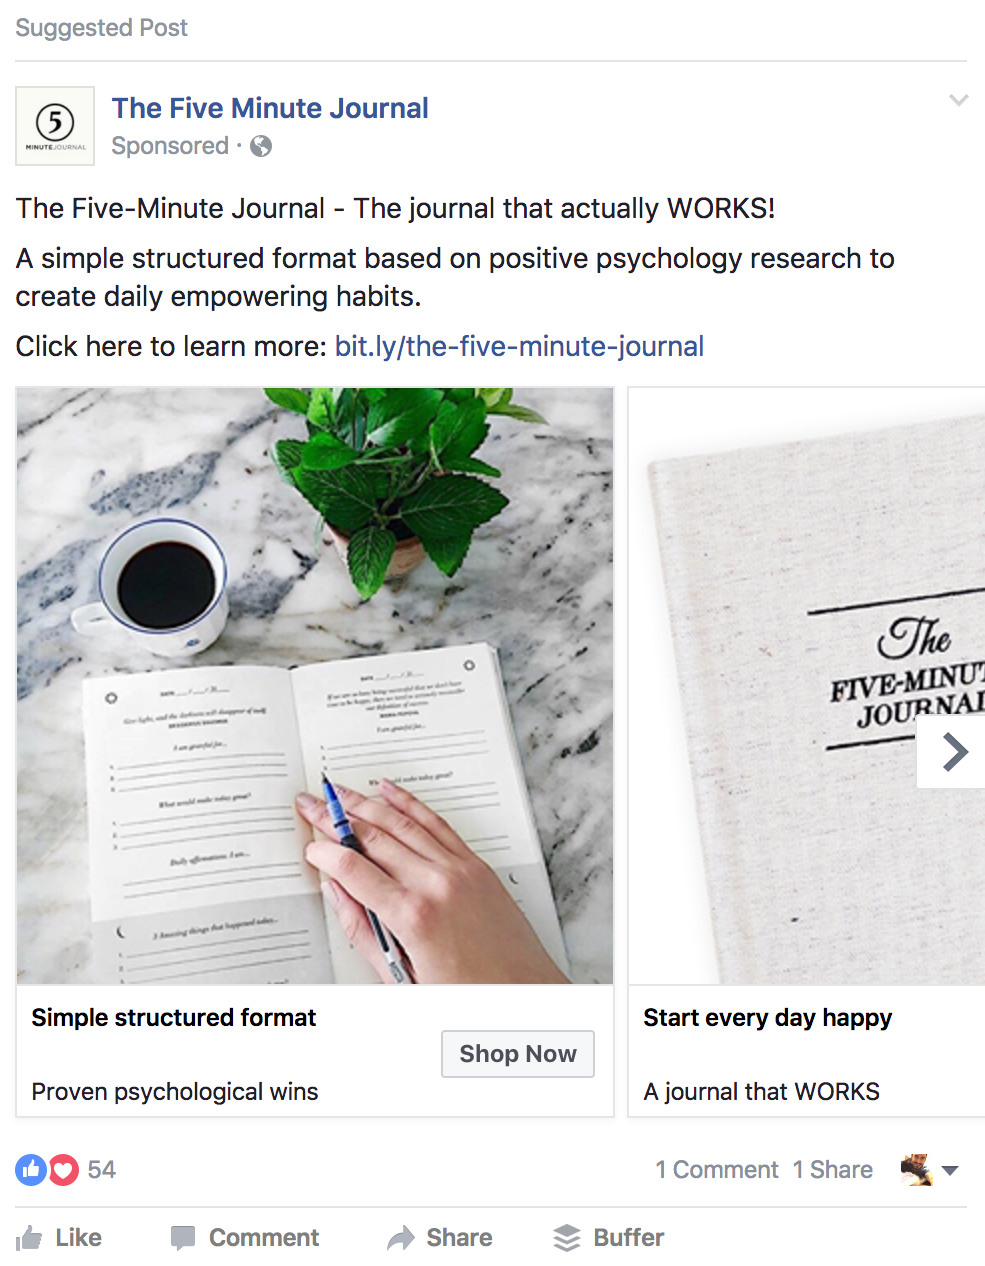
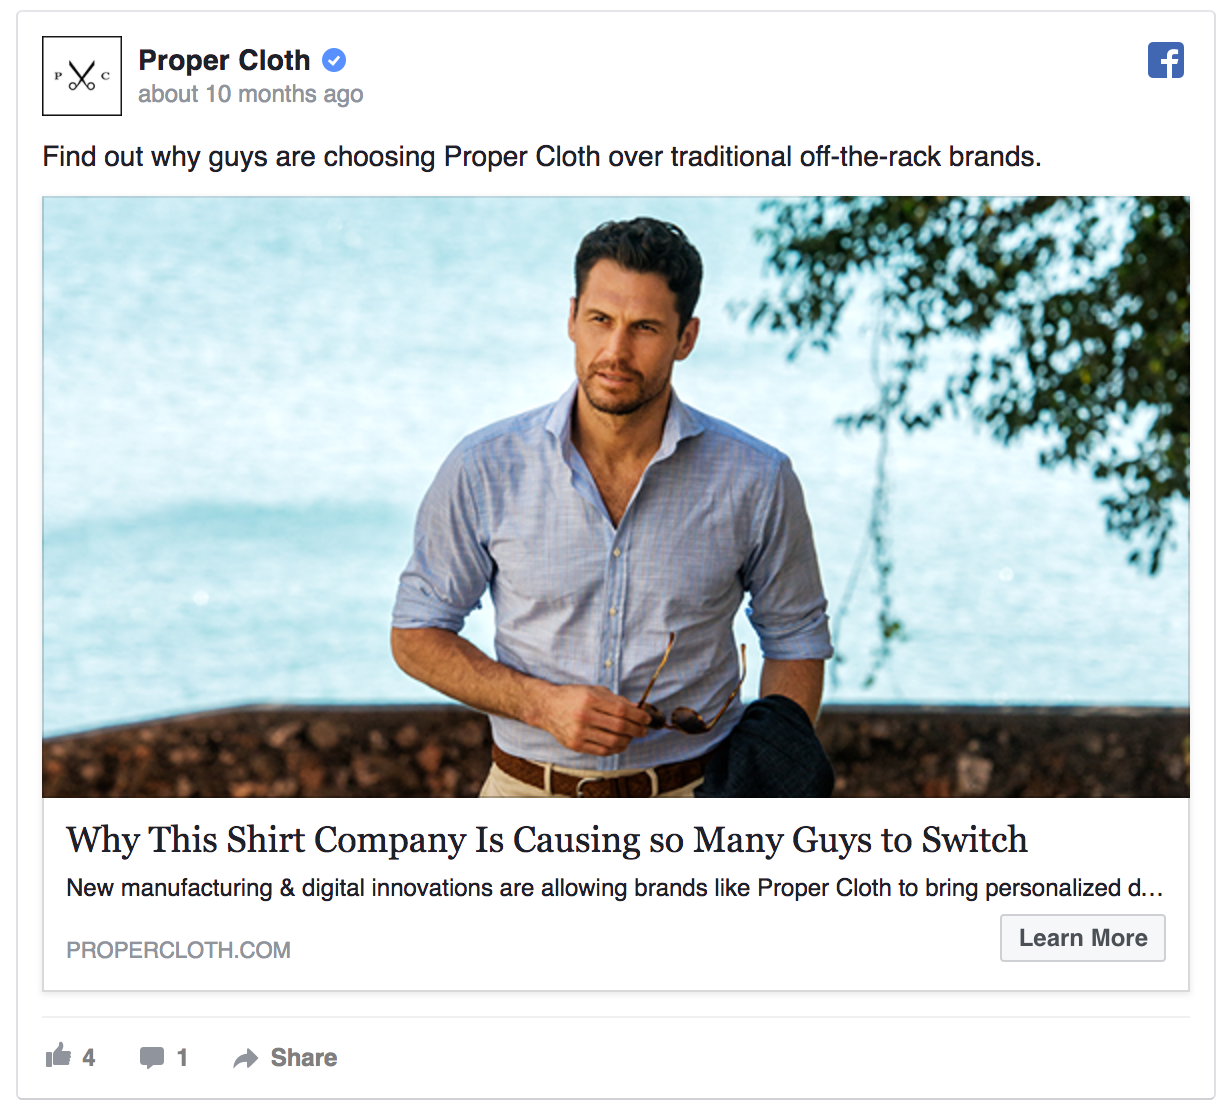
In some cases, this kind of message works fine, especially if the person who’s being targeted has already been on the website (which is the case in the previous example). In some other cases, you show them a piece of content that’s relevant to their interest, but doesn’t explicitly mention the products you sell, like in the following example:
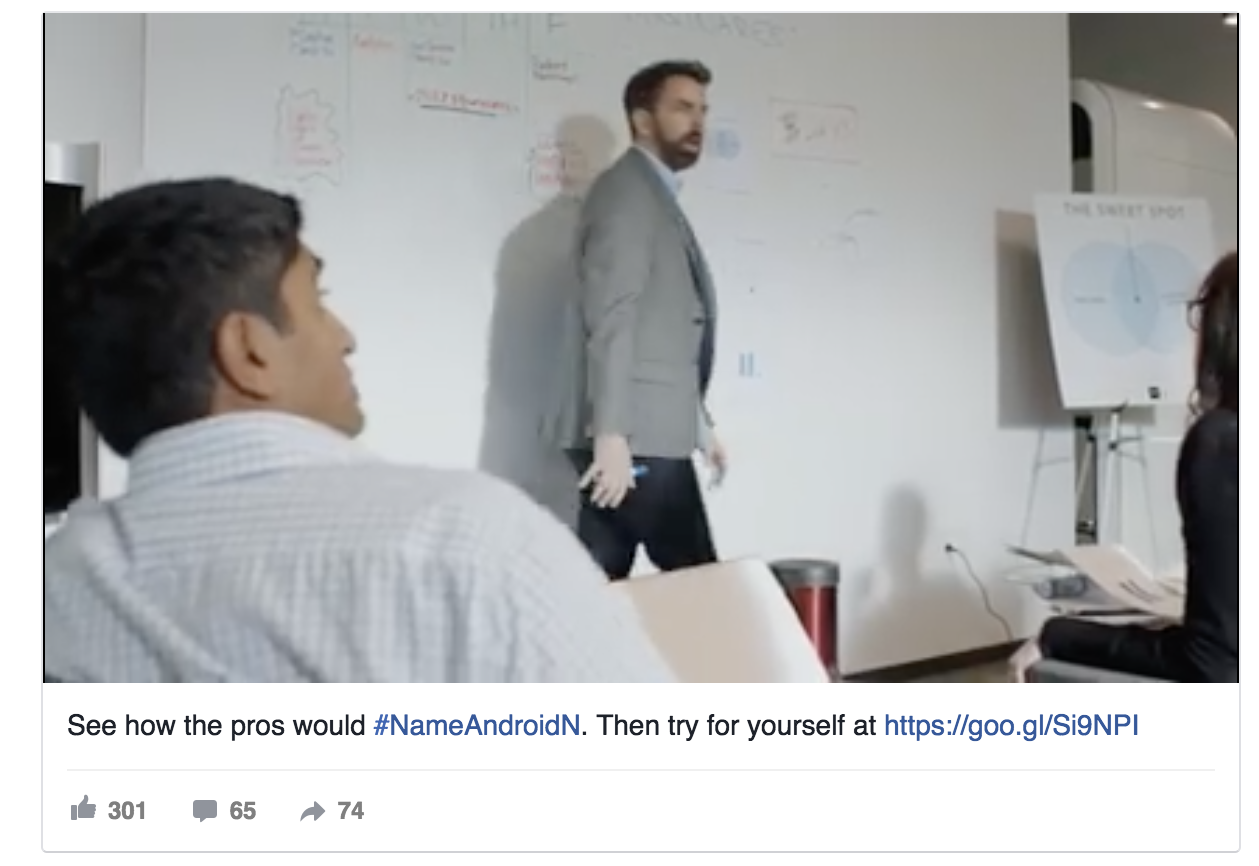
This Facebook ad shows a hypothetical expert talking about how he would name the newest Android OS, which was originally called “N” (it ended up getting called Nougat). Even though this post may be a bit “awareness” focused, it also touches on the interest of Android’s offering: phones and software.
Purchase
Finally, we have the Purchase step, in which you try to sell them your products directly. If you did everything right bringing people into your funnel, engaging with them, and then building interest, many of them will be ready to buy from you. But if you don’t, few will.
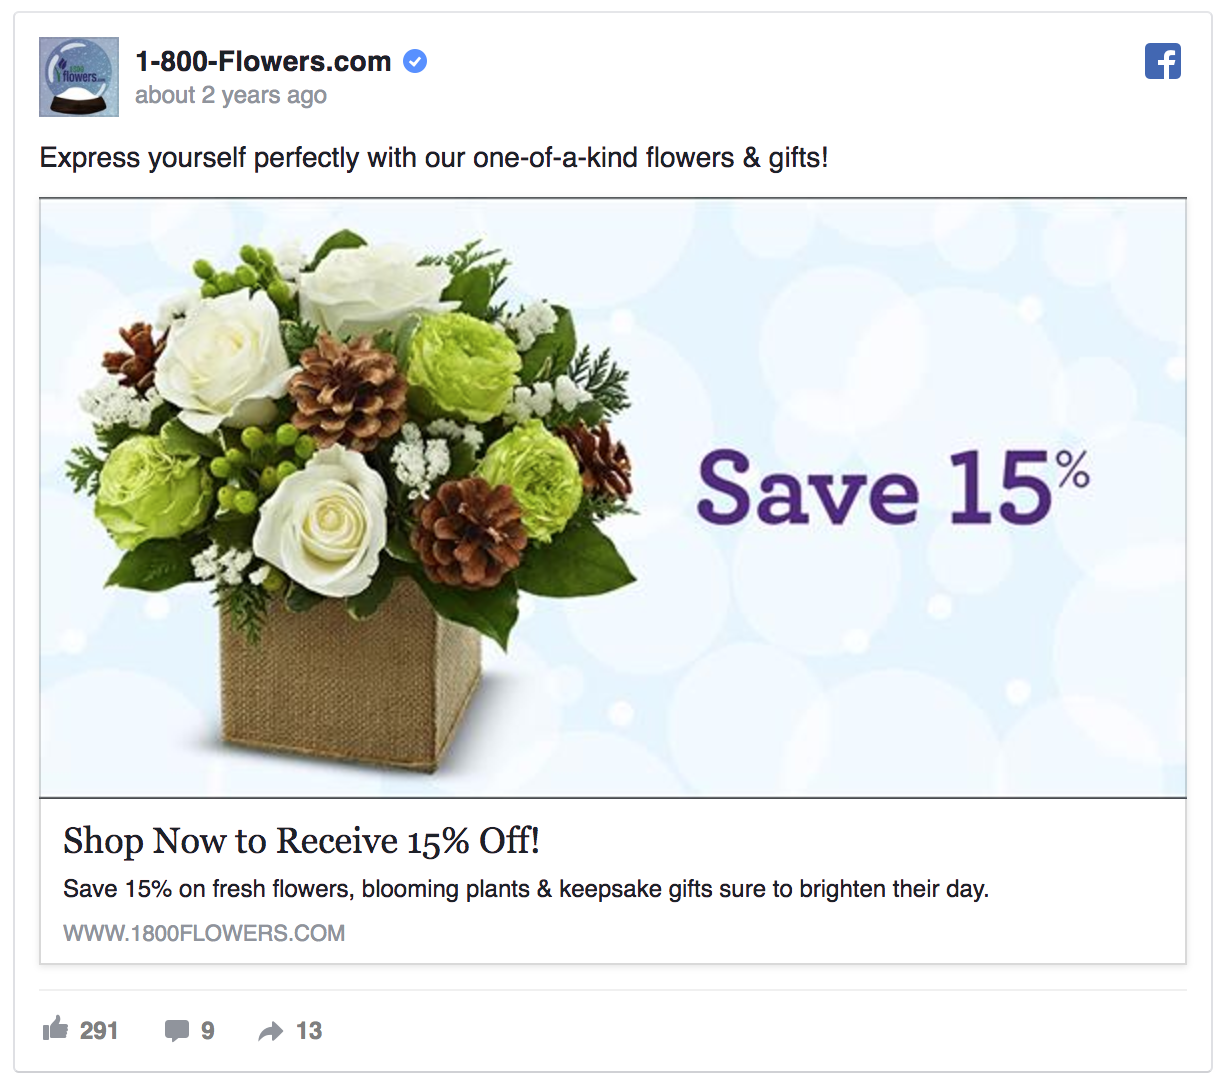
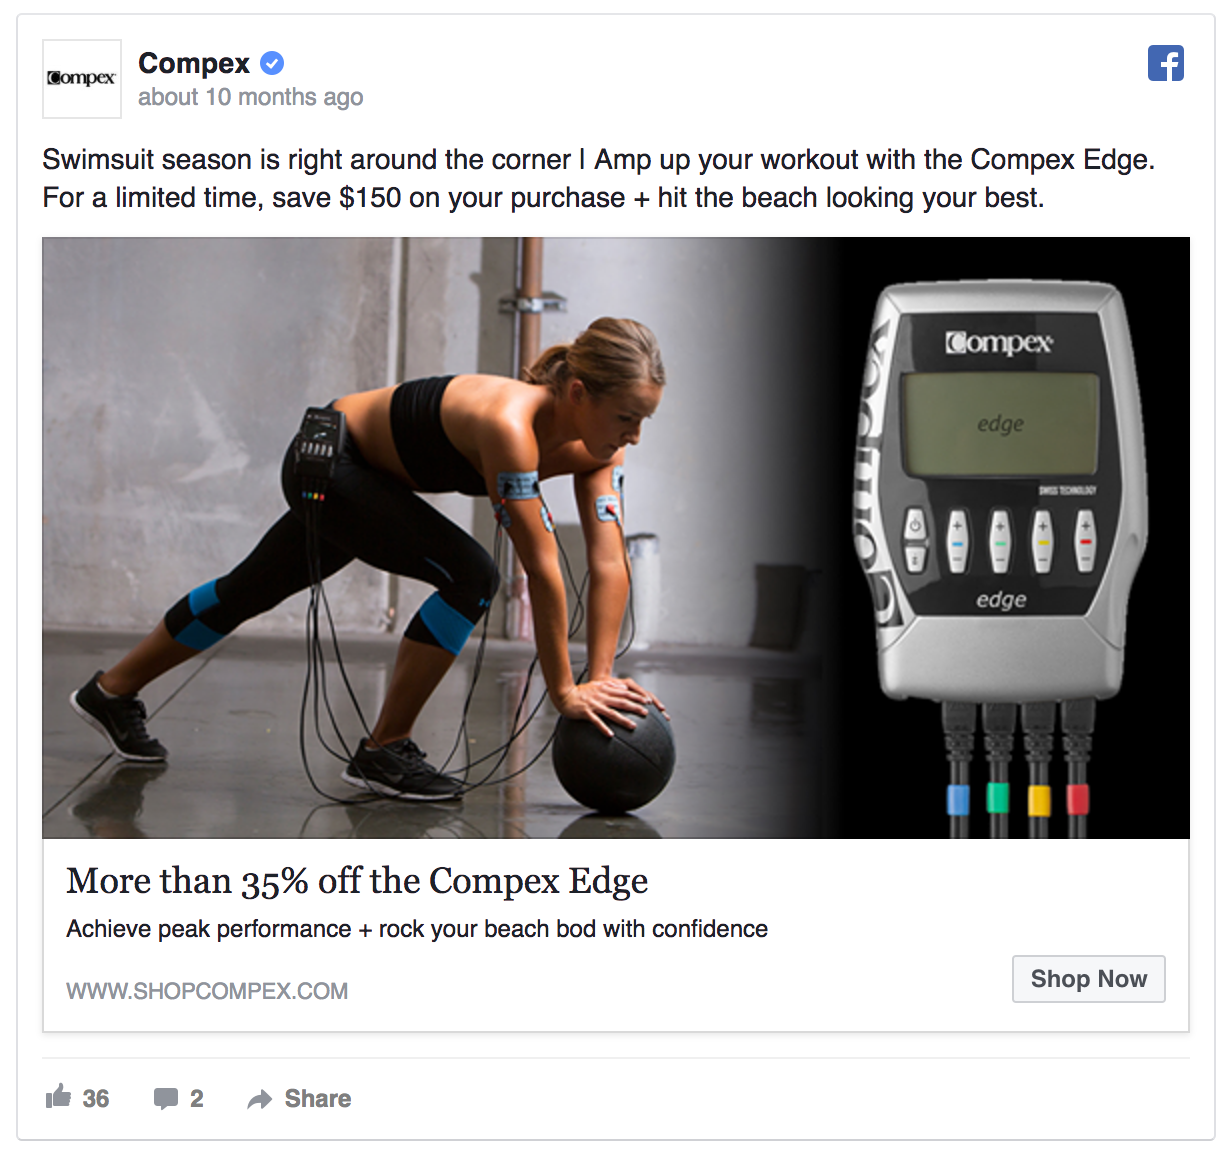
In the following example, you will see how the people at 1-800 Flowers have created a simple yet clear ad that features a big benefit (a discount) and a beautiful product.
How to Use Social Media to Drive Sales
Let’s start with one fact: not every social media channel matters. There are 10 to 20 different ones you can choose from, and the majority won’t make much of a difference in your bottom-line.
I want you to focus your energies in three social media channels that work best for e-commerce stores. These are Facebook, Instagram, and Pinterest.
From this moment on, I will focus the rest of the article to show you how to implement a paid campaign on those three social networks to drive more sales (i.e. I will be focusing on the Purchase step, and not the other two).
Important Caveat: These social media channels work best when you actually implement a paid traffic campaign. This has to do with the fact the organic reach of those social media channels has been falling deeply in the past few years (especially Facebook). I understand this is not ideal, but if you follow the steps in this article, you will learn how to set them up so you can maximize your spending.
How To Create A Facebook Ads Campaign
Step #0: Install Pixel
Before you even get started, you need to have a tag Facebook calls “pixel” installed on your site. Fortunately, it’s quite simple to get and install. This handy guide by Facebook will explain to you how to do so.
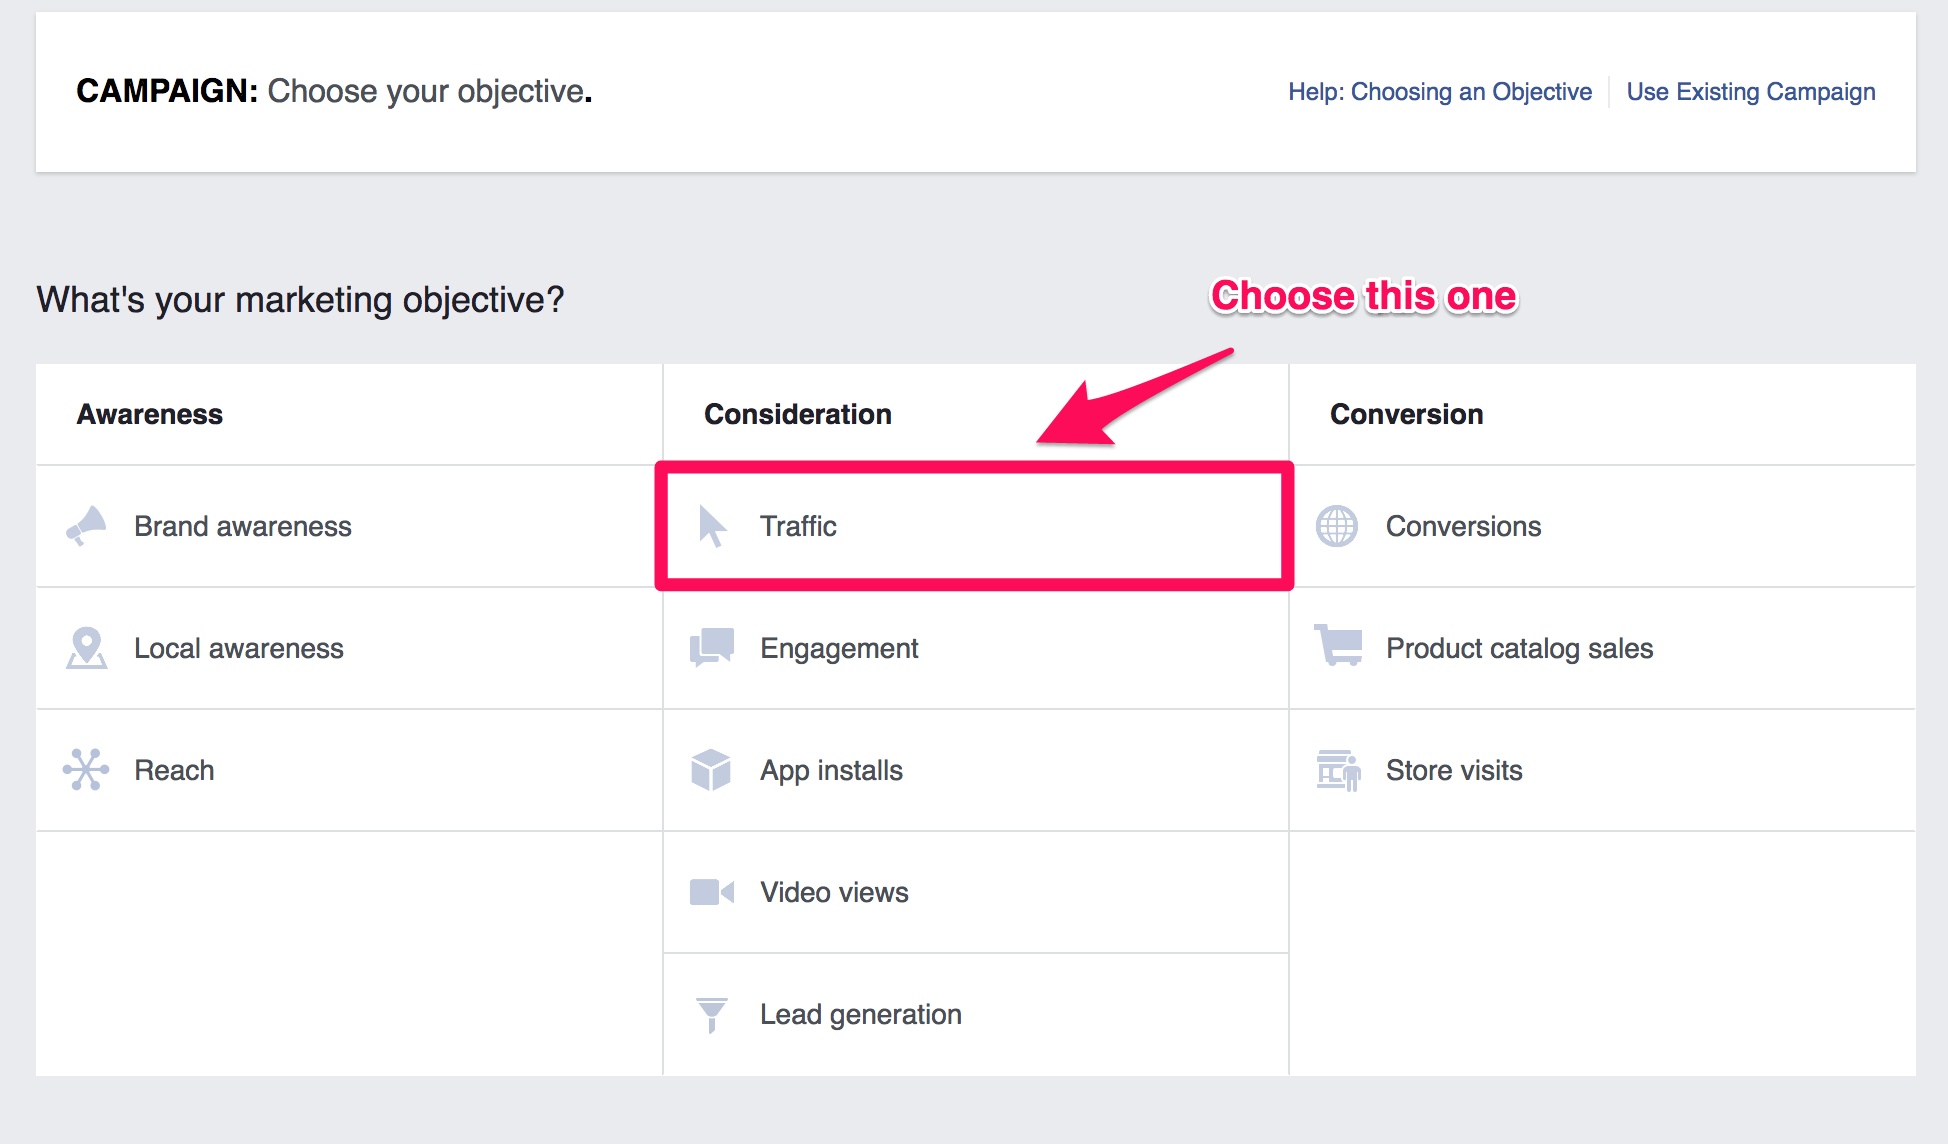
Step #1: Go to Facebook Ads Manager and Choose the Marketing Objective
The first step to creating a Facebook Ads campaign is to choose the goal you want to achieve. In the Ads Manager, you will find 11 objectives, separated by three categories: Awareness, Consideration, and Conversion.
Our goal is to drive sales, so you most likely will want to pick the “Conversions” goal that’s on the top right. Since I assume you are not experienced with setting up Facebook Ads campaigns for your e-commerce store, I recommend you don’t choose it. The conversion goal is better geared for companies that already have experience with Facebook Ads. Campaigns with this goal can get very expensive, and they can be quite ineffective at first (I know because it happened to me, and lost a lot of money). I recommend you start with the Clicks goal, and once you have enough data, you can switch to the Conversions one.
Give it a simple name, like “Store – Clicks”, and click “Continue”.
Step #2: Create The Ad Set
Once you are in the Ad Set creation page, you will find four different sections:
- Traffic
- Audience
- Placements
- Budget & Schedule
At first, they may confuse you a bit. There seems to be a lot you need to do and set up. But don’t despair, setting up your ad sets is easier than you think. In order to do so, you only need to know two things:
- Who you are targeting (i.e. your buyer persona)
- How much you want to spend per day (and per click)
That’s all there is to it.
In our example, we will only use one audience, and we will segment it based on the ad placement (you will see later what this means).
Let’s start with the audience. Who are you trying to sell your products to? If you don’t know, then this is a good time to think about it. This guide developed by CoSchedule will help you achieve that.
In Facebook, you need to know the following:
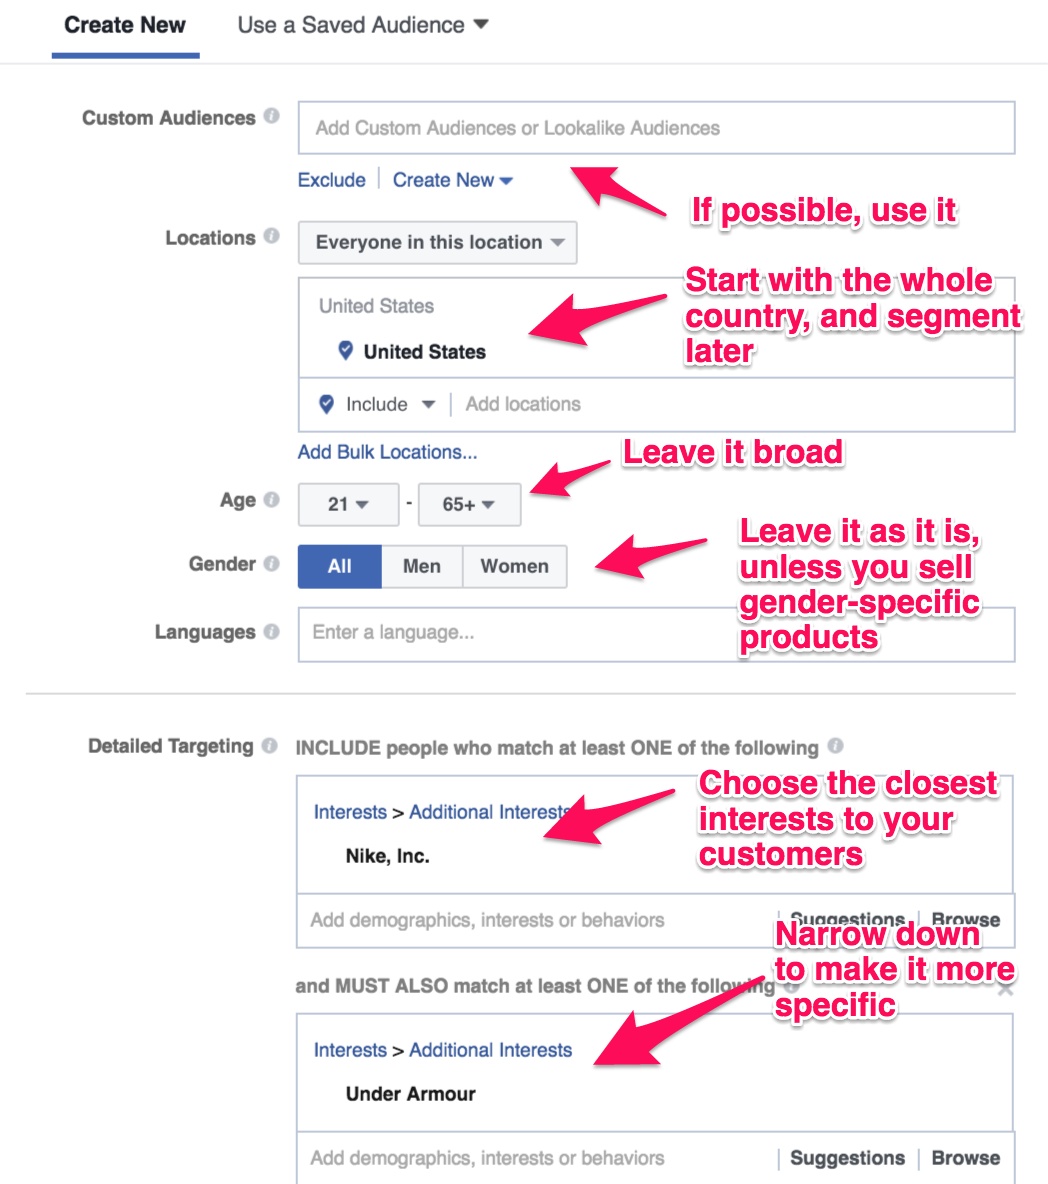
- Custom audience: If you want to target the people who visit your site, or your email subscribers, or your customers, you can do that with custom audiences.This guide by AdEspresso will help you create them. You can also use “Lookalike Audiences”, which as the name suggest, is an audience that looks like a custom audience of yours. This other guide, once again by AdEspresso, will show you how they work and how to create them. Generally speaking, the ad sets that target custom audiences and/or lookalike audiences tend to perform better, so if you can use them, do it.
- Where they live: This can be their cities, states, or countries. It’s usually recommended to segment your ad sets based, at least, by country. So you would have one campaign for US customers, another one for UK ones, and so on.
- How old they are: It’s better to start with a broad range, like 21-65+, than to segment too soon. Unless you sell clothes to old people, or games to teenagers, generally age isn’t a key driver of sales.
- Gender: This may matter if you sell men or women-only products, otherwise, ignore it.
- What language they speak: This may matter if you target different countries, otherwise, ignore it.
- Targeting: This is where the gold is. Choosing the right targeting options will be in most cases what makes or breaks your ad set’s performance. This guide by Digital Marketer will help you find the ideal targeting for your ad sets.
- Connection: If you want to target those that already follow you (or the opposite), or if you want to target your followers’ friends (a smart move), use it. If not, ignore it.
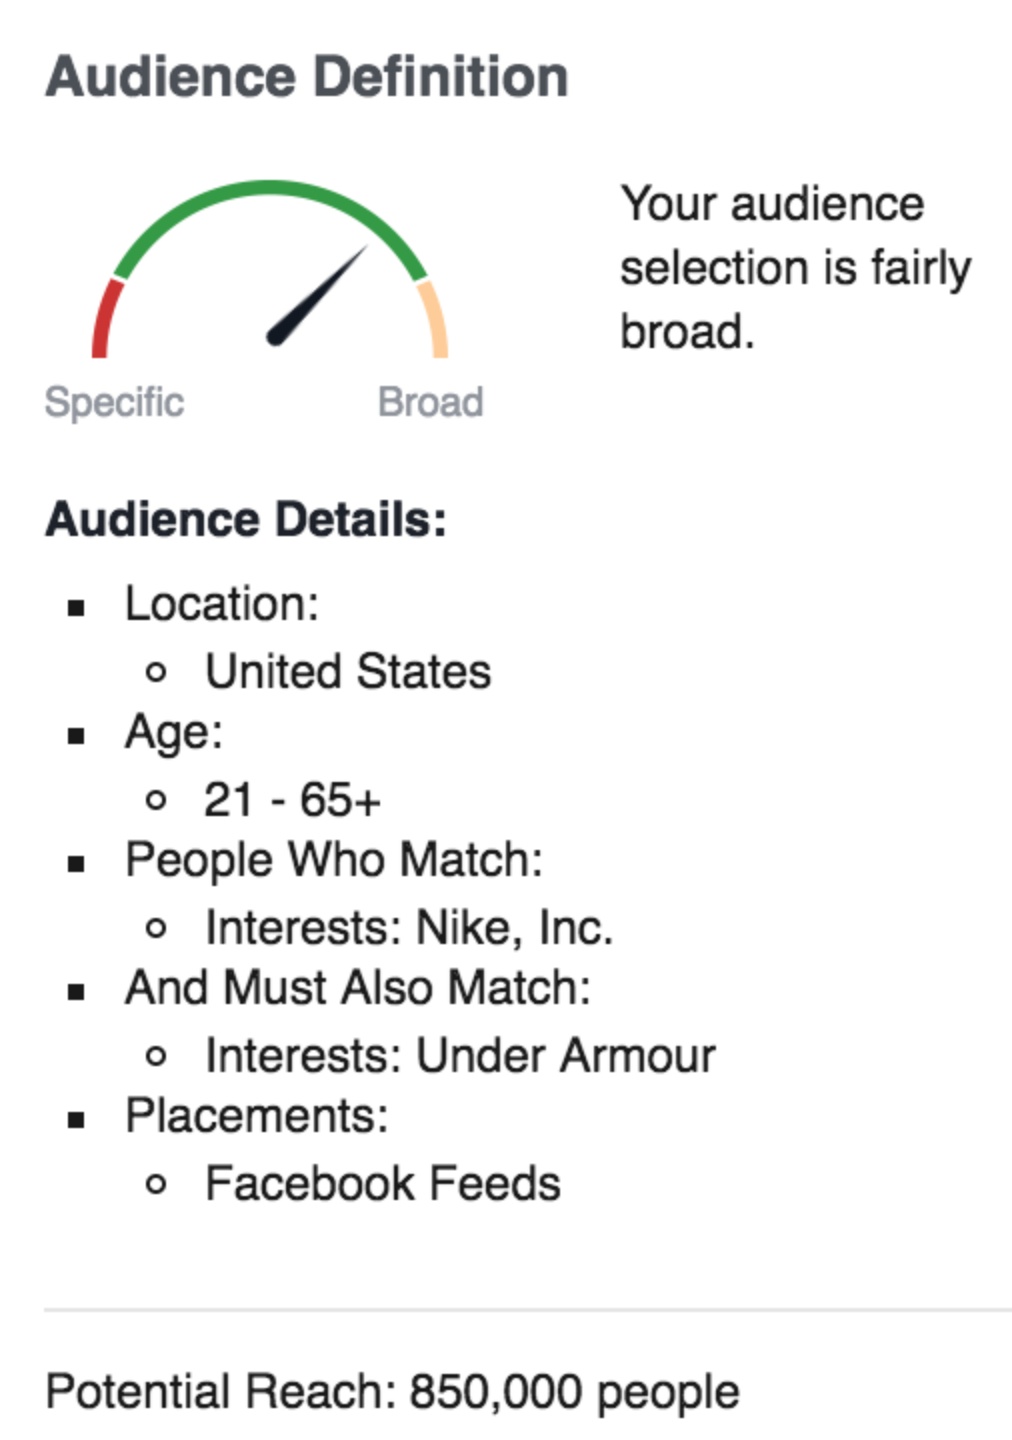
In this example, I will be targeting people who like the two biggest American shoe brands, Nike and Under Armour. To make the targeting more specific, I use the “Narrow Audience” option. Otherwise, I will be targeting all the people who like Nike OR Under Armour. That would be a huge audience. The “Narrow Audience” option changes the conditional to AND, which makes my ads way more relevant. After all, someone who likes all these brands together must be a huge shoe fan.
As a rule of thumb, you always want your “Potential reach” to target between 250k and 1 million people. Also, if the “Audience Definition” meter says your audience is still too broad, ignore it. It usually changes to normal when you use a custom or lookalike audience.
Then, you will have to choose the placement. In contrast with what Facebook tells you, I don’t recommend you start with automatic placement, as it will be a waste of your money. It’s better to separate your ad sets based on two main placements: desktop and mobile.
Desktop visitors tend to be more expensive, but better for e-commerce sales since they have more space to see the product and read the copy, while the opposite is generally true for mobile. However, most Facebook visitors are mobile, so you won’t get as many clicks on desktop than on mobile.
To change the placements, click on “Edit Placements”, and then on Devices Types, and finally, on “Desktop Only” (or “Mobile Only”, whatever you want to start with).
I also recommend you segment by “Feed” and ignore the “Right Column” option. Despite the latter being cheaper, it tends to be more irrelevant. Click on Platforms > Facebook, and then untick the “Right Column” button.

This is how my final targeting looks like:
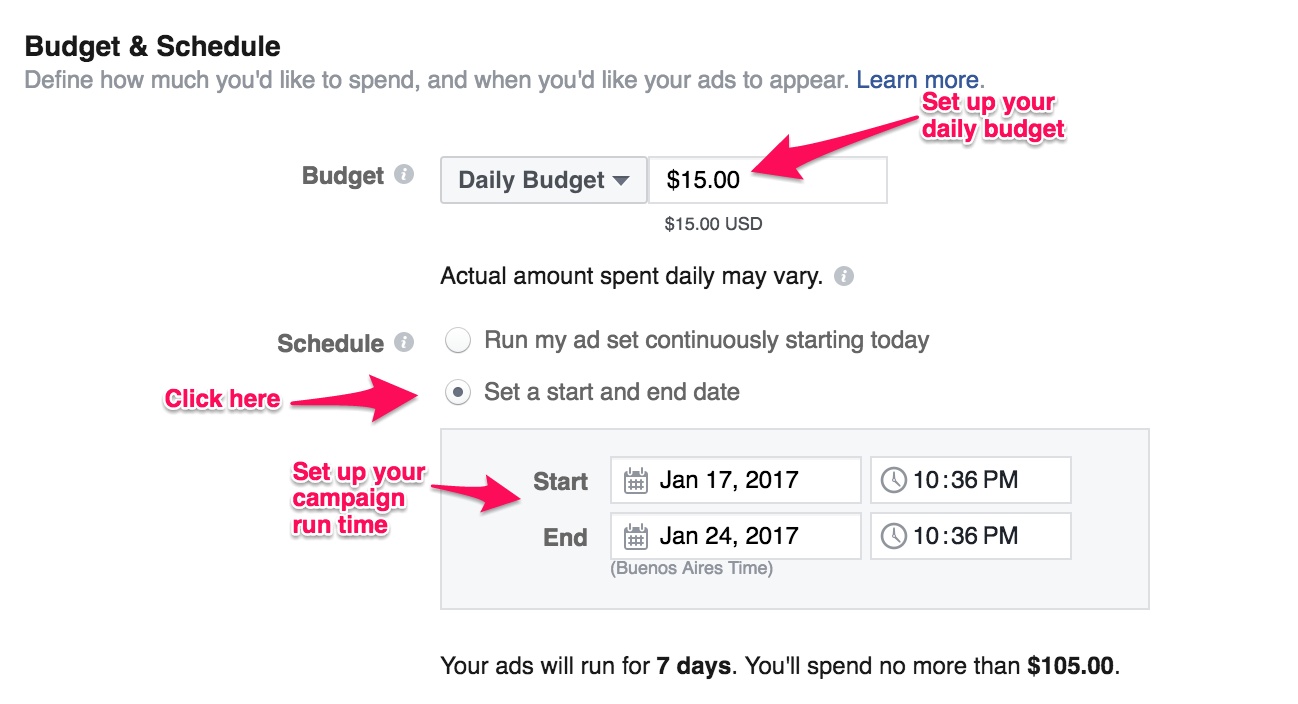
Now, we need to finish with Ad Set configuration with the budget. To start, you have two options: you can choose a daily budget or a lifetime one. I prefer the former because it gives me more control. This is especially powerful when you are getting started. The latter can work if you are running a short and cheap campaign. But since Facebook distributes that money throughout the time of the campaign, you may end up spending lots of money at first and nothing at the end, or vice-versa.
The daily budget depends a lot on how much you are willing to spend. At first, you are likely to spend more, since Facebook will have to take some time to optimize the campaign. So don’t set it too low. The best way to do this is to make bold assumptions on the clicks you want to get and the CPC you expect. If you want 50 clicks, and you assume a $0.80 CPC (very high, but common when getting started), you need to set up a $40 daily budget. On the other hand, since you know Facebook will spend more at first, you may want to target a lower amount of clicks, at least for the first week of the campaign.
In this case, I will assume a $0.50 CPC and 30 clicks per day, which gives me a daily budget of $15.
Then, we need to define whether we want it to run for a specific amount of time or not. I recommend you start with a week time to get your feet wet. This will be what I’ll do in this example.
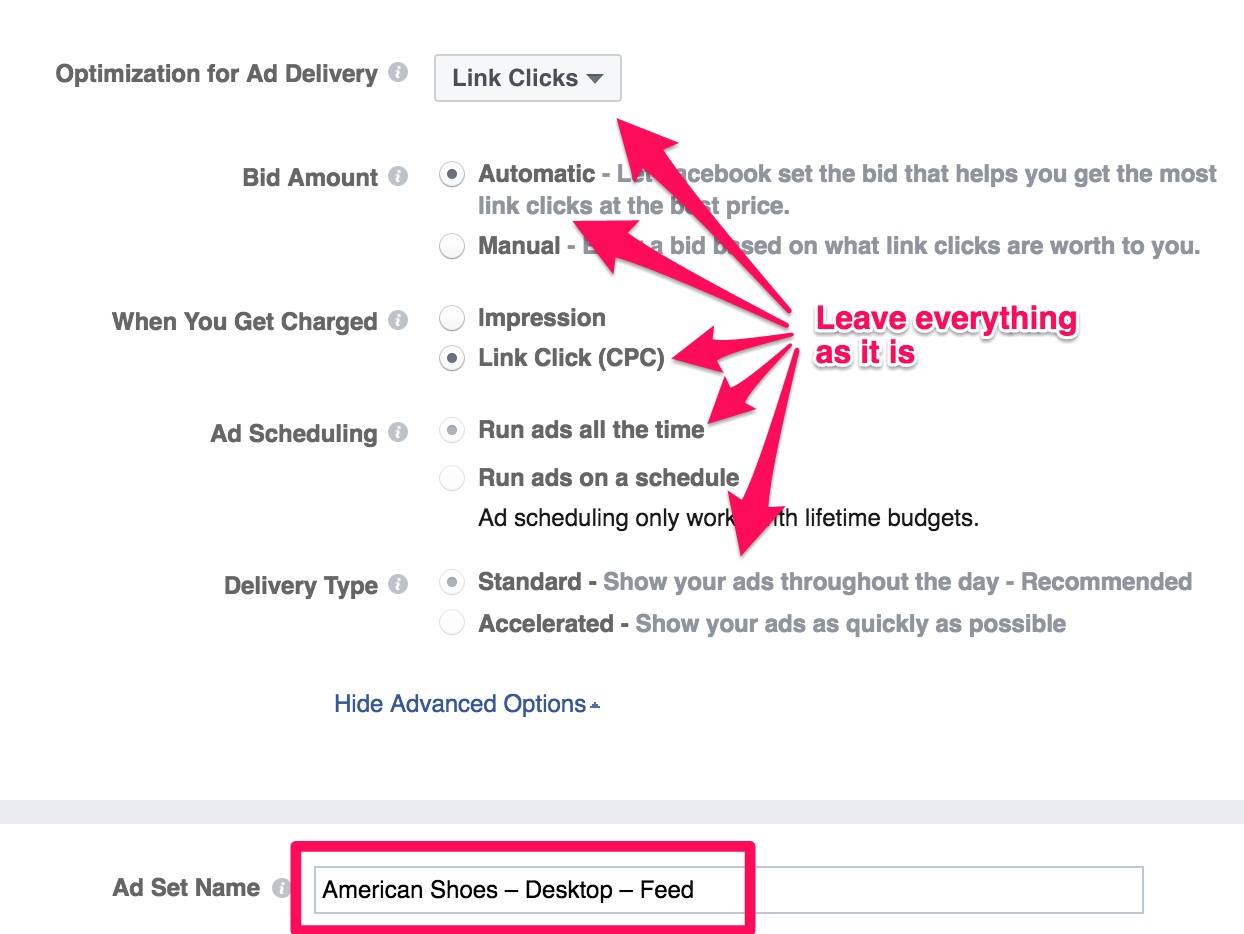
We also need to define the “Optimization Ad Delivery”, which as a beginner, I highly recommend you leave it as it is, that is, on “Link Clicks”. This means Facebook will use their algorithm to optimize the delivery to the people that are likely to click on your ad, making your ad more effective and relevant. The other two options, Impressions and Daily Unique Reach, are used generally used with other Campaign goals and aren’t nearly as effective as Link Clicks.
Regarding the bid, once again, leave it as it is (on Automatic). Manual bidding works best when you know how much you are paying and want to try different strategies to maximize your click-through ratio and other metrics. You should leave the other options as they are as well (i.e. When You Get Charged, Ad Scheduling and Delivery Type).
Finally, give your ad set a name. I like using the following structure:
[Targeting Description] – Device – Placement
In my case, it would be like this:
American Shoes – Desktop – Feed
Step #3: Create The Ad
Now it’s time you create the ad. This is where you want to think deeply what you are trying to get. In our case, we want sales, so you need to make sure the people who click on your ad are highly interested in your products. Just showing off your product won’t do. Your ad needs to talk to the people who care about the most about your product. If you did the targeting right, half the battle is already won.
The first thing we need to do is to choose the format. You have 5 options:
- Carousel
- Single Image
- Single Video
- Slideshow
- Canvas
To make things simpler, I like starting with a single image. If you have a video, then, by all means, use them. They tend to work much better than images. Carousel images usually work best for remarketing.
Then, upload your image. Since we are going to add our products, you can upload two kinds of pictures:
- Your product’s default image (i.e. the ones that show up on a white background)
- Your product being used
You should try both and see what works best. In my experience, that’s usually the second one, so in this example, I will upload a picture of my shoes being used.

After uploading your picture, it’s time to create the ad. This is a big deal as it can make or break your campaign. There are three main things you need to focus in this section:
- The headline
- The text
- The description
The first one is the headline. There are many formulas you can use for your Facebook ads. The two main ones I like to use for e-commerce are:
- The direct headline: Buy Wool Shoes or Wool Shoes – 15% Off
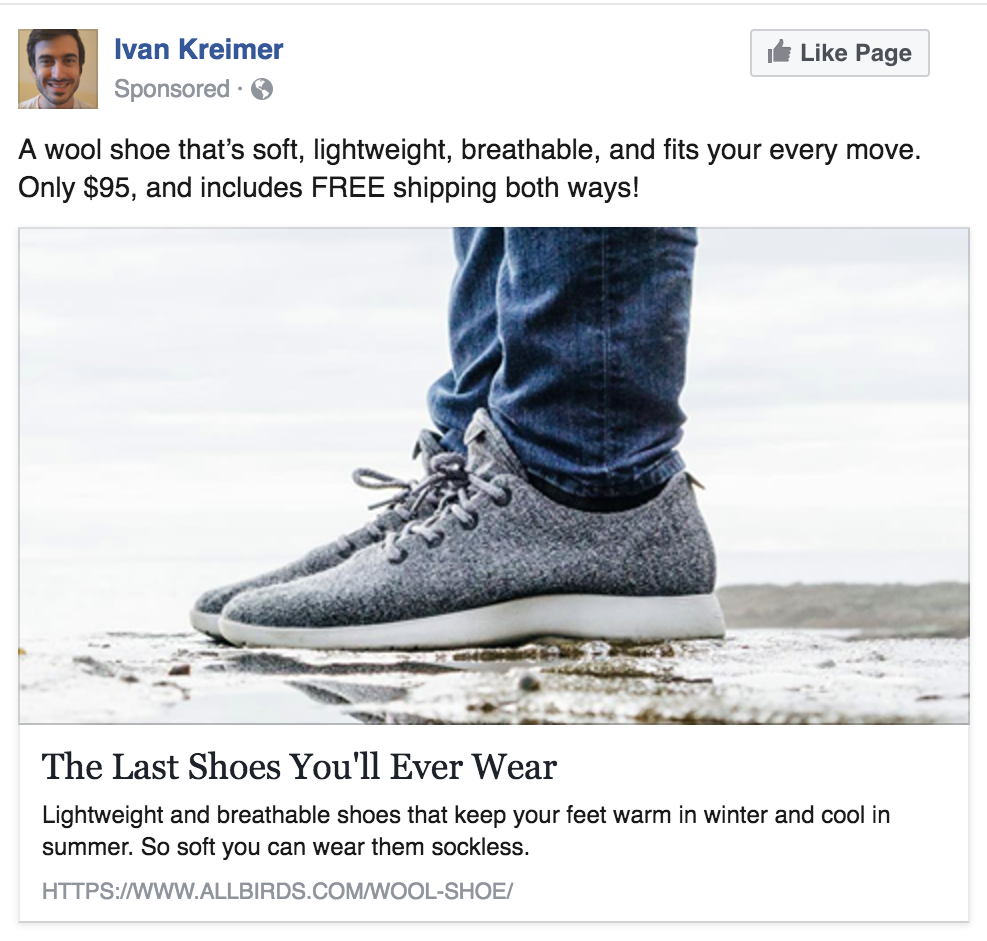
- The indirect headline: Shoes You Want to Wear or The Last Shoes You’ll Ever Wear
The former works best for products that are cheap or for people who have already visited your site, whereas the latter works best when you are reaching out for the first time, which would be our case.
When using indirect headlines you need to think, what’s the one thing you’d say about your product? That can be the main value proposition your audience will want to see on your ads.
Then we have the text. That’s where we are going to focus the most, as it’s where you need to prove and expand on the theme of the headline.
Here’s one important tip: don’t expect people to click on your ad because of your text. Actually, people will stop and look at your ad if they like the image and are intrigued by the title. If they both elements enough, then they will read your text. If that convinces them even further, they will click. The text is the third element most people will see when they look at your ad.
To start with, the text should be short and concise, one or two sentences long. Using long texts will confuse them, and therefore, make you spend more money than you should. Since you are trying to make a sale, there’s no need to explain every reason why they should buy from you.
Expand on the value you mentioned on the title. If you used a direct headline in which you mentioned something like a “15% off”, explain what else can they expect if they click the ad. Remember the 1-800 flowers ad you saw before? The text for that ad focused on “expressing yourself”. That’s a pretty good way to expand on the value of the title, which focused on a discount. The same applies for ads with indirect headlines. Don’t repeat the same message, focus on what people will find if they click the ad.
For my product, I added this description (mostly based on the short product description):
A wool shoe that’s soft, lightweight, breathable, and fits your every move. Only $95, and includes FREE shipping both ways!
Once you have written the ad text, you have the “Call to Action”, which is a little button that shows up at the bottom right of your ad. There are many theories about whether to use it or not. Some people say they increase CTR, whereas other say they make your ad look like, well, an ad. Personally, I don’t use them, since I want people to see my ad, not my call to action.
Then, you have the description (aka the “News Feed Link Description”). This is the last piece of text that shows up as a description of your ad. You can consider the description as being in between the headline and the text. Whereas the former focuses on getting the person to see the ad, the latter gives a reason why you need to click on the ad. The description gives more context to the ad, kind of like a measure of last resort.
Think, what else can you say about your product that will make people about your ad? In my case, I added a bit more about the description to convince people and explain the product better:
Lightweight and breathable shoes that keep your feet warm in winter and cool in summer. So soft you can wear them sockless.
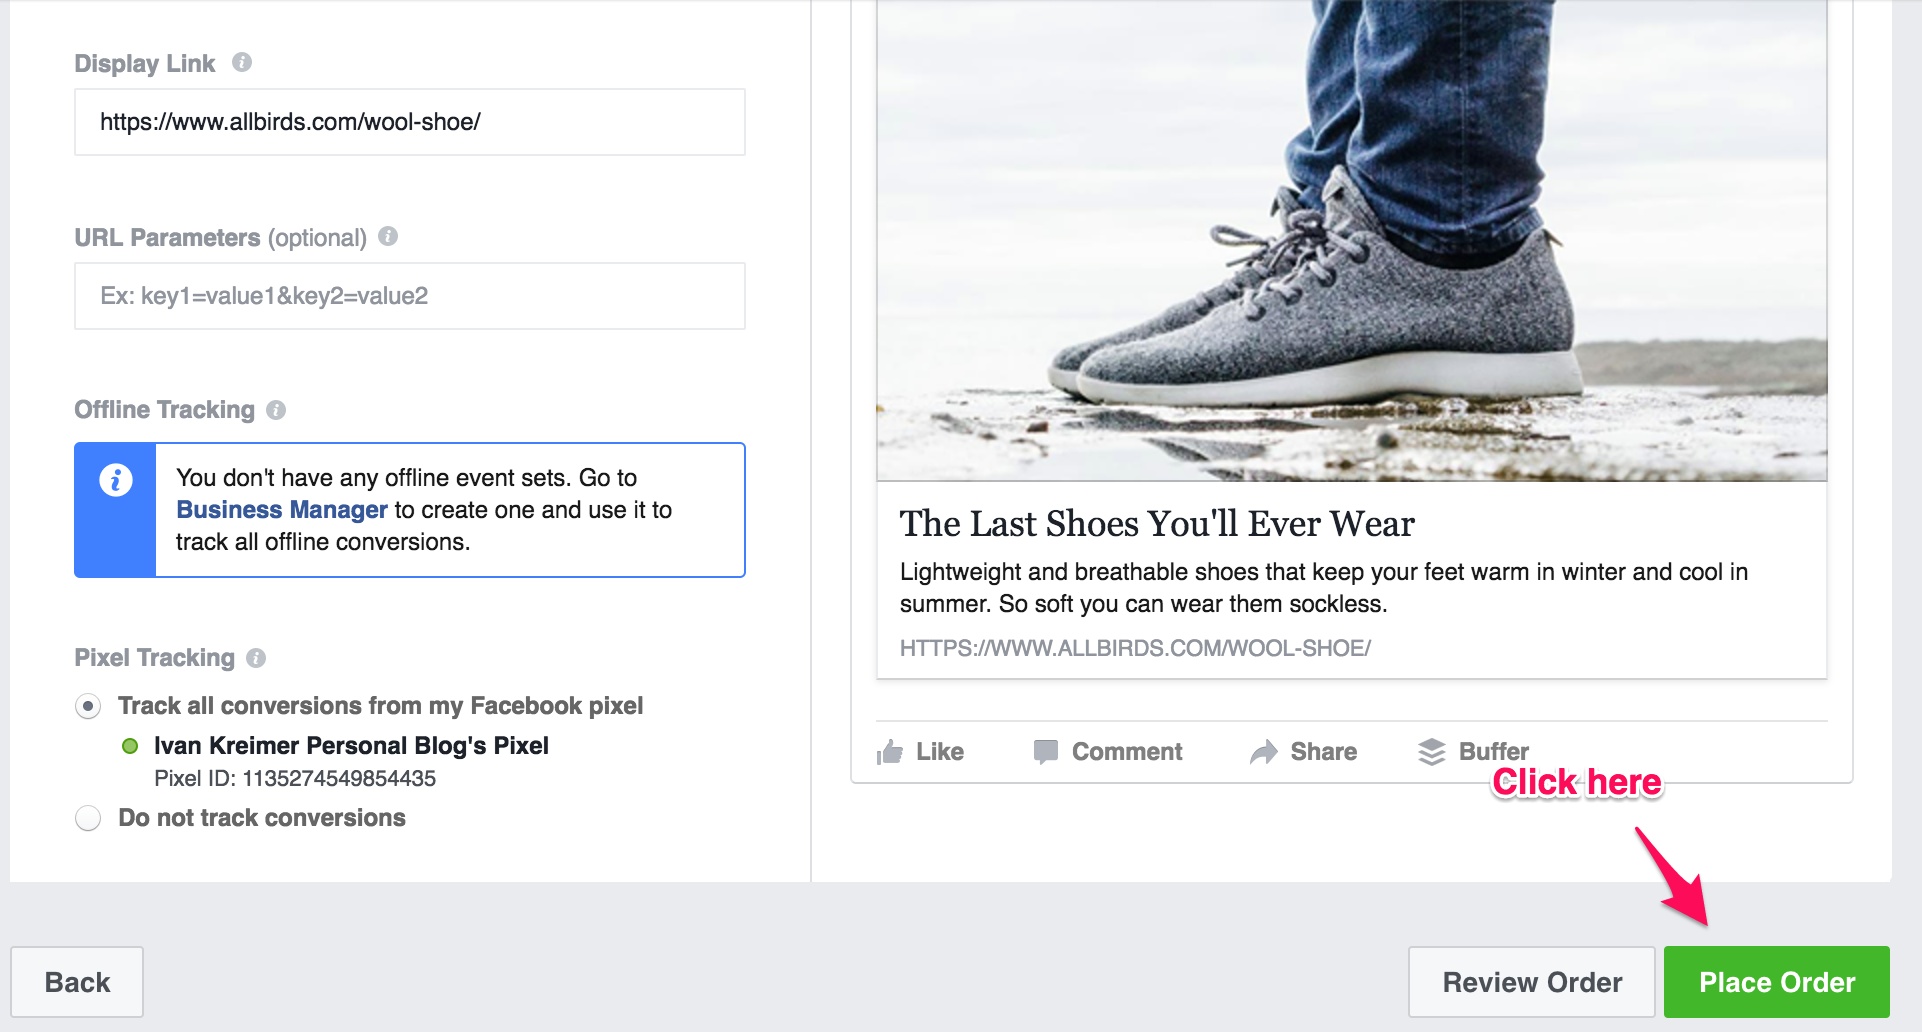
Once you have written the description, you have the display link. This is the link people will see on the ad, which doesn’t necessarily have to do with the real URL. You can leave it as it is, or add something more relevant. In my cases, I added “https://www.allbirds.com/wool-shoe/”.
Then, you have the URL parameters, which are usually used for testing purposes. Since we aren’t, ignore this.
Finally, you have the pixel conversion tracking. Even though we aren’t measuring conversions (because we are paying for clicks), I always turn it on, just in case.
This is how my final ad looks like:
After you finish with this, click the “Place Order” button.
Step #4: Analyze And Optimize
When analyzing and optimizing your ad campaigns, there are two things you need to keep in mind:
- Relevance score
- CPC
There’s a lot I could talk about relevance score. Instead of giving you a long explanation about what you can do to optimize it, I highly recommend you read Facebook’s guide on this topic. They will explain you everything you need to know about it.
To optimize your CPC, first you need to take into consideration the assumptions you previously defined for your ads. If your assumptions were to get $0.50 clicks and you ended up getting a $1 click, then obviously you are doing something wrong. If you are getting $0.50 clicks, but you want to lower that cost 20 cents, then there are a few things you can do:
- Test different images: Test images with and without CTAs, images that show the product in better detail, images with the product being used vs. on a white background, among others.
- Test different audiences: Your customers may not be interests on what you thought they were. Test different interests, jobs, locations, ages, and gender. Keep it close to your personas.
- Test desktop vs. mobile: As I said before, mobile clicks are cheaper but don’t convert as well as the desktop ones, so be careful when testing mobile clicks if you want to make sales.
- Test the bids: Change your ad set for manual bidding, and see if you can get enough impressions and clicks with a bid closer to your ideal one.
Conclusion
Today you have learned a lot. You’ve seen how an e-commerce funnel looks like, and it influences your customers.
You have also seen how to implement a Facebook Ads campaign to start driving sales on your store.
This won’t be easy at first, and you may even lose some money. That’s all right. Make sure you follow the advice I gave you today, and you will be over the other 99% of the e-commerce store owners out there.
Don’t wait any longer. Get started today, and start making those sales.
* Adapted lead image: Public Domain, pixabay.com via getstencil.com
About the Author: Ivan Kreimer
The post How To Use Facebook To Drive E-commerce Sales appeared first on Search Engine People Blog.
Search Engine People Blog(149)


