As email marketers, we know we’re a bit old-fashioned. We still code in tables, we use emoticons from last millennium and we’re still applying fixes for versions of Outlook that are over a decade old. That’s why when you think of what the future of email has to offer, it’s difficult to consider looking at an art form that was popular 30 years ago.
Pixel art in email.
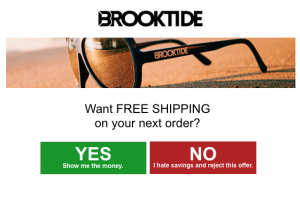
You’ve shoved your way to a seat on the tube and so, with the extra room that you so nobly fought for, you might as well check your emails. This is the first one you get:

Next! You’ll move on. You won’t read that email again. You won’t think about that email again. That email is dead. That is time and money spent by an organisation on sending you information that you won’t receive. “But they’re on the tube, silly, how are they supposed to view an email without images?” I hear you scream.
Well, like this:

They are not images but coloured cells that don’t require the images to be downloaded, meaning that the 43% of users that don’t automatically download images have seen your content regardless. Not only has the user seen your content without the need to download images, but they’re engaged. This content is exciting, it’s cool and it generates a buzz around it that makes the user want to show off their discovery.
However…
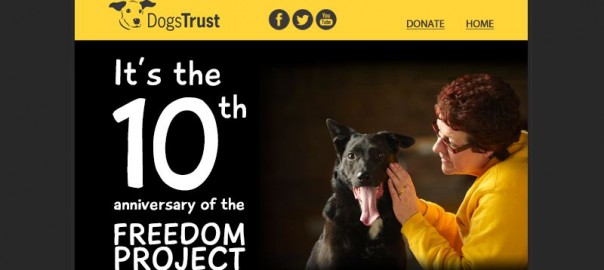
It isn’t a perfect answer to all your email woes. It can be very time consuming and complicated and really it’s down to you and how much you want to test to decide whether it justifies your time. I’m going to break down how this process is done and what you’ll need to give it a go. Let’s take a look at an example. This is a Dogs Trust email celebrating an anniversary and this is what it looks like with images off and images on:

As soon as the email is opened, images on or not, you can see the purpose of the email. You’ve also got a nice visual that will make you smile and want to read more. It helps if your content is cute fluffy dogs by the way.
Instead of the banner being one whole block that would only display as a big broken image, it is chopped into lots of little pieces that have each been given an individual bgcolor attribute. This means that when your images don’t load, they display the colours that you’ve assigned them, which in this case displays pixel art. This can be seen a bit more clearly in chrome thanks its delightful broken image icons:

Let’s start from the beginning with our banner that we’ve designed in photoshop.

We’ve decided we want a pixel art dog to be hidden behind the banner. The first stages are sketching how we want that dog to look in glorious blocky form. It’s all well and good going for a complicated design but that’s going to be incredibly time consuming to code. It’s worth starting on more straightforward ideas to begin with until you get more comfortable.
Get sketching
Designs can be sketched on paper or just straight into Photoshop with the slice tool. You can even use Excel if you prefer. This example started life as a piece of graph paper:

Using graph paper is a great way to get started as you can see the limitations you have without rounded edges. Try to keep sketches simple and consider the coding you’re going to have to do as you sketch. You’ll get better and faster with more practice!
The trusty slice tool
You can then translate this onto your image in Photoshop using the slice tool. Use guidelines, if needed, to keep it neat. Start slicing your image into the shape of your drawing. Remembering how you’re going to code this, keep it all in horizontal rows. Eventually you get something that resembles your sketch. Then, you can slice the rest of the image.

Remember to make a new slice for each change of colour. You can see I’ve made a new slice where the eyes, nose and collar will be. Export your slices and you will have a big pile of very small pictures.
Coding
Now we can start with the fun stuff. This pixel art uses a whole bunch of TABLEs within a parent TD so that each row is a new table, allowing us to vary the length of each cell in each row regardless of what happened above it. If your slices are all the same length and you’re just going for a striped effect then you can keep it all in one table and change rows with TR instead of redoing a TABLE each time.
Here are the first two rows in code:

You can see what this displays in the gif below. When the images are available, you see the top half of Bruno and his owner. When the images are off… Well you see some weird rectangles. But you know that this is the start of your pixel art and is the top of the pixel art dog’s head.

We’ve done this by setting the background colour of the table to black (#000000), which will colour the whole table black. To colour the dog, we want to override this by colouring the individual cells that make up the pixel art image. I’ve chosen a sandy colour for the dog (#DFD3B2) in this case. From my slices, I can see that image NW0015_23.jpg is the top corner of the dog’s ear so I’ll make sure I’ve coloured that cell the sandy colour by adding a bgcolor=”#DFD3B2” into the TD.
I’ve then closed the table and started a new one for the next row and followed the same pattern. This time, I know that the cells containing images 26, 27 and 28 are part of the dog so I add the bgcolor attribute colouring them the sandy colour.
You can make these colours whatever you want. If you want to colour the dog black with a nice sunny sky then go for it. Change the table’s bgcolor to a blue and the individual cell colours to black:

Keep following this down until finished. Using bgcolor in your table to set the default colour and then adding the bgcolor attribute in the cells that you want to be a different colour. Eventually revealing a pixel art dog.

Remember if you don’t specify the colour of each cell then it will default to the colour you’ve set for the table. The reason we’ve set the table colour to black and not in each cell is purely to save time of colouring in each cell when we can set the default to black from the start.
The eagle-eyed among you may have noticed I’ve added into the alt text. This is a personal preference as adding alt text stops the broken image icon appearing in Firefox.
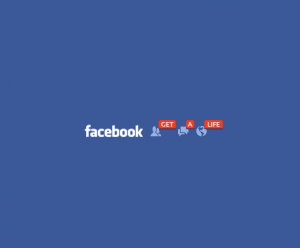
Not every email has to be complicated. Feel free to start small with your logo or even just the bgcolors behind your social media icons. The user is going to recognise the blue of Facebook and the red of YouTube without needing to see the logo.
You don’t have to draw pixel art in every email but at least consider what your email is going to look like with images off before you send.
Digital & Social Articles on Business 2 Community(137)