Bing Places For Business is Bing’s solution for local search, just like Google My Business. It is essential to have your business listed on search engines in order for potential customers to easily find your business. It also gives them a sense of credibility when seeing your business appear on the side of the search results in its own dedicated billboard.
In this article, you will learn how to setup a Bing Places account for your business.
- To begin, go to the Bing Places for Business website and click Get Started.
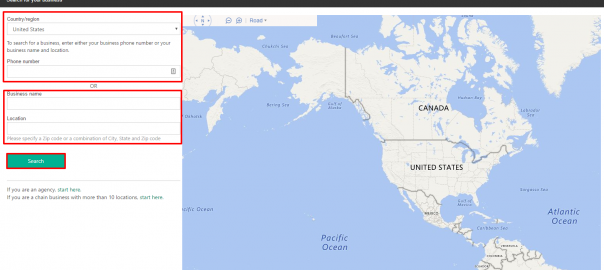
- In the next screen, search for your business by entering in the Country/region your business operates in and your main business phone number. Or you can choose to search by the Business Name and Location. Click Search. If you are setting up more than 10 locations (for a chain or franchise) follow the link given below the Search button.

- If your business shows in the results, click Claim Business. If your business is not listed in the search results you will want to click Create new business.

- Whichever option you choose, the next step involves signing into a Microsoft Account (previously a Windows Live ID). You can either sign in using an account you have previously made or create a new account.
- Once logged in, you will see a screen asking to fill in Basic Info about your business.
- If you clicked Claim Business earlier your information will automatically be filled in and you’ll want to make sure that all the information is accurate.
- If you clicked Create new business you will have to fill in all your information as accurate as possible.
- Click Next when done.

- If you clicked Claim Business earlier your information will automatically be filled in and you’ll want to make sure that all the information is accurate.
- Enter the Categories your business operates in (your business type). You’ll want to enter all that apply then choose a Primary Category. Click Next.
- Enter your Contact details, your main phone number and email you would want to appear on your Bing listing. Also, if you wish you can enter your social media URLs you can here. Click Next.
- Enter your hours of business for each day you are open. Click Next.
- Add some photos of your business, such as your logo, storefront, products, etc. You can add up to 10 photos that represent your company. *You cannot add images smaller than 480×360 or larger than 8192×8192. Click Submit.
- A very important step for Bing will be to verify that you’re the owner of the business either by Email or by physical Mail. Choose the appropriate verification option and click Next.
- You can see all your listings/businesses on your home page. This is where you will also see the Status of each business whether it is “In Review” or “Verified”.

- Now, all you have to do is wait for the verification email or mail to come in, go back to your Bing Places Dashboard and verify your business. Once you receive your verification, go to your homepage and click the name of the business you want to verify.
- Enter the PIN and click Verify.
Congratulations! You have now set up and verified you Bing Places for Business account.
Digital & Social Articles on Business 2 Community(194)