— February 23, 2018

Video marketing is here to stay; it’s an essential selling and marketing tool for any business. If you are wondering whether it’s worth investing in video marketing, the answer is yes.
The numbers in support of video marketing are staggering:
- Video marketers get 66% more qualified leads per year and achieve a 54% increase in brand awareness.
- 76.5% of marketers and small business owners are getting results with video marketing.
- 83% of those using video think it gives them a good ROI; 82% think it’s a key part of their strategy.
- 81% saw an increase in sales and 53% said support calls were reduced.
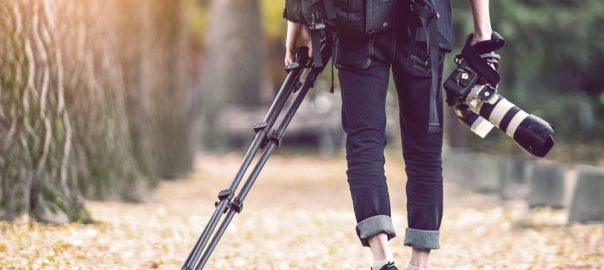
Companies have caught onto the benefits of video marketing and on average businesses publish 18 videos every month. However, most businesses can’t afford to bring on an in-house video production team. But as many smaller businesses have figured out, it is totally possible to create professional videos on a small budget. In fact, you don’t need to spend a lot on camera gear and equipment. If you’re wondering what equipment you need, you’re in the right place. Bizness Apps has been producing videos for over a year now and after a lot of trial and error, we have figured out the best way to create videos on a budget. In this blog post, you’ll discover how to make a video like a professional and set up a video studio for no more than $ 250.
#1 The Camera [Free]
The latest smartphones have great cameras. Anything from the iPhone 6/Samsung Galaxy S6 (and similar models from other brands) and later will produce good enough quality to use for your videos – some devices can even film in 4K. A smartphone is also perfect for on-the-go filming, no need to spend a lot of time on planning and setting up. Just set it on top of the tripod (more on this coming up) and start shooting.
Tip: Use the exposure and focus lock feature to lock in the lighting and the focus point, that way the person or object won’t lose these parameters while you are filming.
#2 The Tripod [$ 40]
Now that you’ve got the camera, you’ll need to stabilize it. While you get creative with this (by stacking books or using shelves), if you’re going to be shooting a lot of videos, a tripod will be the most convenient. There are very cheap ones out there, but after some experimenting here at Bizness Apps, we can say that investing in a proper tripod makes producing videos a lot easier.
Tip: You’ll need to get a smartphone mount to add on top of the tripod, as they are made for DSLR cameras.
#3 The Lighting [$ 120]
What sets a quick smartphone-taken video apart from a high-quality business video? Good lighting. Good lighting is crucial for video, it allows even the worst cameras to shoot better footage. Poor lighting in your videos is a surefire way to make your company look unprofessional.
Natural light is the best form of light, and it’s free! But many of us don’t have the luxury of well-light homes or office with giant windows. Artificial lighting is a great way to solve for this problem. We started out with umbrella lights, but upgraded to softboxes after we got familiar with lighting practices. Softboxes give you more directionality and control over the lighting.
Tip: We use a lighting kit with three softboxes in order to execute the Three Point Lighting Technique. This is a simple but versatile technique, using a key light, a fill light, and a backlight, to make the subject you are filming stand out its surroundings.
#4 The Microphone [$ 19]
No matter how good your camera and your lighting is, if you have poor sounds quality, your video is doomed. Generally speaking, the more expensive the microphone, the better the quality. But you don’t need to spend hundreds of dollars on audio equipment. On a small budget, you can purchase a lapel microphone that can be clipped to the collar for hands-free use. While not the best microphones in the industry, it is a big step up from your smartphones built-in microphone.
Tip: Always test out the microphone before you start filming the actual video. We’ve had it happen too many times that we forgot to turn on the microphone or plug it in before filming and had to start all over again (oops!).
#5 The Background [$ 0-100]
A nice background can set the scene and tone for your videos. You want to eliminate any clutter for professional-looking videos. If you don’t want to spend any money on a background, you can find a clean, textured wall in your home/office or you could use a nice bookcase.
If you have some room in the budget, you can get a backdrop that speaks to your brand image. For example, we use a backdrop with our brand colors and logo on it. If you want to be able to switch out backgrounds, you can buy a background stand and different backdrops. The cost here really depends on what you need for your videos but doesn’t need to exceed $ 100.
Tip: When purchasing a backdrop, make sure it is wide enough. If not, you will find yourself having to get way too close to your subject in order to have a “full-screen” background.
Bring it all together
Once you’ve shot your quality footage, you’ll need to edit it with video software to put everything together. You can use free software like iMovie or pay for something more professional like Pinnacle Pro. If you don’t have editing skills yourself, you can outsource it to someone on Upwork, for example, and send over all your video material.
Here’s an example of one of our videos, made in our DIY video studio:
Altogether, you can set up a video studio for under $ 250 and produce as many videos as your business needs. Don’t have any inspiration yet as to what to film, consider how-to videos, product videos, interviews, employee advice, behind-the-scenes look etc. Aaaaand, action!
Digital & Social Articles on Business 2 Community
(45)