— May 28, 2019
When most people think of image SEO, they’re only thinking about the alt tags. While those are important to SEO and accessibility, there’s much more work to do for image optimization to help you get more traffic. Here’s what you should be doing in addition to those alt tags.

Name Your Images Appropriately
Google says, “the file name can give Google clues about the subject matter of the image. For example, my-new-black-kitten.jpg is better than IMG00023.JPG.”
While Google’s Machine learning can do a lot to identify what’s in a photo, objects that look similar – say a block of butter compared to a block of cheese – can still trip it up. That’s why you should again be using descriptive names for your image files.
Use Descriptive Alt Text and Captions
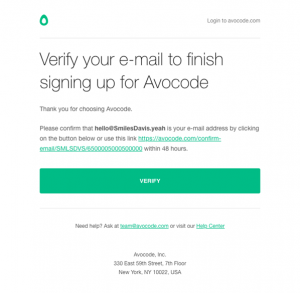
The alt text describes an image and is what browsers show when someone uses a screen reader. It’s critical to have alt text for all your images not just for SEO, but also for 508 compliance.
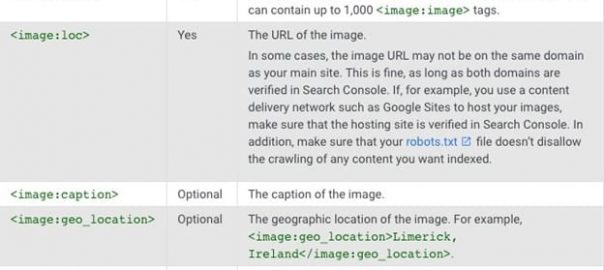
Google’s official guidelines demonstrate what a reasonable alt tag looks like. Here’s what they say about writing them:
“Google uses alt text along with computer vision algorithms and the contents of the page to understand the subject matter of the image. […] When choosing alt text, focus on creating useful, information-rich content that uses keywords appropriately and is in the context of the content of the page. Avoid filling alt attributes with keywords (keyword stuffing) as it results in negative user experience and may cause your site to be seen as spam.”
Pay Attention to File Type
The majority of images you see online are one of three file types: JPG (JPEG), GIF, and PNG. Each uses a different compression method, meaning the file sizes between them can vary drastically. That’s important because images are often the most significant part of your page’s overall size, which makes pages slow to load.
Page load time is one of the critical ranking factors for both desktop and mobile. You must choose the most appropriate file type for each image – the one that offers the best compression with the least impact on photo quality.
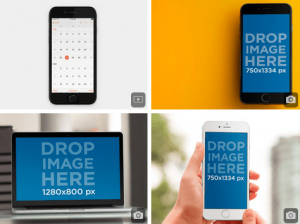
Take a look at the image below to see a comparison of the same image in the three main formats – in a 640×246 size. A larger image size would result in even larger file size.

JPG is the clear winner here, but that doesn’t mean it’s always the best choice. PNG is better for images that are screenshots, illustrations, anything with text, while JPG is the best for photographs, and GIF is best for moving images.
Compress Your Images
Now that you know how to choose the right file type for your images, it’s time to get their file sizes down a bit more, using an image compression tool. There are several to choose from, including TinyJPG/TinyPNG, Compressor.io, and CompressJPEG/CompressPNG.
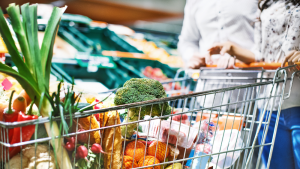
We used Compressor.io to compress the same images as in the collage above since it also supports GIF and SVG. Here’s the result.

There’s no noticeable difference in terms of image quality, and yet there is a remarkable difference in the file size. Since file size affects load time, it’s essential to get it as small as you can without sacrificing quality, especially if you have image-heavy pages on your website.
If you need more help, check out the extensive documentation from Google on image optimization. They say you shouldn’t be afraid to turn down the quality because the visual results aren’t generally affected much, but the file size savings are significant enough to justify it.
Create an Image Sitemap
Why? Because Google says, you should. “Images are an important source of information about the content on your site. You can give Google additional details about your images, and provide the URL of images we might not otherwise discover by adding information to an image sitemap.”

Source: Google Search Console Help
The good news is, if you’re using WordPress and Yoast SEO, images are added to your sitemap automatically, even for the sites with media pages set to noindex – the default setting in the latest version of Yoast. But, Yoast only includes the required tags, so if you add captions in WordPress, you’ll need to include those yourself manually in your sitemap.
Use Responsive Images
Your site needs to be responsive for any size screen, so your images need to be too. If you have a 720 px wide image on your website that loads on a 320 px widescreen, the browser still has to load the larger image. Essentially, you’re slowing download time, which negatively affects your SEO. Use the srcset HTML syntax to tell the browser to load different versions of the image for different resolutions.
WordPress, for 4.4 and higher, which everyone should be on now, takes care of this for you automatically, for every image you upload, and adds scrset automatically. With each image upload you’ll get:
- Thumbnail: A square crop (150px by 150px).
- Medium: Resized so that the longest side is 300 pixels wide or high.
- Medium Large: Resized to 768 pixels wide.
- Large: Resized so that the longest side is 1024 pixels wide or high.
- Full: Original image.
Use Schema Markup
If you’ve got recipes, products, or videos, you should be using schema markup, also known as structured data, to tell Google that. The more info you give Google, the better they will be able to rank your site in the long run.
Image SEO is relatively complex, but reading through the Google documentation on it is time-consuming. These highlights here can help you get started. But remember, no amount of SEO will ever replace a quality user experience. This means choosing high-quality stock photos or creating your photos, making it easy to expand product images, and more.
Digital & Social Articles on Business 2 Community
(79)