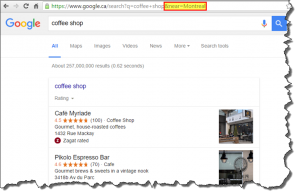
Earlier this week, Snapchat shocked the tech world by announcing it had raised $ 1.8 billion in investment funds. That staggering amount now places the social media giant’s valuation at roughly $ 20 billion. Add in the rapid growth of its active user base (110 million users, up 50% from the previous year), and you have a recipe for advertising gold. In fact, the coveted demographic of 18-34 year olds comprise over 60% of all active Snapchat users.
So what’s the takeaway? You can’t make any more excuses: your business needs to learn how to harness the power of Snapchat.
With all social media platforms that storm onto the scene, businesses are apprehensive about learning the ins and outs.
I’m here to tell you: if you can figure out how to use Facebook and Twitter for business, Snapchat is going to be a breeze. Here’s the step by step guide to creating your own Snapchat Filter.
Step One: Create a Snapchat Account
Grab your smartphone and download the Snapchat app.
Head to the App Store if you’re on an Apple Product or the Google Play Store for Android customers. Once it’s downloaded, open the app and fill out the required fields. The process is very user friendly, and should take just a few minutes. Keep in mind that once you’ve chosen your username, you will not be able to change it without creating a brand new account.
Step Two: Create Your Geofilter
Creating your filter will be the most time consuming step in this process.
It’s also the most important as, after all, the creative content needs to be stimulating and also a reflection of your business’s branding.
Read through the restrictions that Snapchat has added that will influence your design, and follow the guidelines for creation.
Keep your design in PNG format and sized at 1080 pixels wide by 1920 pixels tall. If you’re not fluent with Photoshop or other design platforms, Snapchat offers templates for download to assist in the creative process. You’ll find these templates in the next step below.
Step Three: Upload Your Filter
Once you have you filter designed, head over to Snapchat.com and click on “Want Your Own Snapchat GeoFilter?”. Once you’re on the Geofilter landing page, click “Create Now” and then log into your account.
You’ll be prompted to “Choose File” (or download the templates we previously discussed) so select your filter file and then give it a name.

Step Four: Pick Your Schedule
Now you’re ready to select the dates you want your filter to run. Before you choose your schedule, keep in mind that Snapchat requires up to two days for filter approval. It’s not always guaranteed that your filter will be approved, and resubmission also requires up to an additional two days for approval. The takeaway: give yourself a week or two lead time for your launch. Your filter can also live for 30 days before being launched, so the sooner you submit the better.

Step Five: Set Your Location
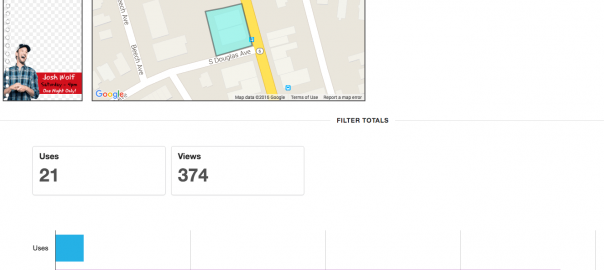
You’re almost finished! Now you’ll need to find the location you wish to fence in and serve those inside that area with your geofilter.
The fenced area must be no smaller than 20,000 square feet and no larger than 5 million square feet per Snapchat guidelines. As you’re setting your location, you’ll notice the amount of space you’re requesting as well as the corresponding price. Pricing of Snapchat filters depends on a number of factors including size of fenced location, the duration of the campaign as well as the population of the area you’re fencing.

Step Six: Provide Payment Information and Check Data
This is it. The final step.
Provide your prefered credit card payment information, name your campaign, and hit “Submit”.
Your filter and the associated campaign are now submitted for Snapchat review. Typically, you’ll get approval within 24 hours, however as discussed earlier, Snapchat reserves two days for approval so plan accordingly.
Once your filter begins to be seen, Snapchat will measure the success of your campaign. You’ll be able to monitor your data under the “My Orders” tab under your username at the top right side of your screen.
 Snapchat has excellent support once a campaign is launched and after it ends.
Digital & Social Articles on Business 2 Community
(65)