— February 25, 2019
If you read through the official WordPress article on how to move your site, it can sound pretty scary. There’s lots of complicated sounding terms you may not be familiar with, like:
- Data serialization…
- Server paths…
- MySQL tables…
- … and more…
To be perfectly frank, that page really seems just to cater to people who are very comfortable with the technical aspects of managing a website.
If you’re not technical, or simply new to working with websites, you may find that page rather difficult to follow. One reason for this could simply be because it attempts to cover almost every single thing that could possibly go wrong during a move.
And I certainly used to follow along with that page when moving WordPress sites. It worked fine, but it could certainly get fiddly and quite time consuming. But thankfully, because of the thriving WordPress plugin ecosystem, I came across a much simpler way to move small (and not so small) sites. And that’s what this tutorial is all about…
 Way to Move Your WordPress Site")
StockSnap / Pixabay
Please note: If you have a very large site to move, this tutorial may still work for you, but you’ll likely need to pay to upgrade the plugin. Alternatively, follow the “manual process” instructions if you need more control.
So, first of all, let’s discuss…
Where Are You Moving Your Site To… And From?
I’m guessing one of these is true:
- You’ve been working on your site locally (on your computer), and are looking to put it online.
- You have your website in a sub-folder, and looking to change that folder (perhaps even moving the site to root).
- The site is either on a domain or sub-domain, and you’re looking to change that domain / sub-domain.
- Or even – the blog address will stay exactly the same, but you’re just moving to a different hosting provider.
Well, good news!
Whichever one of those is true, the approach I talk through in this tutorial applies just the same. In this case one size truly doe fit all!
So just before I talk you through the option I’m actually going to use in today’s tutorial, what are some of the other options you have available when moving your WordPress site?…
The 3 Options for Moving Your WordPress Site
It basically comes down to three options:
- Do it the manual way yourself (can be fiddly, time consuming, and potentially prone to error, but gives you the most control).
- Pay someone else to do it the manual way for you.
- Use a plugin.
Today, I’ll be talking through the third option – using a plugin.
Now that said… not all plugins are created equal! You can of course try lots of different plugins to see which one you like best, but…
Why do that when I’ve done the hard work for you!
In this tutorial I talk through my (currently) preferred plugin, and exactly how you can use it to move your site.
But, just in case you’re still considering moving your site by hand, let’s quickly talk through most of the steps involved with that…
Moving Your Site by Hand – A Quick Overview
If your site is particularly large, or if you’d like total control of the process and are happy to deal with all the “fiddly techie stuff”, then this is the option for you. As mentioned, this is pretty much what the official WordPress documentation talks through, and it largely comes down to:
- Making a copy of your database (for moving, and also just as a general back up… always a good idea).
- Make a copy of all your website files (for moving, and just as a general back up too).
- Move your files to their new location.
- Copy your database to the new location.
- Change the URL of your website within your database – without – causing any data integrity issues.
- Make sure your wp-config.php file has been updated with your new database details.
- Change your name servers (if moving web hosts)
- Test as soon as you can.
- Fix any issues, and if there’s major issues, change your name servers back to your old host while you try fixing the issues introduced during the move.
That said, you could make a local copy of your site and test the move that way. That’s certainly the safest way to test, but would require you run a server on your computer. Talking through that is beyond the scope of this tutorial, but searching for XAMPP is a good starting point regarding that.
But generally, and especially for small sites, the manual approach isn’t needed, as you’ll see…
So, after a lot of trial and error, and moving sites for myself and for clients, out of everything I’ve tried this is the simplest and most low-risk way I’ve found (to date) for moving a WordPress site.
Here we go…
Step 1 – Install the Site Migration Plugin
The plugin I’ve found that works great, and that I’ve chosen for this tutorial is All-In-One WP Migration:
 Way to Move Your WordPress Site")
Basically, what this plugin does is bundle everything that makes up your site into a single downloadable file, so you can easily move this file (and by extension – your site) to its new location.
I must confess – this plugin does have some limitations in the free version. One such limitation is the size of the site you can move. If when bundled together your site is larger than the free version of the plugin supports, it will ask you to upgrade. So for this reason, the free version isn’t suitable for larger sites.
That said, if this becomes an issue for you and you’d rather not get the Pro version of the plugin, there’s plenty of alternative migration plugins. Here’s just a couple:
 Way to Move Your WordPress Site")
 Way to Move Your WordPress Site")
But today, let’s assume your site is smaller than the size limit supported by the free version of this plugin, so we can move onto the next step of this tutorial…
Step 2 – Create a “Migration Bundle” of Your Site
Here’s the steps to take to create a migration bundle of your website…
Go to this page:
 Way to Move Your WordPress Site")
Choose your export options:
 Way to Move Your WordPress Site")
Generally I find not selecting any of the advanced options works fine, but you may decide there’s some parts of your site you’d rather not export.
However, what you do need to pay attention to is the text replacement section. Let’s say you’re moving your site from:
Blog.MyWebsiteAddress.com
To:
www.MyWebsiteAddress.com/blog
You would then need to make sure you replace that text in the database:
 Way to Move Your WordPress Site")
You can also add more text replacements if you choose by clicking on Add.
Very Importantly:
Remember that you’re not replacing the entire web address, just the parts of it that need to change. So keep in mind:
- Not to affect the http(s):// be at the start.
- Whether or not the new address has www at the start.
- Also make sure you don’t end up with double forward-slashes (//) at the end.
- … and so on.
So you need to keep that all in mind during this step. But once you make your new site live, you’ll generally know straight away if you’ve done something wrong!
So next, you just wait for the backup / migration file to be created, and download it.
Next…
Step 3 – Install WordPress at the New Location & Change the Name Servers (If Relevant)
Whether you’re moving web hosts, moving a local site onto your server, or simply moving your site from one folder or sub-domain to another, the next step applies equally…
You’ll want to install WordPress at the new location. I won’t talk through how to install it, as there’s plenty of tutorials online talking through that! Maybe you prefer the manual process via FTP, or you may just use a simple install option offered through your web host’s control panel… either way, I’ll assume the WordPress files and database are in place – but – perhaps you haven’t fully completed the installation.
The reason you may not have fully completed the installation is of course your domain may not be mapped yet (if you’re moving web hosts).
Whereas, if you’re not moving hosts (but moving from local to remote, from sub-domain to main domain…) fully installing WordPress at the new location is simple and straightforward.
If you are moving hosts, you need to change your DNS (name server) settings at this point. This is done through your domain registrar, using the details your web host provider supplies. There’s many tutorials online too that talk through this step if you’re not familiar with it.
Basically, you’re telling the internet at large to visit your site at your new web host, rather than your current web host.
And this change can take anything from a few minutes, to hours, to go through. Once the change has gone through and the internet is now pointing to the new web host – of course – when people visit there won’t be anything for them to see! Since all you’ve installed there is an empty version of WordPress with no customization or content.
That’s the downside of this approach compared to a more manual (and fiddly) approach, and for this reason it’s very strongly recommended you move your site during a quiet time when there aren’t many website visitors. Saturday night comes to mind!
So, as soon as the DNS change has gone through, you visit your website at the new host, and you should be presented with the familiar “Install WordPress” screen. So as quick as you can, install WordPress, log in, and then install the All-In-One WP Migration plugin.
And then use the plugin to upload your “migration bundle”. I’ll talk through that in just a moment, but just before that, let me talk through a way to avoid any downtime at all during this move…
How to Avoid Downtime When Moving Web Hosts
Yes, I know it’s not ideal that your site is unavailable for 20 minutes or more, which is why I recommend doing this moving process during a quiet time of the week, so it’s unlikely anyone visits during this process. But – if your site is always busy, then a manual move may be better suited, as it helps minimize any downtime (assuming you don’t make mistakes during the migration process which end up taking your site offline entirely – it does happen).
That said – another idea is to use a temporary domain or sub-domain at your new web host, move the site there, test it, and if it all looks good make the DNS change while also mapping your main domain on top of the temporary domain.
Okay, that may sound a little confusing – but – web hosts generally allow you to have multiple domains or sub-domains “mapped” to the same place.
This means:
- www.Website-A.com
- www.Website-B.com
Could be mapped on top of each other, so you can visit either domain for exactly the same site.
It’s not a good idea to leave domains mapped in this way long-term since it confuses Google (and people in general), but it can be helpful in this instance.
So here’s this process in a nutshell:
- Back up your existing site.
- Set up a temporary domain / sub-domain at your new web host.
- Install WordPress in this temporary domain.
- Import your “migration bundle” into this temporary domain (see the next step below).
- Test this temporary site.
- If it’s all looking good – map your actual site on top of this temporary site.
- Change your DNS settings.
- Once those have gone through, test your site at its new location using the actual address (not temporary address).
- If it’s all working, change the URL in WordPress (see below).
- And finally, remove your temporary address.
Make sense? Yes, I know it may sound a little fiddly and confusing, but if you go through it step by step you’ll see how it works.
And do make sure your web host supports mapping domains / sub-domains on top of each other (the same server path, basically) before you try this out. Many if not most do.
Here’s a quick reminder of how you change your URL in WordPress:
Settings / General, then…
 Way to Move Your WordPress Site")
Okay, so let’s round up this tutorial by talking through uploading the “migration bundle” to your new site, which is something we haven’t covered yet:
Step 4 – Upload Your Site, and Test
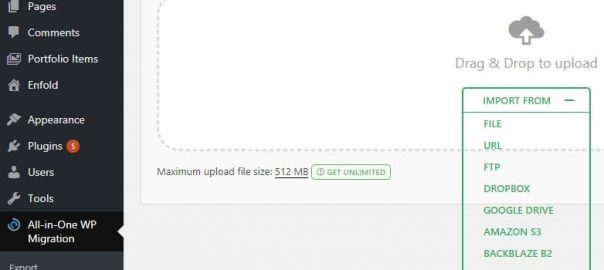
Go to the All-In-One WP Migration import screen:
 Way to Move Your WordPress Site")
Upload your file, and follow the prompts.
If everything goes smoothly (fingers crossed!), at the end you’ll be asked to set your permalinks again.
Click the link in the message that pops up, and simply press save on this screen a couple of times – you don’t need to change the settings:
 Way to Move Your WordPress Site")
Either just before or after this step, you may perhaps need to log in again, but at this stage that’s pretty much it!
Have a look around, check everything looks and works okay, maybe visit your site in an incognito window (or different browser) just to double check the site as a regular visitor.
But if you’ve got this far, it’s pretty likely the move has gone successfully. And ideally, that move would have happened with minimal (even no) downtime, and with far less fiddling around than the manual approach.
Digital & Social Articles on Business 2 Community
(114)