
It’s no secret Facebook has paved the way for social media advertising. Businesses now have the freedom to build and expand their brand with a Facebook page; the groundbreaking part is Facebook has invented an incredibly simple way to create and share ads.
Facebook Ads Manager allows page admins the ability to promote companies, events, etc. by way of Desktop or Mobile News Feeds, Right Column ads — even Instagram.

You will be surprised how simple the process of crafting and posting ads to Facebook.
Begin by going to the Facebook Ads Manager page, which you can get to by hovering over the “Promote” button on the right-hand side of your page (so long as you have admin privileges) and “Go to Ads Manager”.
The first page you come to will ask you to define your objective, i.e., what is the purpose of the ad you are posting? Are you trying to increase brand awareness? Promote your page? Send more people to your website? Consider your primary goal for your business and then you can move on to selecting your audience.

Now that you’ve selected your objective, you’ll need to come up with a Campaign name. Campaigns are just a series of ads — or just one — that share the same primary objective. For example, if your goal is to drive more people to your website to promote a special summer sale on clothes, you might name your campaign “Summer Sale 2016”.

The next step is to define your audience. Who do you want to reach with your ads? You can select a specific geographic area and then enter demographic data — specifically age and gender. If you so choose, you can narrow down your target audience using the “Detailed Targeting” tool; this allows you to select certain activities or interests you think your target would most likely appeal to.

Once you have narrowed down your target audience, pick where you want to place your ad(s) — Desktop or Mobile News Feed, Desktop Right Column, or Instagram.
Now you just need to set a daily budget and schedule — or time frame — for your ad set to run. You can set your budget as low as or as high as you want. Once you select the run time for your ad set, Facebook will automatically show you exactly how much you will be spending for the duration of the campaign.

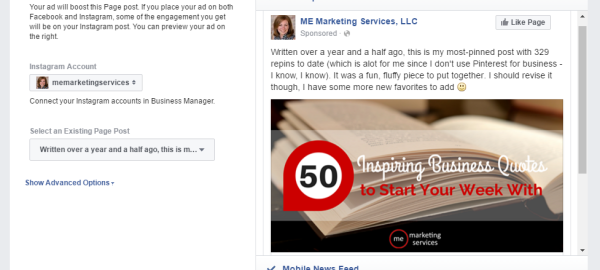
The final step is the fun part — making the actual ad! You have the option to select one or multiple images (called a “Carousel Ad”), a slideshow or video.

Once you select and crop your image to your liking, just enter the text that will appear at the top of the ad picture. You want this to be short but catchy so users will be drawn to visit your website. Your headline will appear below the ad picture. Your headline should be simple and mirror your primary objective.
Be sure to connect your Facebook and Instagram pages and link your website URL; the more exposure, the better! Select a “Call to Action” that will best suit your campaign goal — Learn More, Sign Up, Shop Now, etc. This is the button that will appear on the bottom right side of the ad and will drive people to your site. “Place Order” and you’re done! Now sit back and watch the magic right before your eyes!
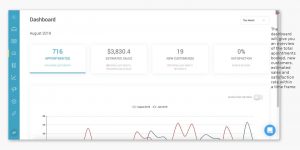
You will have the ability to view the analytics of your ads over the duration of the campaign. You have the freedom to edit the ad itself, the budget, or audience if you aren’t satisfied with your results during the first few days or week of your campaign. This is an extra step you can take to make your business even more successful and expand your market at the same time, quickly and simply.
Digital & Social Articles on Business 2 Community(50)